
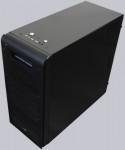
Those altogether nine 5.25 inch bays are provided with black mesh front panels, whereby one front panel is provided for a 3.5″ floppy drive assembly. The entire aluminum front panel is removable and can be pulled off to make things easier. Primarily it’s much easier to remove the bay panels with a demounted front panel. The complete front is very air permeable and allows thereby a good admission of fresh air with the already integrated bottom 120mm front fan.
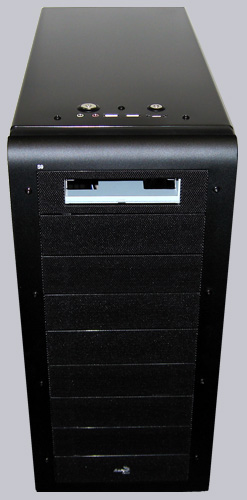
Here is the rear of the S9 chassis, which is affected by a large 120mm fan hole. It’s recommendable to mount another 120mm fan to this place in order to ensure an optimal airflow. free spaces meaningfully and install quiet slow rotating 120mm fans. Acoustic absorption mats are of course nevertheless very recommendable to get a much more silent PC. BTW. a standard ATX panel is already integrated at the rear of the case and can be replaced with the desired motherboard panel.
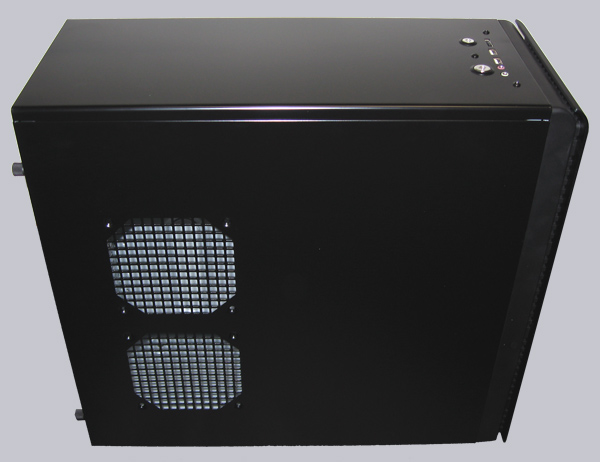
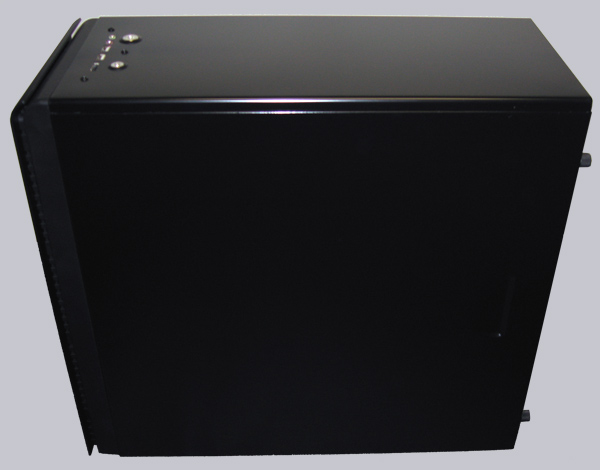
The side panel of the S9 “standard” model has two large 120 mm fan holes and is fixed by two knurled thumb screws. All knurled thumb screws are manufactured from plastic and appears thereby at first sight something “cheap”, but positive is that these plastic knurled thumb screws do not scratch the rear of the case. The attachment of both side panels could be arranged more comfortable, however nevertheless even a DIY layman can easy open and close this case.
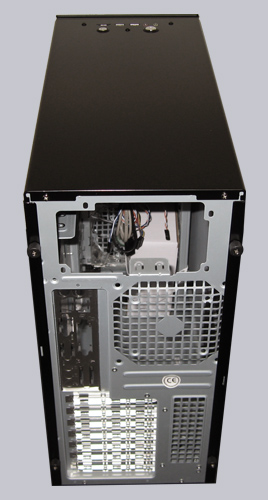
The opposite side panel with the fixed motherboard tray is also detachable and offers with the thumb screws a fast way to get access to all drive bays.
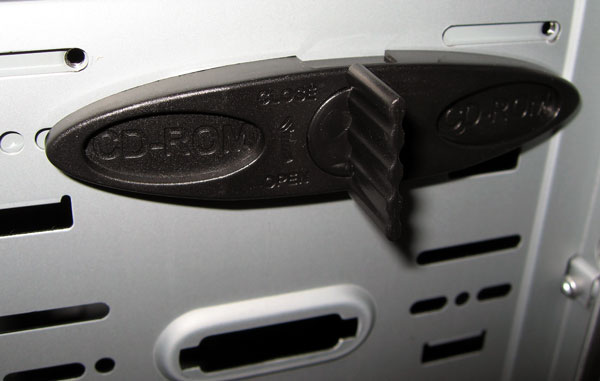
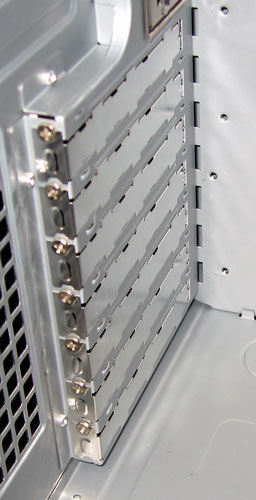
As already mentioned on the first page of the review, this case is delivered with special drive bay clamps. All front drive bays have special clamps to hold the drives which can be used instead of screws. Simply plug on the tapped holes of the desired drive and turn the middle handle of the mounting plate about 90 degree to mount the drive – that’s it!
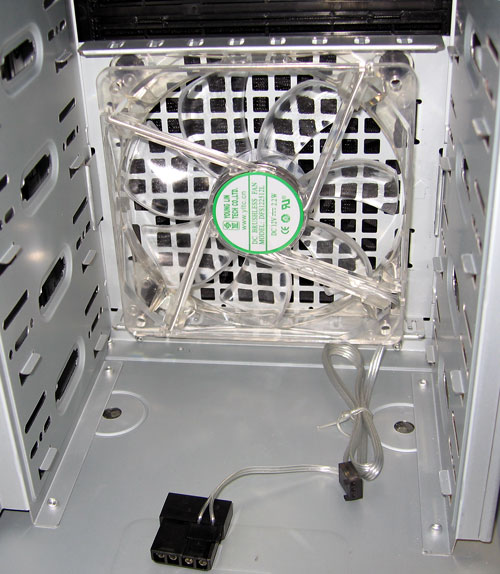
Here is a look behind the scenes, where the 120mm front fan is installed, which can be connected either to the motherboard or (!) directly to the power supply.
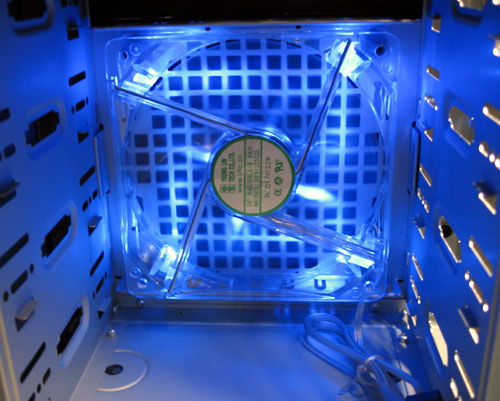
As soon as the fan is supplied with up to 12 Volt, the chassis is shining in a bright blue. Outside of the case the lighting of the four light emitting diodes is slightly visible in the fan area thanks to the meshed front.
As usual, up to seven cards can be installed in the S9 case. There is exceptionally no special ease of work – plugin the card and mount the screw – not more, not less.
Here is a picture of the two upper buttons and connectors, which can be handled very well from top. The power and reset button are arranged of various sizes, in order to avoid mistakes by pressing the wrong button. Thanks to the standardized color of the 3.5mm headphone and microphone jacks it’s difficult to confound them. A special highlight of the Aerocool S9 chassis is the e-SATA connection beside the two standard USB ports. Simply connect the SATA I/II port of the motherboard internally to the eSATA cable in order to connect an external SATA drive very easy.
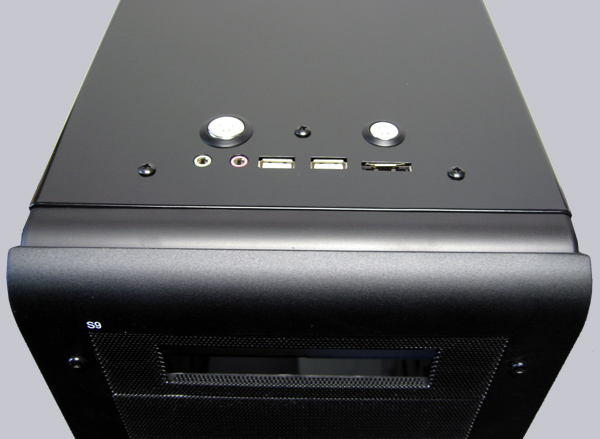
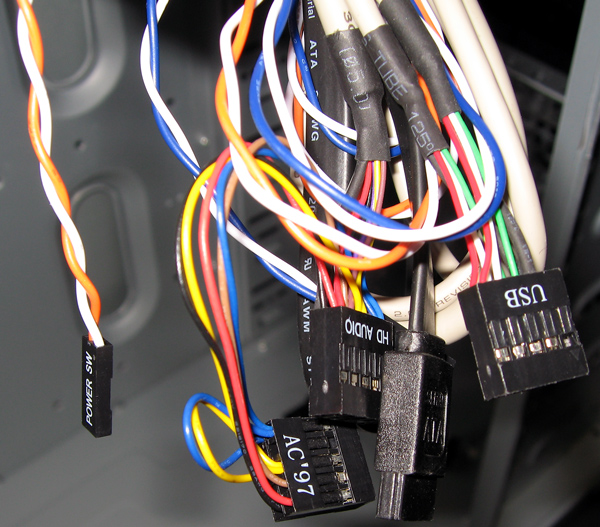
All plugs of the upper connections, power button and reset button are well labeled. The USB connector as well as the audio plugs are build in one block, whereby the audio connection has both, AC’97 and HD audio pin layout. So it’s not necessary as often usually to connect each pin to the mainboard. Nevertheless one should compare the pin allocation of the USB plug and the audio plug with the motherboard manual before the installation. But without a detailed case manual it’s not very easy for a layman to find out the right pins, so it would be necessary to get a more detailed manual or quick reference guide from Aerocool.
Fortunately most cable colors have a standardization, where for example black stands usually for GND, red for “+”, green from the USB cable usually for DATA+ and white from the USB cable for DATA-. If a pin does not fit with the layout data of the motherboard manual, the respective pin can be replaced with the right one.
Result and general impression of the Aerocool S9 Standard Case …