
BIOS and Overclocking …
Let us continue with the BIOS / UEFI Setup options and the UEFI overclocking. By pressing F2 or Del during the PC boot, you get access to the UEFI Setup.
The ASRock Fatal1ty X99X Killer 3.1 UEFI has a graphical interface that allows intuitive operation with the mouse, or can be operated still as usual with a keyboard.
On the first BIOS page you can see the UEFI version, the installed CPU, the installed DDR4 memory with Quad Channel support, a language selection, and the My Favorite menu item:
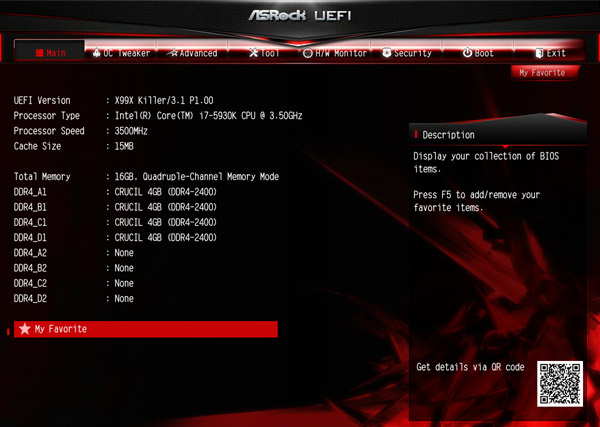
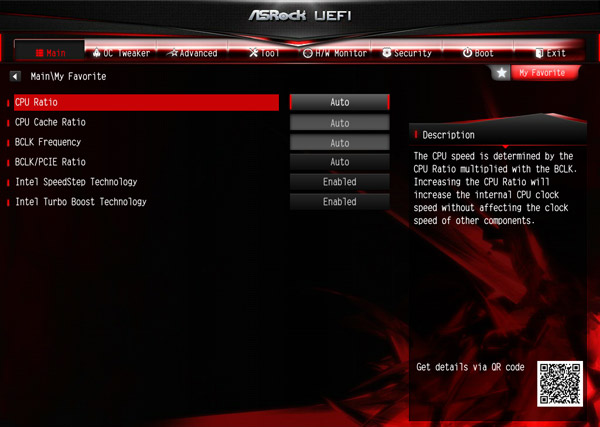
This My Favorite feature is very useful, because you can put here often-needed menu items by simply selecting the desired button, then press F5 and the feature is added to the my favorite overview page.
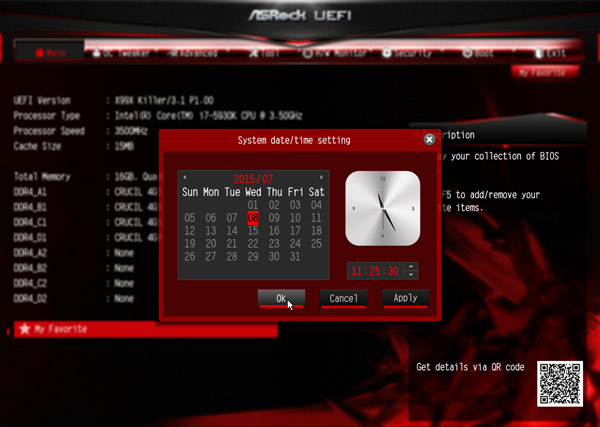
Of course you can also adjust the time and date on the entry page, which is now also graphically selectable in the UEFI.
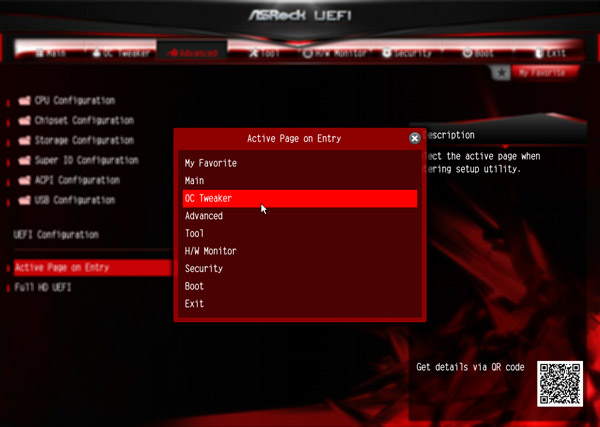
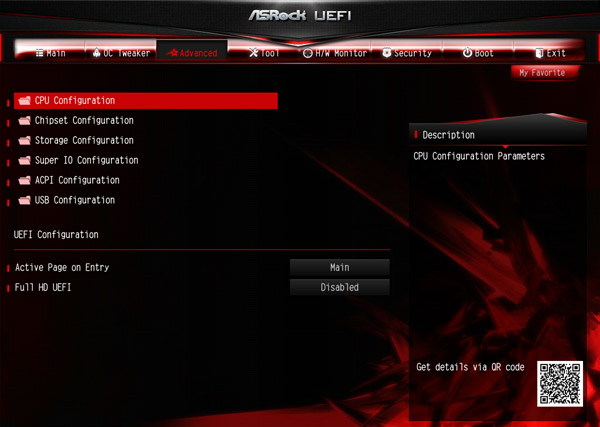
This X99 motherboard again has the selection to view the UEFI in Full HD and also offers the Active Page on Entry selection, where you can decide which UEFI page you want to see when you enter the UEFI Setup. This is very helpful mainly for overclocking, since one have to enter the second OC Tweaker menu very often to find the best OC settings. Or one just add all necessary points to the My Favorite overview and start directly to this My Favorite overview page. At the ASRock Fatal1ty X99X Killer 3.1 you find the Active Page on Entry option and the Full HD UEFI selection now in Advanced.
UEFI BIOS update …
Before we begin with the UEFI settings, we update the UEFI BIOS to the latest version. ASRock offers several ways to update the BIOS and one very comfortable option to flash BIOS updates is the so-called ASRock Instant Flash or ASRock Internet Flash with direct access to the internet. The motherboard came with BIOS P1.00. At review date, this ASRock UEFI BIOS P1.00 was the latest versions for download.
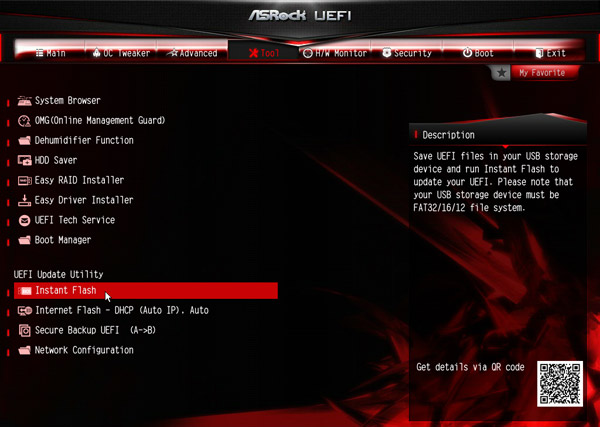
One can enter the so called ASRock Instant Flash utility in the Tool Screen or by pressing F6 during the PC start. Hereby one can upgrade a downloaded ASRock BIOS without further boot CD, etc. very easily. Just start the ASRock Instant Flash utility and select a BIOS Flash ROM from the device like an USB Stick to flash the BIOS without an additional boot medium and is available after the restart. Furthermore, this motherboard is equipped with a backup BIOS. By the “Secure Backup UEFI” option one can update it with a working BIOS from the other BIOS EEPROM and select the preferred BIOS chip at any time by the BIOS selection switch.
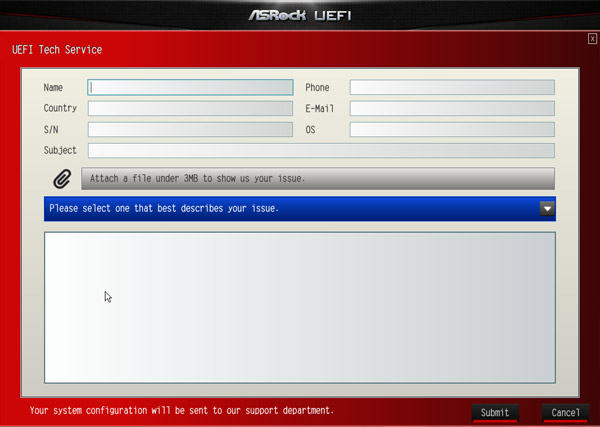
If you need technical UEFI support, you can contact the ASRock in the UEFI Setup over an internet connection.
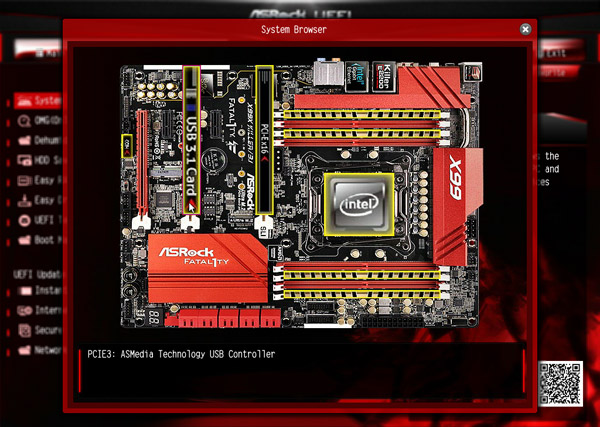
On the tool page, you can find by the way a system browser view, where you can graphically see all installed components, for example the new USB 3.1 PCI Express card.
There is also the OMG – Online Management Guard, to specify the times and days for the access of the Internet. This is, for example, handy for parents who want to provide their children an Internet usage time and would like to block the access with a password safely in the UEFI BIOS, or for companies that allow employees to access the Internet only in the lunch break or after work hours.

ASRock X99X Killer 3.1 overclocking …
The X99X Killer 3.1 UEFI Setup offers many OC options for the LGA2011-3 Intel CPU overclocking.
ASRock offers a clearly arranged OC Tweaker menu in the UEFI Setup, here are few of many OC Tweaker settings:
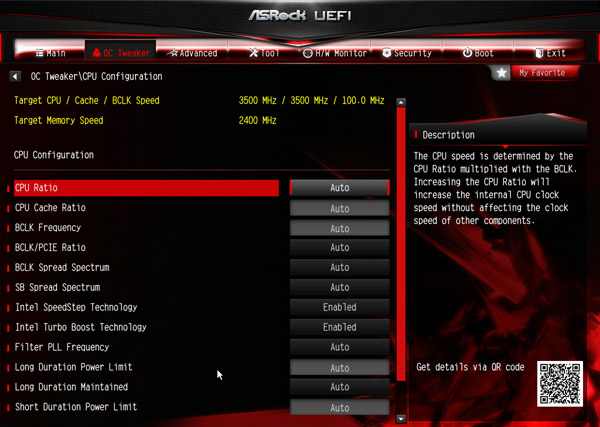
One can set the BCLK/PCIE frequency in this menu from 96 MHz to 300 MHz. This frequency is very important for a lot of frequency values also with Intel LGA2011-3 processors, which can get quickly too high. For this reason, you should carefully increase the BCLK host clock and also adjust the BCLK ratio to 125 MHz, 167 MHz or even higher.
In our tests the board at 1.67 BCLK ratio could be stable overclocked to 171 MHz BCLK!
The Intel “K” CPUs have an unlocked multiplier, so one can overclock the CPU frequency very extensively over the CPU multiplier. With a 5930K CPU (default clock 3500 MHz with a CPU ratio of 35x), the ASRock X99X Killer 3.1 motherboard offered a multiplier range from 12x to 120x.
Here you can see the lower part of the OC Tweaker selection, where we also find the new CPU Tj Max option to setup the maximum CPU temperature in the range from 85°C up to 120°C:
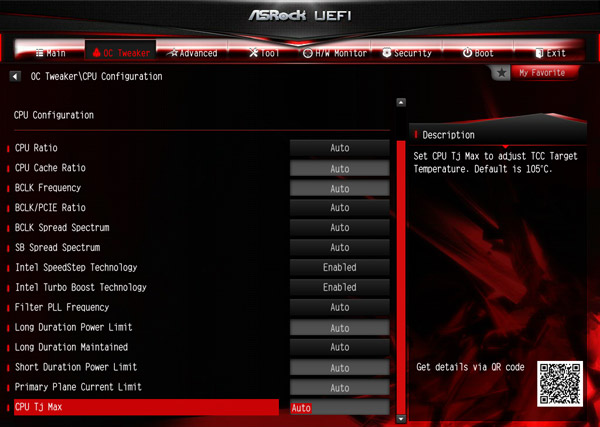
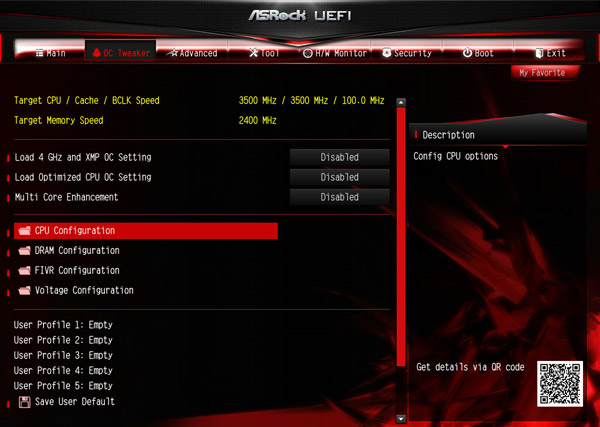
Of course that are not all settings for OC tweaking yet, because ASRock now has divided the settings in the following four areas of CPU Configuration, DRAM Configuration, FIVR Configuration and Voltage Configuration:
X99 memory settings …
Thanks to the XMP support, XMP memory modules can be set correctly with one mouse click in the UEFI, selecting the desired profile in the DRAM configuration. In the DRAM configuration menu you will find among others the selection, whether to the DDR4 reference clock 100 MHz or 133 MHz and how high you like to adjust the memory voltage.
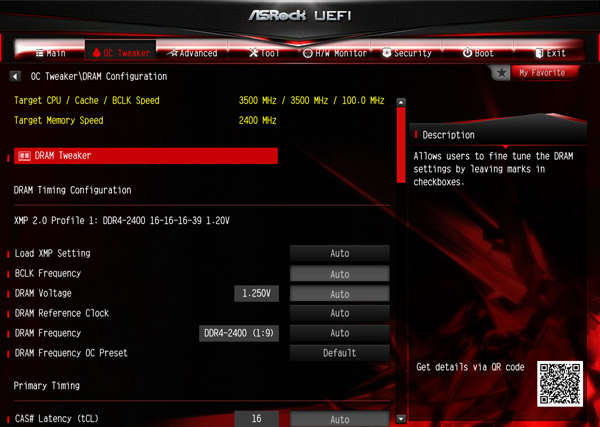
For the DDR4 memory, there are settings like e.g. the memory frequency from DDR4-800 up to DDR4-2666. Here you see the DDR4 frequency selection up to DDR4-2666:

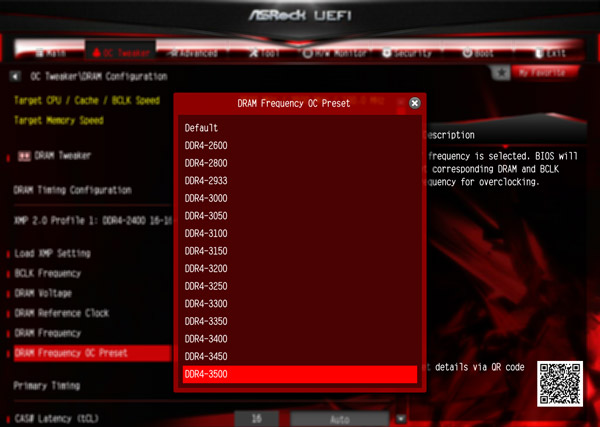
ASRock has more very special to offer, because higher DRAM settings can be easily selected by the DRAM Frequency OC Preset values. With this DDR4 OC preset it is possible for example to overclock to DDR4-3500 by automatic BCLK increasing:
With manual BCLK boost significantly higher memory clock rates are possible. The frequency of all memory modules is calculated and displayed after changing the reference clock to make it much easier adjusting to the right RAM frequency.
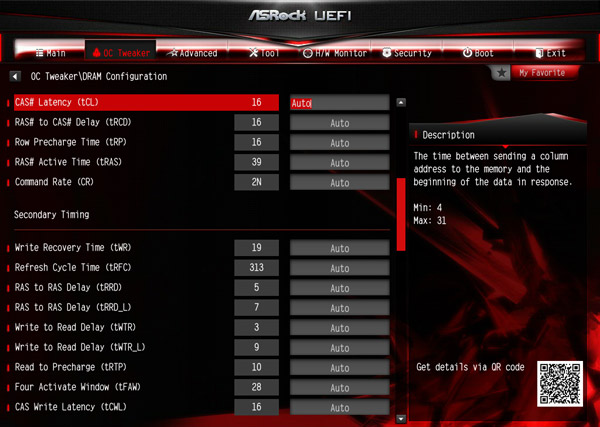
And of course you can adjust all DDR4 timings manually, too:
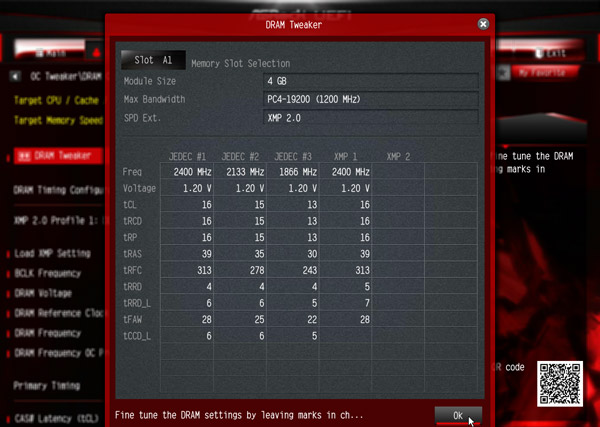
Furthermore the ASRock X99 Killer 3.1 offers e.g. an overview of all SPD and XMP values to select them directly in the DRAM Tweaker menu.
X99 voltage settings …
Let us now continue with the voltage settings that can be set very extensively, as well.
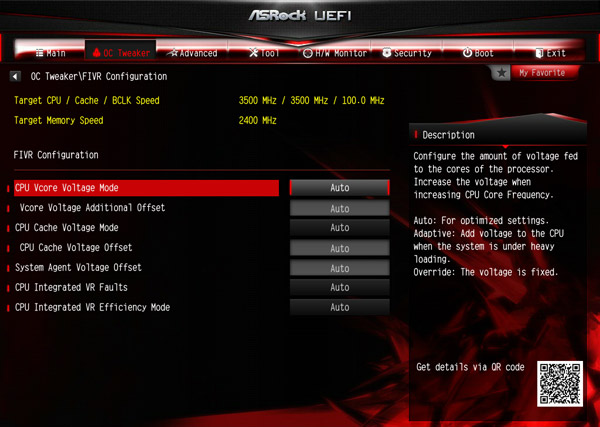
ASRock separated the voltage settings in two different menus: FIVR Configuration and Voltage Configuration. Here you can see the values for the FIVR configuration:
And here are the settings for the voltage configuration:
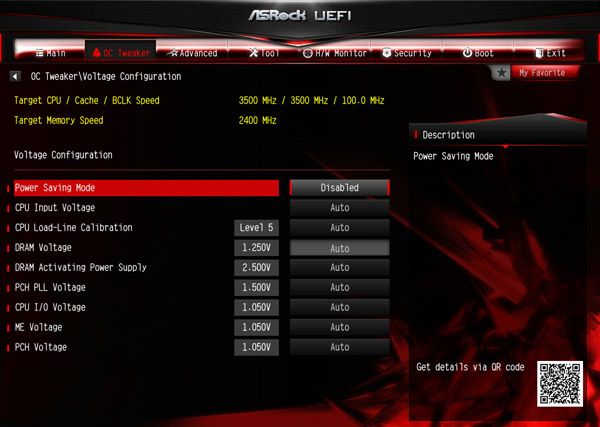
The motherboard has many voltage settings, like for example a Vcore selection with the Intel Core i7-5930K Test CPU from 0.800 Volt up to 2.000 Volt and -0.500V to +0.500V offset, CPU Cache Voltage from 0.800 Volt to 2.000 Volt and -0.500V to +0.500V Offset, CPU Input Voltage from 1.200V to 2.300V and -0.600V to +0.400V Offset, CPU IO Voltage from 0.900 to 1.500 Volt, PCH 1.05V voltage (Chipset) from 0.900 to 1.500 Volt, PCH PLL Voltage from 1.200 to 1.800 Volt, ME Voltage 0.900 to 1.500 Volt, System Agent Voltage Offset from -0.300 to +0.600 Volt, Primary Plane Current Limit, Short Duration Power Limit, Long Duration Power Limit, CPU Load Line Calibration from 1 to 5, DRAM Activation Power Supply from 2.400V to 3.000V and more voltage boost settings to offer more room for detailed overclocking.
The DDR4 voltage could be increased as seen above, between 1.000 and 1.800 Volt, which should be enough DDR4 memory voltage for high overclocking or low undervolting.
More easy overclocking …
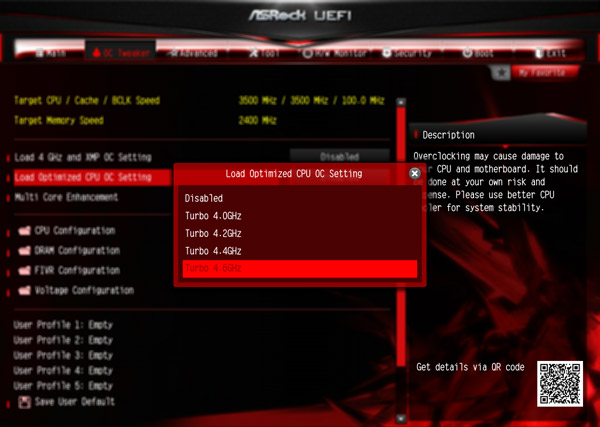
If you do not like to get deeper inside of overclocking, you can overclock either by the Load 4 GHz and XMP OC Setting or by the Load Optimized CPU OC Settings, to try overclocking with predefined OC settings. It can increase the system performance automatically by overclocking in different Turbo steps – at least with some luck and if it is possible with your processor. Simply select the desired Optimized CPU OC setting, then some components and the CPU are overclocked, e.g. to Turbo 4.0 GHz, Turbo 4.2 GHz, Turbo 4.4 GHz or Turbo 4.6 GHz – overclocking could not be easier !
Here you can see the Load Optimized CPU OC Settings for the Intel 5930K CPU:
Highest overclocking should set manually for each value, to be able adjusting all values in detail for the installed hardware. We give you overclocking help in our PC Forum.
Once the desired settings are found, you can save up to five different OC Tweaker BIOS settings with names in the UEFI. For example, for example you can save balanced BIOS settings, overclocking settings and underclocking settings in an user profile of the UEFI to load them very quickly at any time.
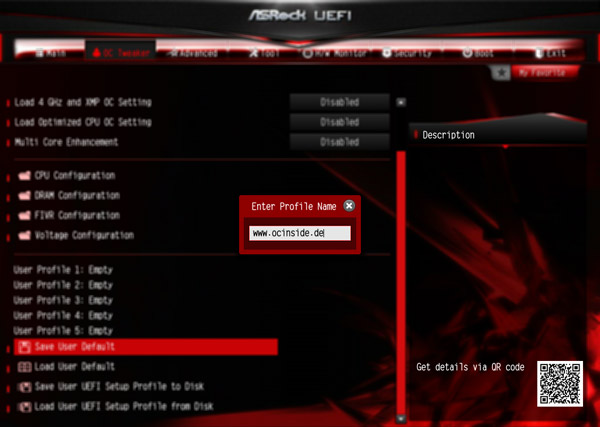
Very interesting is the new “Save User UEFI Setup Profile to Disk” option.
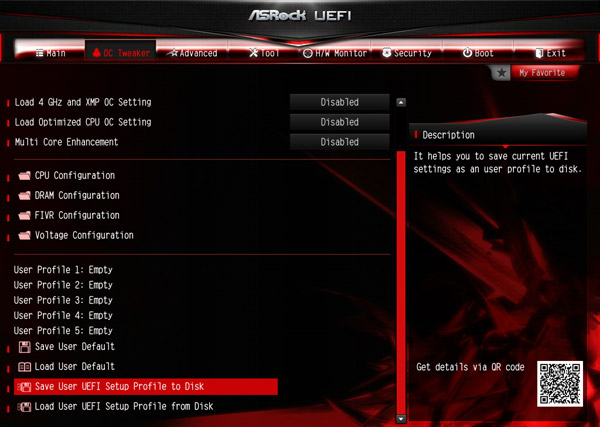
Just click it to save your own UEFI settings on the hard drive or an USB stick, to have a backup of all values for example, after an UEFI update.

The boot failure guard was also tested and started the PC even at too high overclocking settings without Clear CMOS at default frequencies. ASRock offers the “Boot Failure Guard Count” option to setup, how often the board should boot with incorrect settings before it automatically reduces the frequencies. If it accidentally succeeds that the PC fails to boot, you can also press the Clear CMOS button, the stored values in the user profiles fortunately remain to load them quickly.
BIOS Undervolting …
The downclocking or underclocking is also tested in this review. It was possible to lower the Intel Core-i7-5930K CPU multiplier over the BIOS to 12x to underclock the processor with 100 MHz BCLK to approx. 1200 MHz. Of course, underclocking is like overclocking outside of the manufacturers specification, so it is necessary to have some luck. ASRock gives several options for easy PC underclocking / downclocking.
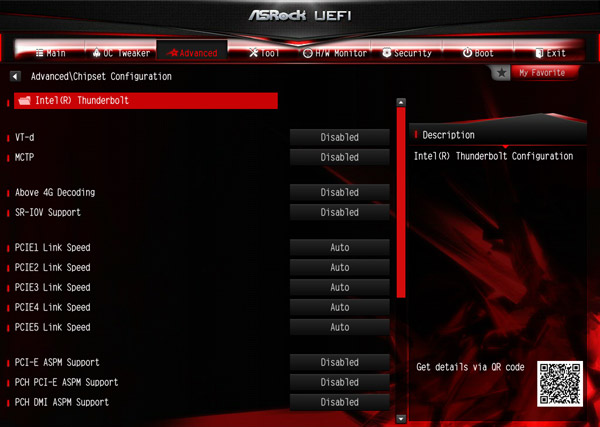
Of course there are more UEFI settings like the CPU, Chipset, Sorage, Supoer IO, ACPI and USB Configuration setup.
If you want to save energy consumption of the Intel Core i7 PC, you should check all settings in the CPU configuration menu under Advanced, as well:
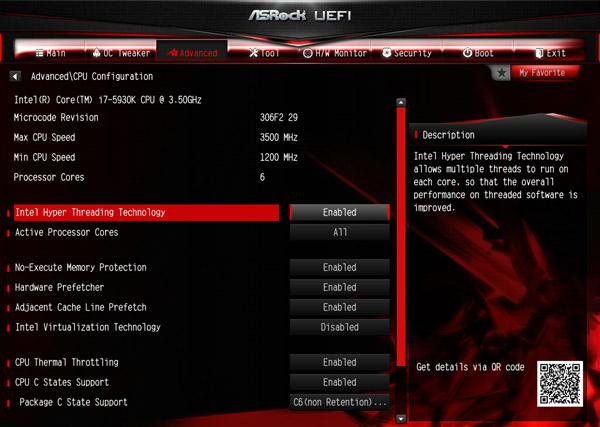
But also the other settings are not unimportant.
Fan controller …
The UEFI Setup of the passive cooled X99X Killer 3.1 motherboard offers extensive temperature fan control options for a 4-pin or 3-pin CPU fan, the 4-pin chassis fan 1, the 3-pin chassis fan 1, the 3-pin chassis fan 2 and the 3-pin chassis fan 3.
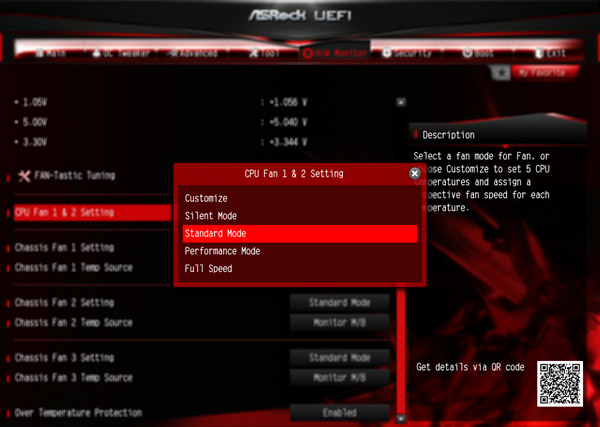
The settings for the fan controller can be found in H/W Monitor directly below the temperature und voltage display.
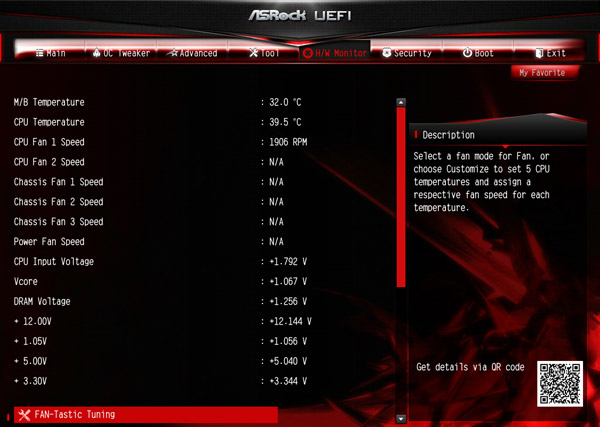
You have the choice between Customize, Silent, Standard, Performance and Full Speed.
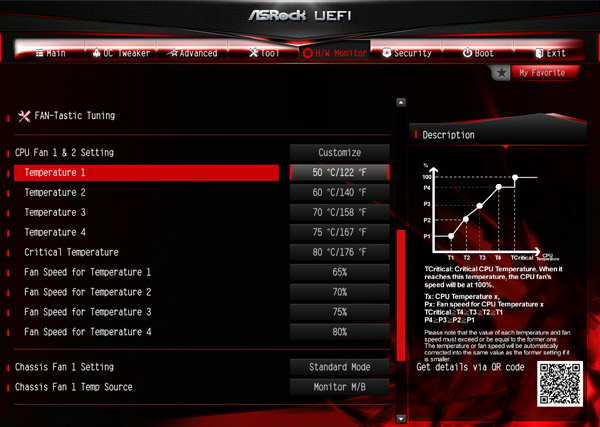
In Customize mode are several temperature steps to assign a certain fan speed.
Since the fans are controlled by the CPU temperature or the motherboard temperature, in most cases it is not necessary to additionally buy an expensive fan controller. BTW. the fan control can also easily controlled by using ASRock’s F-Stream Tool. First of all you start the fan test to determine all possible speeds and then you can adjust the temperature curve depending upon desire. The ASRock F-Stream software provides some additional tools, such as temperature monitoring, the HDD Saver Option and some OC settings in the OC Tweaker menu.
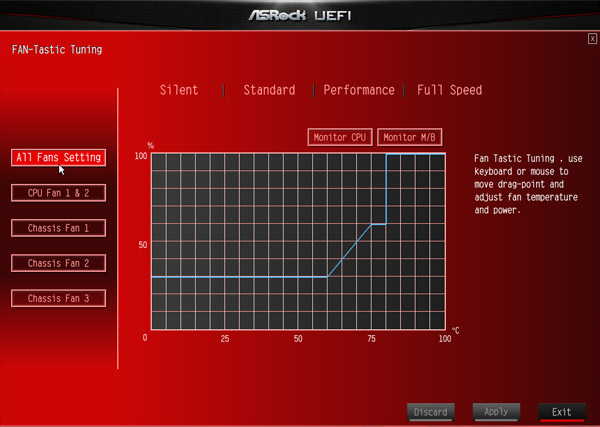
But not enough, ASRock has integrated now even a graphical interface for controlling the fans in the UEFI Setup. You can find the FAN-Tastic Tuning menu option also in the H/W monitor and can thus make all settings very clearly. Simply select the respective fan connector on the left side and select the mode type on the right side – for example Performance. And there is now also an option to setup all fans at the same time.
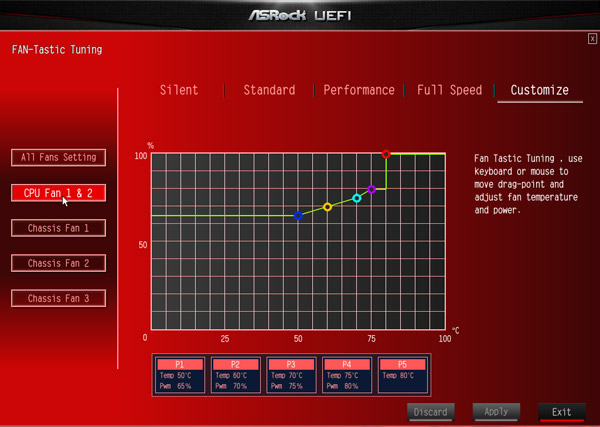
In the Customize mode, you can set all values directly in the chart and save.
For the chassis fan connectors you can even select, which source you want to use for temperature measurement: Monitor CPU or Monitor Motherboard.
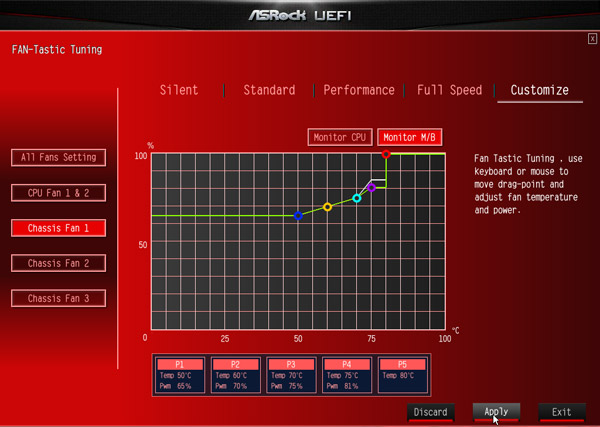
Then click on apply or just exit the menu and save the values.
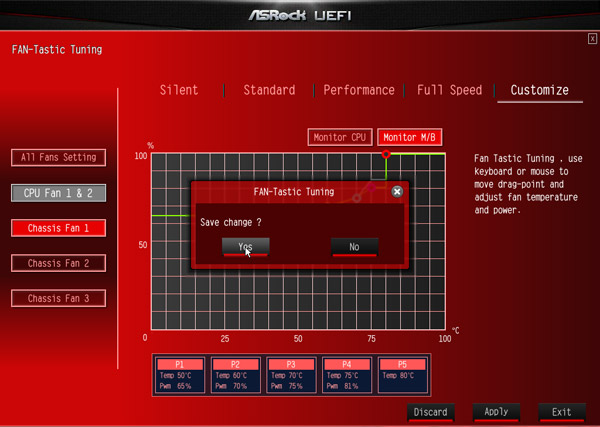
It would be desirable that the FAN-tastic tuning settings are implemented immediately, to be able to get an acoustically impression of the selected fan speed. Let us wait what ASRock offers soon and we are already very excited about these new features !
Power consumption …
The power consumption will vary depending upon the hardware and upon the PC load. The current consumption of the test PC with Intel Core i7-5930K CPU, 4x 4GB DDR4-2400 memory, hard disk drive and Cooler Master Silent Pro M 600W test PSU without overclocking depending upon load:
– With MSI Radeon R9 280 video card and with installed USB 3.1 card, the X99 PC power consumption was between 60.3W idle and 297.2W load.
An ASRock X99 Extreme6 Intel X99 motherboard with an Intel Core i7-5930K CPU had the following power consumption:
– With MSI Radeon R9 280 between 60.5W idle and 290.4W load.
– With Sapphire HD6870 graphics card from 61.5W to 228.4 Watt full load.
An ASRock Z97 Extreme6 Intel Z97 motherboard with an Intel Core i5-4670K CPU had the following power consumption:
– With MSI Radeon R9 280 between 53.1W idle and 270.7W load.
An ASRock Fatal1ty FM2A88X + killer AMD Socket FM2+ motherboard with an AMD A10-7850K Kaveri APU had the following PC energy consumption:
– With Sapphire HD6870 between 56.3W idle and 233.5 Watt full load.
– With internal AMD Radeon R7 GPU between 30.2W idle and 118.8 Watt full load.
An ASRock FM2A85X-ITX AMD Socket FM2 motherboard with an AMD A10-5800K Trinity APU had the following power consumption:
– With Sapphire HD6870 graphics card from 52.9W to 221.0 Watts.
– With internal AMD Radeon HD7660D GPU 29.4W idle and 120.4 Watt full load.
ASRock Fatal1ty X99X Killer 3.1 Result and general impression …