
The handling of the new interactive AMD Pin-Mod guide …
Very important, if you’ve already an option to change the multi in your BIOS, you HAVE TO change this multiplier to “Autodetect” !!! (unless you just like to use the unlock function in the Pin-Mod guide) The same applies to the Vcore, please also leave the Vcore settings of your BIOS (if existing) at Default respectively at Autodetect if you like to change the Vcore with the Pin-Mod guide.And please cut all L11 bridges if you like to select a Vcore with the Pin-Mod guide, otherwise you’re just able to build a higher Vcore depending to the actual L11 bridge and Pin-Mod combinations.
First of all I would like to present four new ways how to change the multiplier of an AMD XP, AMD T-Bred or AMD Barton processor. In a following tutorial I’ll also publish fifth way, but in addition later more 😉 If you like to use the interactive pin-mod guide with an AMD XP CPU (five L1 and four L3 bridges), you also need to connect the five L1 bridges with silver conductive compound to connect the signals from the FID pins with your CPU core. But it’s not necessary with a newer AMD T-Bred or AMD Barton CPU, so you’re also able to modify CPUs with a varnish layer on the surface.
1.) The wire method under the CPU You select “CPU view” in the interactive Pin-Mod guide, then choose the CPU and the desired multiplier or Vcore (and may be also the FSB to calculate the approximate frequency you’ll get). Now you can already see the pins, which you have to modify for this multi. Take several thin wires (e.g. one cord of a HDD or floppy cable), wrap it once around both pins, twist this a little bit and pinch off the unnecessary wire to connect the pins as shown in the picture.
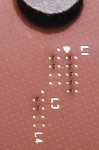
2.) The silver lacquer method under the CPU You select “CPU view” in the interactive Pin-Mod guide, then choose the CPU and the desired multiplier or Vcore (and may be also the FSB to calculate the approximate frequency you’ll get). Now you can already see the pins, which you have to modify for this multi. To connect the pins under the CPU you can take a little bit of silver lacquer and a toothpick to connect both pins. Because you can hardly clean up the CPU afterwards you should only use a multi you have already tested before. This method is very good for a permanent unlocking of an AMD T-Bred or Barton CPU.
3.) The soldering method at the back of the Mainboard. You select “PCB view” in the interactive Pin-Mod guide, then choose the CPU and the desired multiplier or Vcore (and may be also the FSB to calculate the approximate frequency you’ll get). Now you can already see the pins, which you have to modify for this multi. Then you take a soldering iron with max. 16 watt and a very fine soldering iron and solder the pins as shown in the interactive pin-mod guide together. But remove the CPU from the Socket first ! The Pins are very close so you do not need any additional wires, just solder them together, directly.
4.) The plugging method into the CPU socket You select “Socket view” in the interactive Pin-Mod guide, then choose the CPU and the desired multiplier or Vcore
(and maybe also the FSB to calculate the approximate frequency you’ll get). Now you can already see the socket with the respective connections for this multi. To connect these, you take some little pieces of wire e.g. from a HDD or floppy-cable and shorten them to 8 – 10mm pieces. Then you put them into the shown positions and put the CPU into the Socket. Et viola, now the CPU works with the desired multiplier.
I try to present a fith method as soon as possible with an update of the interactive AMD Pin-Mod guide when i’ve finished all tests successfully. So i wish you lot of fun with these easy overclocking methods.
!