
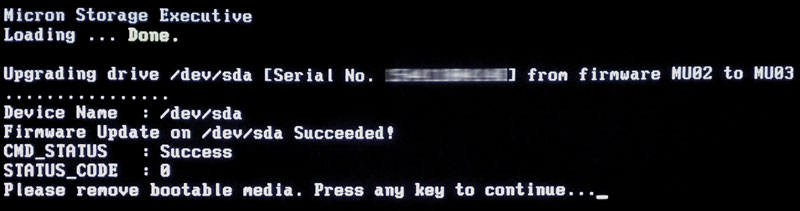
SSD Firmware Update …
Before we begin the RAID setup, we have updated all four SSDs individually at this point to the latest firmware. The MX200 SSD has been delivered with the MU02 firmware. At test time the MU03 firmware was available from Crucial for this MX200 SSD. Of course we’ve installed the latest firmware before proceeding with the benchmarks. With the latest Crucial Storage Executive Tool, you can upgrade the SSD firmware relatively easy, but you should always backup important data before updating the firmware. We have also tried the classic method: Download the Crucial MU03 firmware, unzip the included ISO file, transfer the ISO file with unetbootin to an USB stick (can be transfered on CD or CDRW as well), boot with the USB stick and immediately updating the SSD firmware. If you get the message “no supported drives found in the system”, you should check the BIOS settings.
Now the firmware of the MX200 should be updated from MU02 to MU03 and available the next time available.
SSD RAID0 Setup …
Now we can start setting up RAID with the SSD. The RAID setup is quite simple:
– First you connect both SSD drives with a RAID controller or on the motherboard with RAID controller.
– Then enable the RAID controller in the BIOS (additional instructions in the manual) or switch the SATA controller in the BIOS from IDE or AHCI to RAID.
– Next time you start the PC, you can then reach the RAID BIOS by a shortcut (at ASRock e.g. CTRL + F or CTRL + I).
– There you setup the desired RAID array.
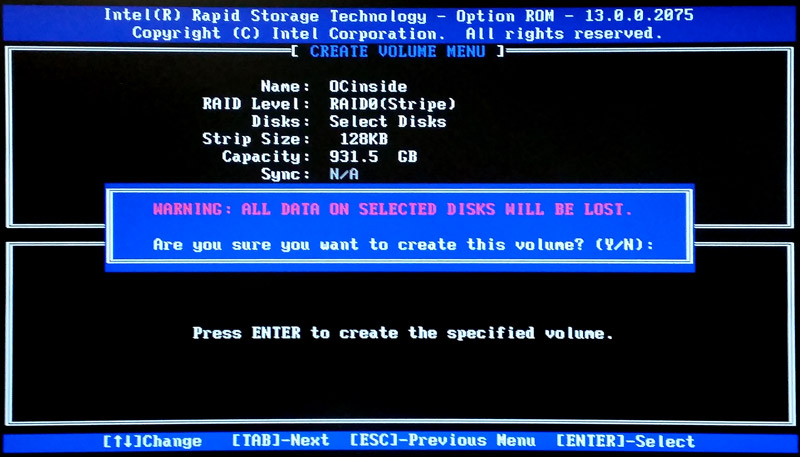
In order to explain two simple RAID array types (there are still some further combinations):
– RAID1 mirror drives, in order to operate two or more drives at the expense of the size as much fail safe as possible reduntant, even when one SSD fails.
– RAID0 stripe drives, in order to operate two or more drives at the expense of the data loss possibility with higher performance, thus without redundancy.
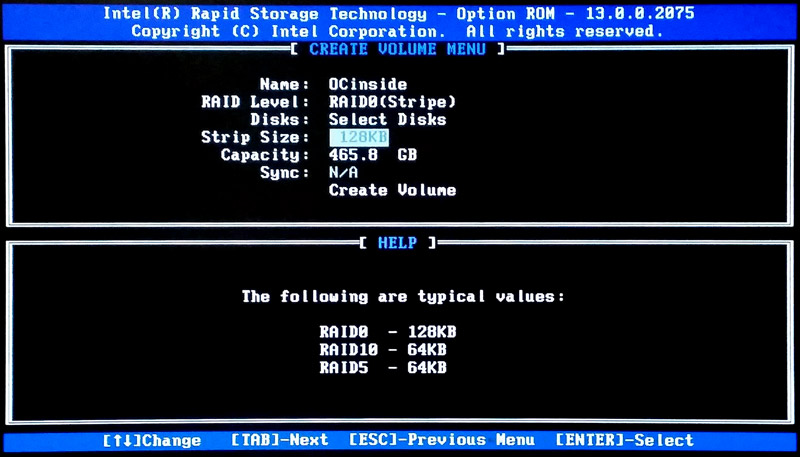
Since we like to reach the highest SSD speed, we setup a RAID-0 Striping. We’ve decided to define a stripe block size of 128KB and assign the name of the RAID – in our case OCinside 😉
Now we choose for the RAID array the desired SSDs.
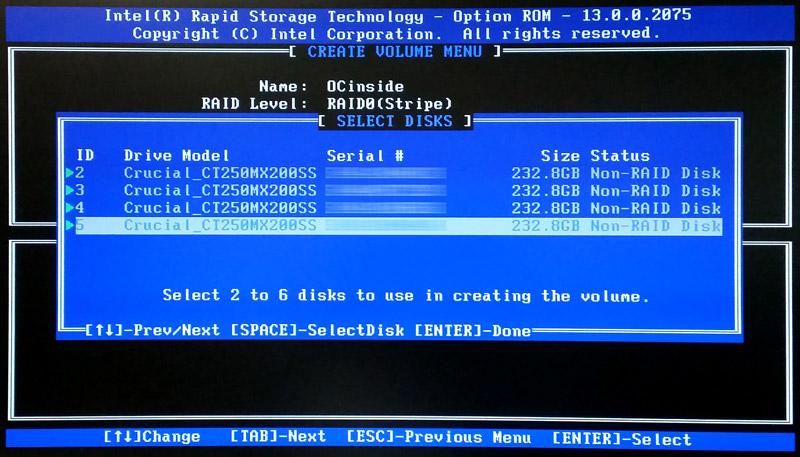
This note should be taken seriously, because all data on the selected SSDs lost definitely on the RAID0 creation.
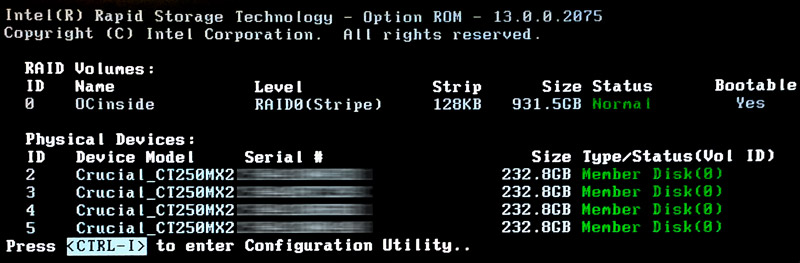
After we’ve created the RAID0 array, we restart the PC and see the new logical drive already with the LD name OCinside. In Windows, we can partition and format the RAID array now as an ordinary drive. In the following example, we have created all four 250 GB SSDs as one big 1 TB RAID0 array.
Further questions on this topic or all other PC or Mac questions we help at any time 24/7 in our PC Forum.
After we’ve now explained the SSD RAID setup for the Crucial MX200 250 GB SSD, we come to the SSD RAID benchmark values.
Crucial MX200 250GB RAID Benchmark values and test results …