
BIOS and Overclocking …
Get fast to the right UEFI settings …
ASRock X299 Taichi BIOS and Overclocking
ASRock X299 Taichi UEFI BIOS Update
ASRock X299 Taichi overclocking
ASRock X299 Taichi memory settings
ASRock X299 Taichi voltage settings
ASRock X299 Taichi Overclock even easier
ASRock X299 Taichi BIOS undervolting
ASRock X299 Taichi Fan control
BIOS and overclocking …
Let us continue with the BIOS / UEFI Setup options and the UEFI overclocking. By pressing F2 or Del during PC boot, you get access to the UEFI Setup.
The ASRock X299 Taichi UEFI has a graphical interface that allows intuitive operation with the mouse, or can be operated still as usual with a keyboard.
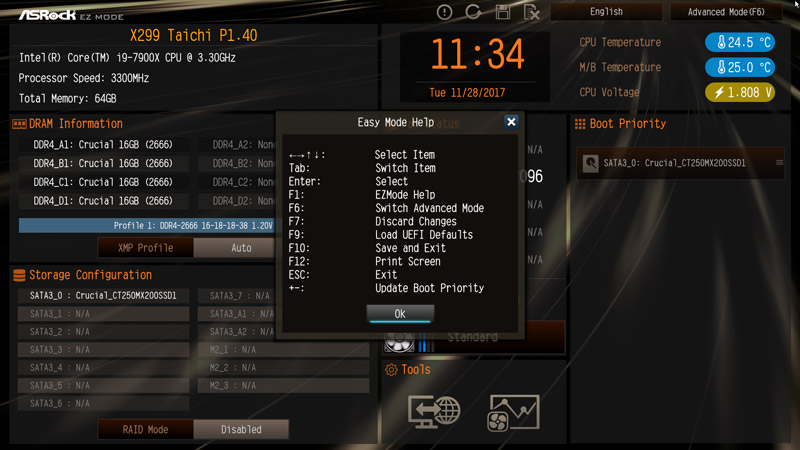
As usual at the latest ASRock motherboards, there is the ASRock EZ Mode – Easy Mode – which offers a clear input page with a lot of important information and still does not seem overloaded. It has Basic information such as time, date, CPU temperature, mainboard temperature, CPU voltage, first details about hardware, fan speed, hard disk configuration, RAID mode and fan settings with one click.
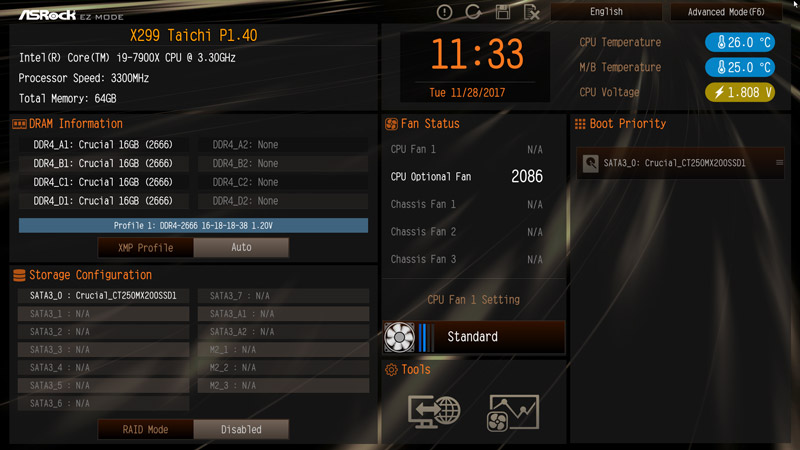
In addition, a few applications have been combined in one tools page.
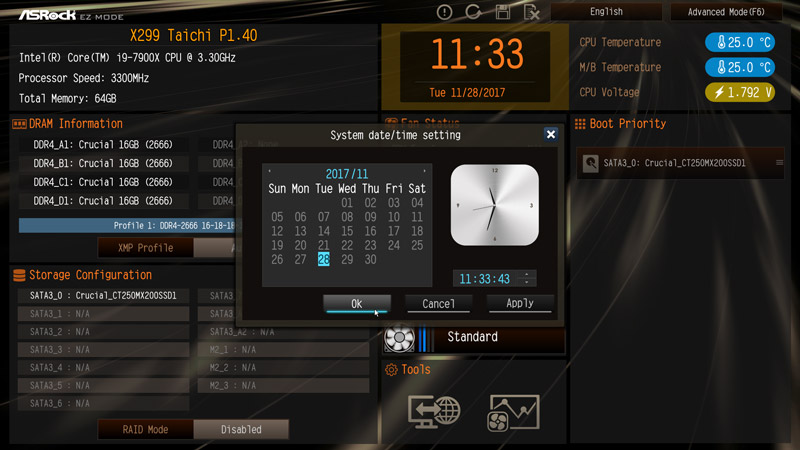
Of course you can also use the EZ menu to set the time and date again.
Many functions can be controlled with the following shortcuts or F-keys.
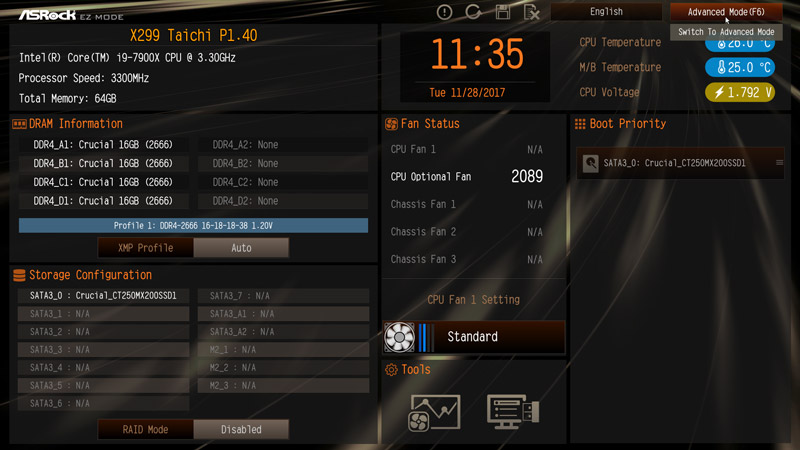
With the F6 key or the upper right button you get to the usual ASRock Advanced Mode, which you can also set as default. Overclocker will probably start with Advanced Mode or directly with the Tweaker or Favorite menu anyway, but later more about that.
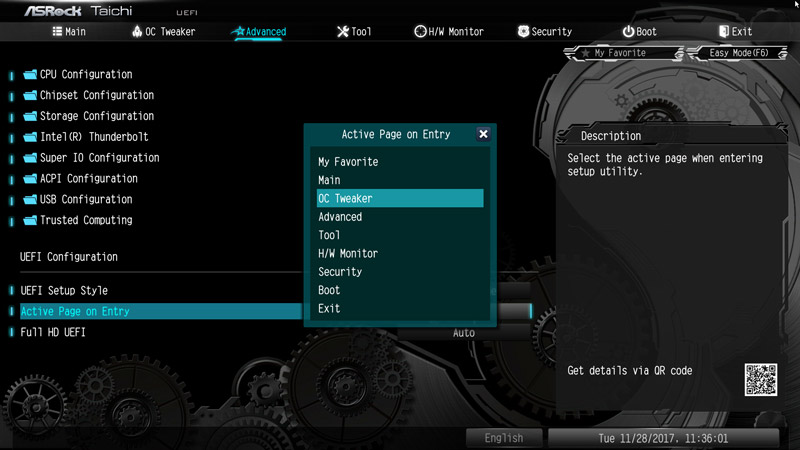
The system browser view can’t be found (yet?) on the ASRock X299 mainboard, but you can find the Full HD UEFI selection and the Active Page on Entry selection again, which allows you to decide on which UEFI page you want to start with in the UEFI setup. This is especially helpful for overclocking, as you often have to go to the second OC-Tweaker menu in order to find the optimal OC settings. On the ASRock X299 Taichi you will find the Active Page on Entry option and the Full HD UEFI selection under Advanced.
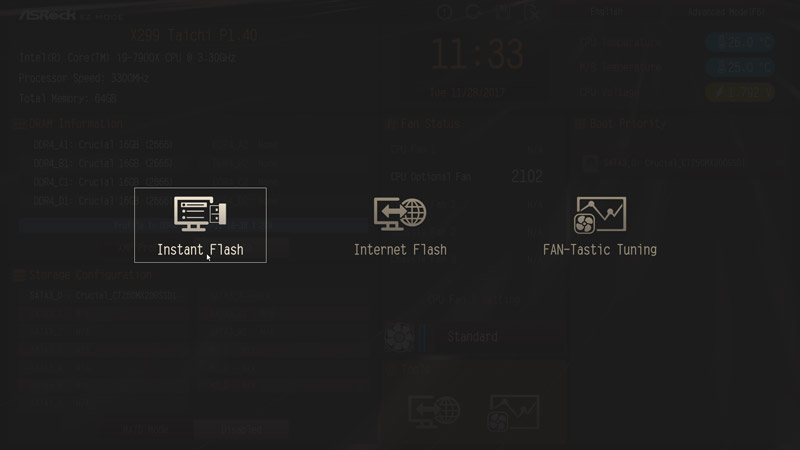
UEFI BIOS Update …
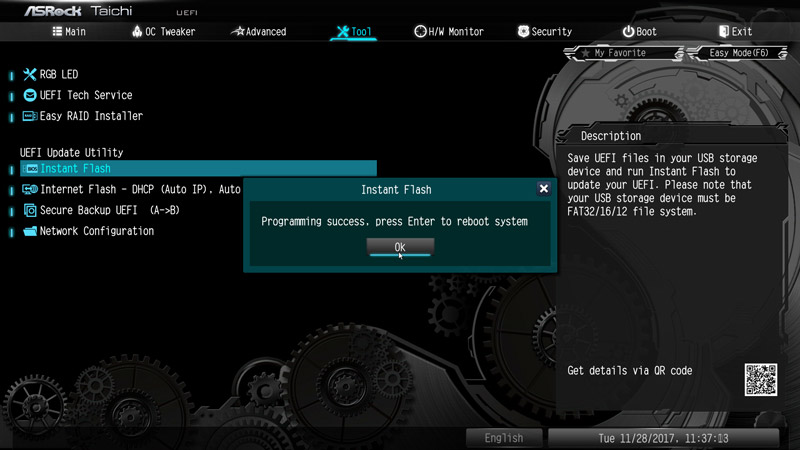
Before we start with the UEFI overclocking, we update the UEFI BIOS to the latest version. Since ASRock regularly adds new features, better memory support and new processors, the BIOS update is recommended in most cases. ASRock offers several possibilities for flashing the UEFI update, e.g. the very simple Instant Flash or even the ASRock Internet Flash with a direct connection to the internet. The ASRock Instant Flash Utility can be accessed via the ASRock Instant Flash Option in the Tool Screen or via the F6 key at PC startup. You can simply install a previously downloaded ASRock BIOS without boot CD or similar by starting the ASRock Instant Flash Utility. Then select the BIOS Flash ROM from the desired drive, e.g. from a USB stick, which you have to unpack after downloading.
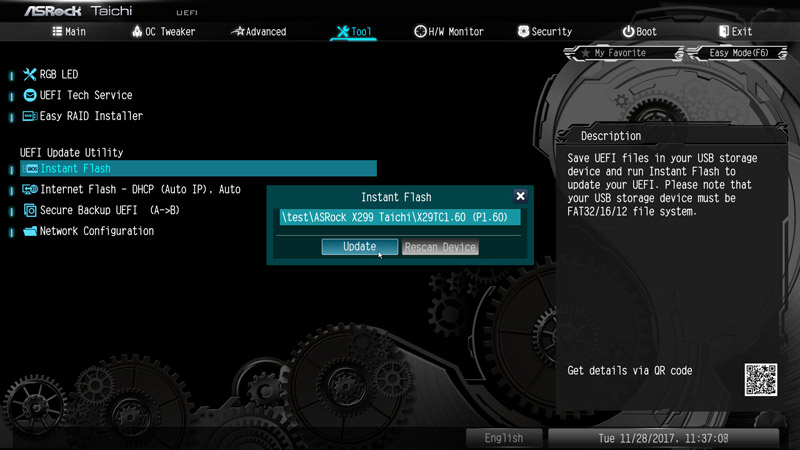
After a reboot the new BIOS version is available.
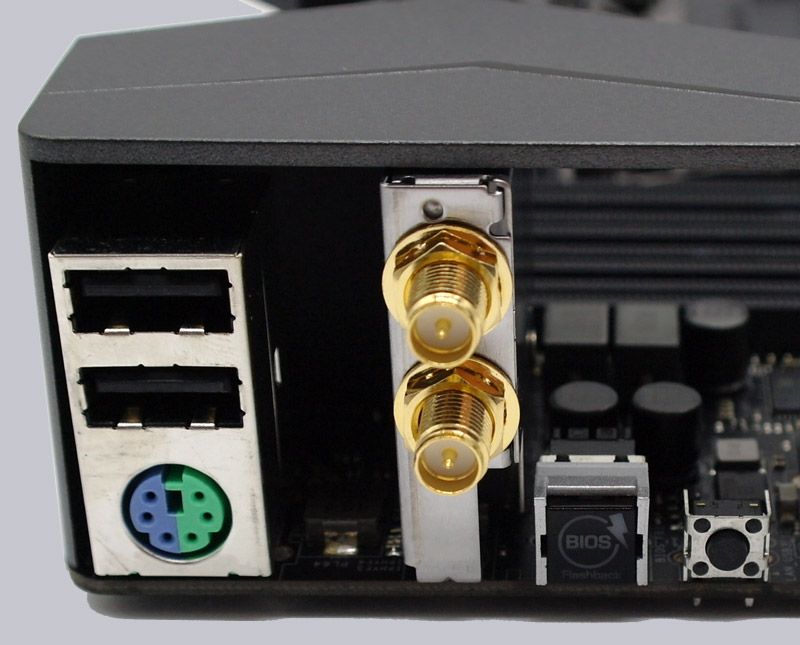
Furthermore, there is also an option for the X299 Taichi, which we have already extensively tested in the previous ASRock X399 Taichi Mainboard Test. It is the ASRock BIOS Flashback Switch, which we have also shown in ASRock X299 Video. You can transfer the BIOS without CPU, memory and graphics card from the USB stick to the motherboard and you can update it even with an old BIOS to a new CPU. You load the latest BIOS file into the main path on a FAT32 formatted USB stick and rename it to creative.rom. At the time of testing, the latest UEFI BIOS version P1.60 was available for download. The USB stick is then plugged into the lower USB 2.0 port on the PS/2 port. This is important because the BIOS update only works with this USB port. Now press the BIOS flashback switch for about 3 seconds and start the BIOS update (recognizable by the green LED flashing in the BIOS flashback button). As soon as the LED stops flashing, the BIOS has been updated.
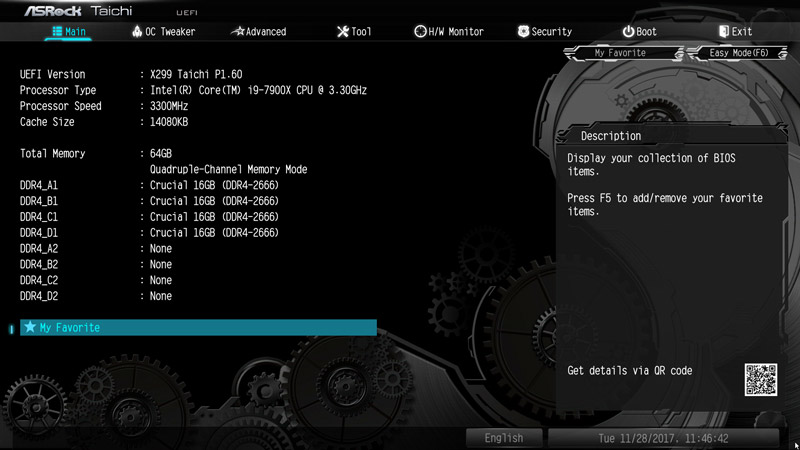
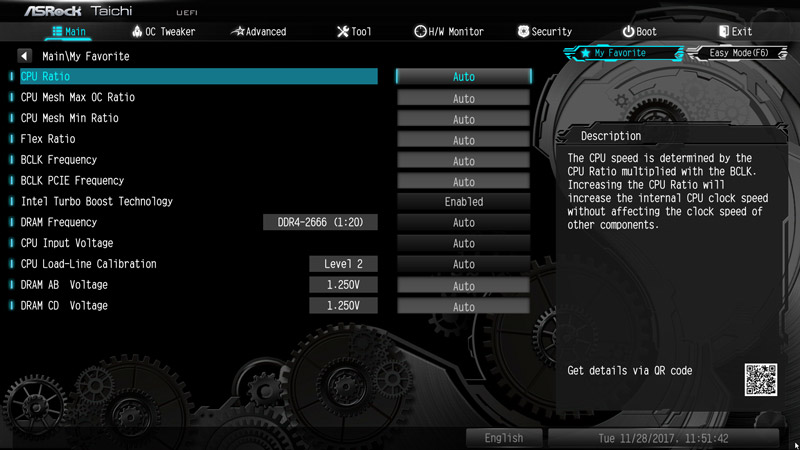
The new UEFI version is available after the motherboard is fully loaded and can be checked directly on the input side, as you can see here with the Intel Core i9-7900X CPU. In the Advanced Mode input area you can now see the UEFI version, the installed CPU, the DDR4 memory used, a language selection and the My Favorite menu item.
The My Favorite function is very helpful because it allows you to place frequently used menu items here, so that you can see them easily on a page and access them faster. You start with a blank page – by the way, it will be emptied after a BIOS update.
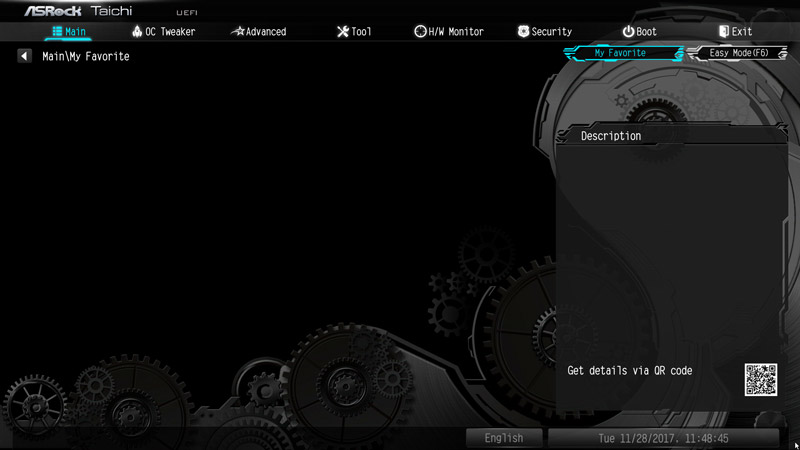
The My Favorite page is now filled with your own menu items by simply going to the respective menu item, then pressing F5 and the desired functions are already included in the My Favorite overview page. Here you can see a selection of possible favorites.
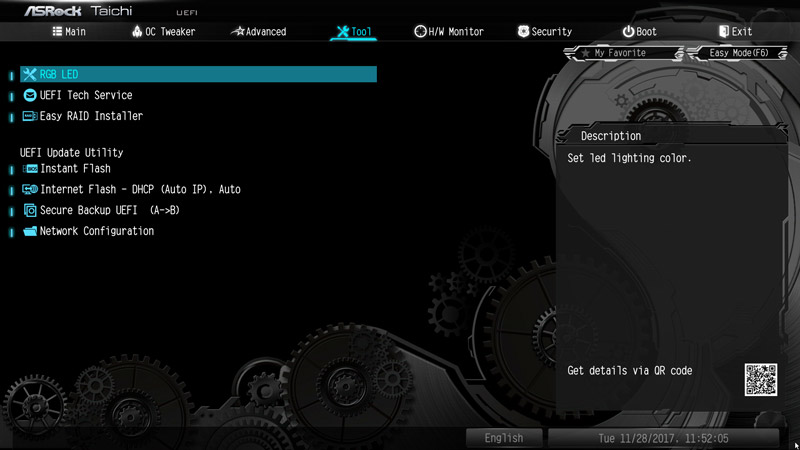
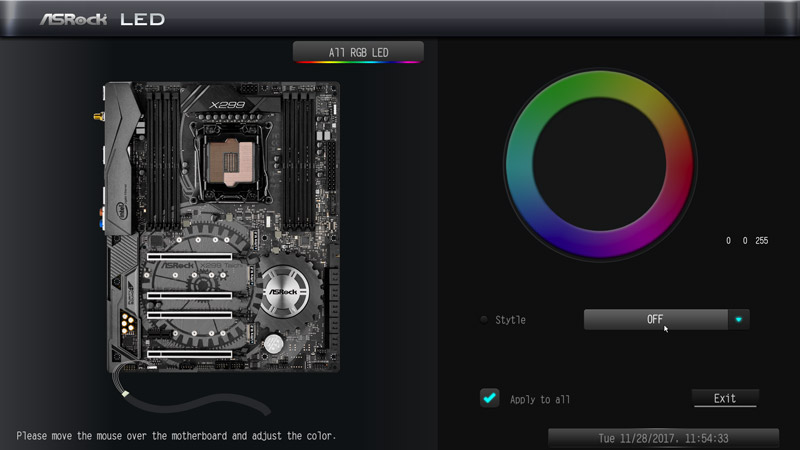
The RGB LED entry is located on the Tools page.
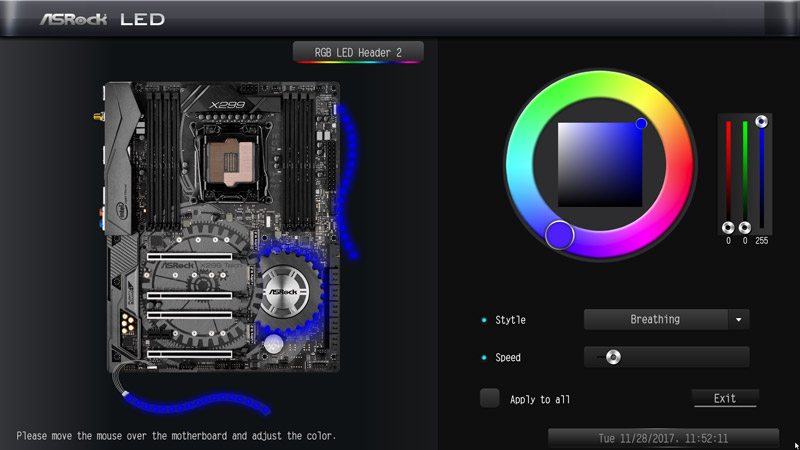
The AURA RGB LED menu has numerous adjustment options. This allows you to select the color in an RGB color selector.
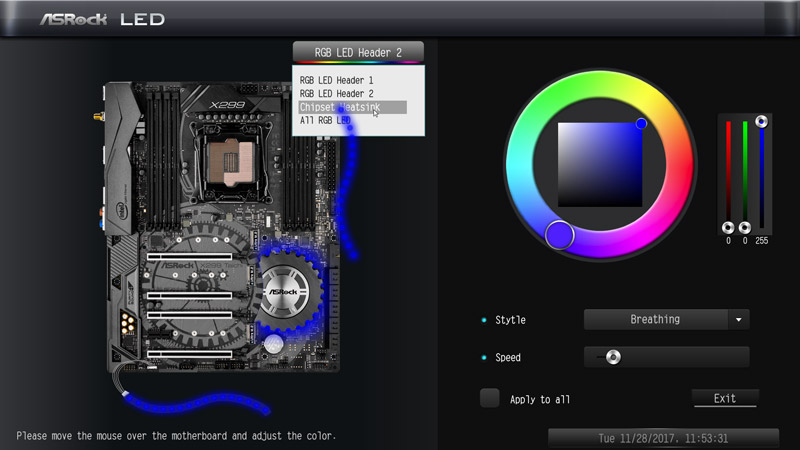
You can choose whether you want to control the RGB header separately or together with the RGB lighting under the chipset cooler.
And in the AURA RGB LED menu you can set whether the LEDs should light up continuously,”breathe”, be controlled randomly or even to music. This gives the user numerous possibilities of how and how fast the LED strips or the chipset cooler should light up. Sure it is, as already mentioned on the Z270 killer, no “must have” feature, but definitely “nice to have”! And if you don’t need it, you can of course deactivate it completely.
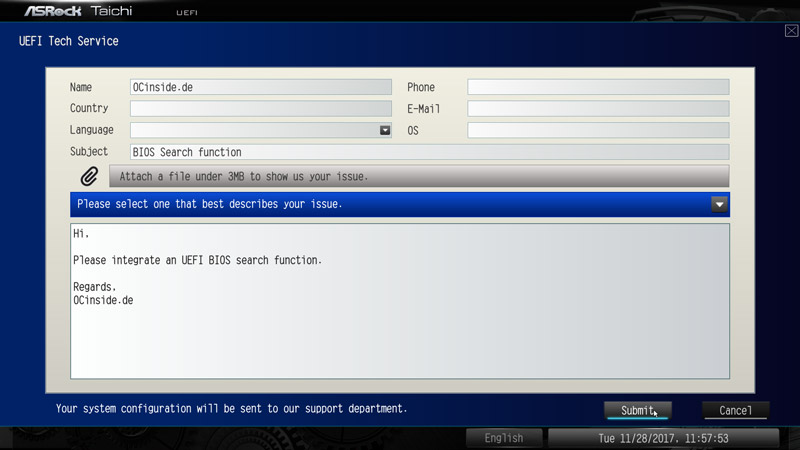
If you need technical UEFI support, you can even contact the ASRock Tech Service via the UEFI setup via network connection.
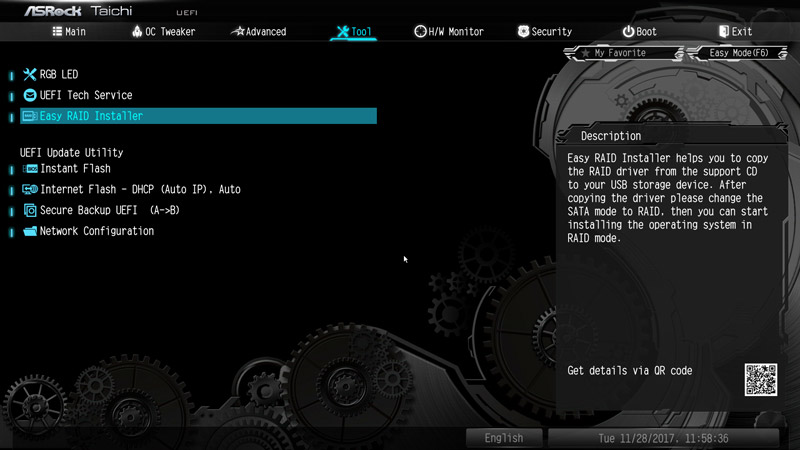
Although ASRock does not offer an Easy Driver Installer option for the X299 motherboard (yet?), ASRock makes the RAID driver installation very easy for the user by offering with the Easy RAID Installer the easy way to download the current RAID drivers.
ASRock X299 Taichi overclocking …
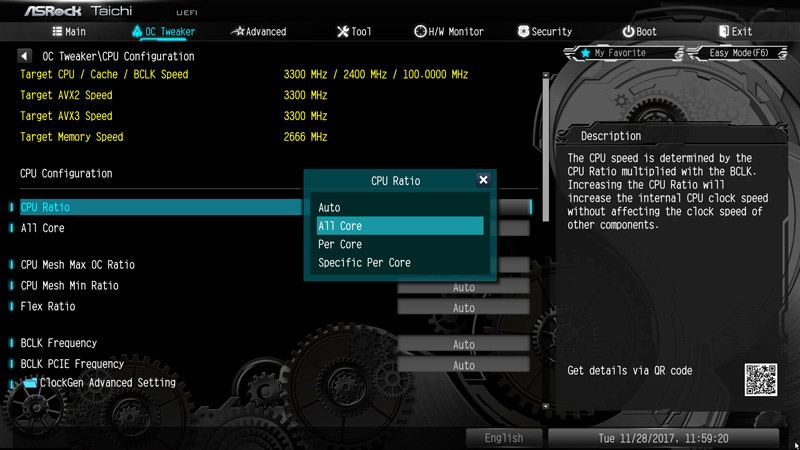
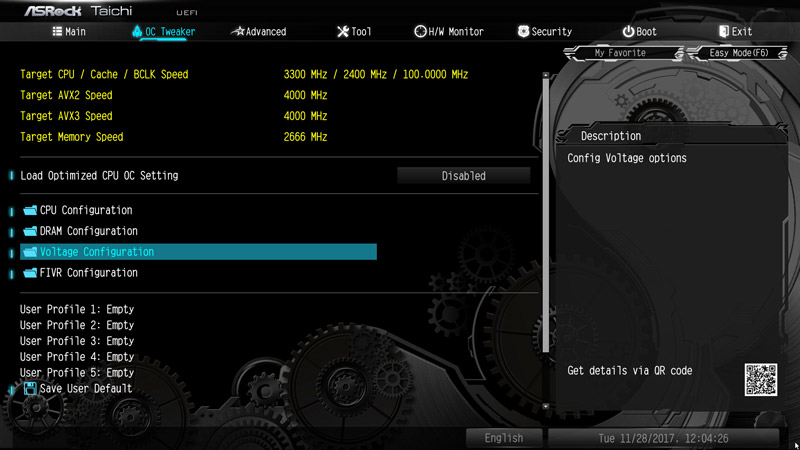
Now let’s get to Intel LGA 2066 overclocking with the X299 chipset on the ASRock X299 Taichi motherboard. ASRock divides the OC-Tweaker menu of the ASRock Z270 Taichi into CPU Configuration, DRAM Configuration, Voltage and FIVR Configuration.
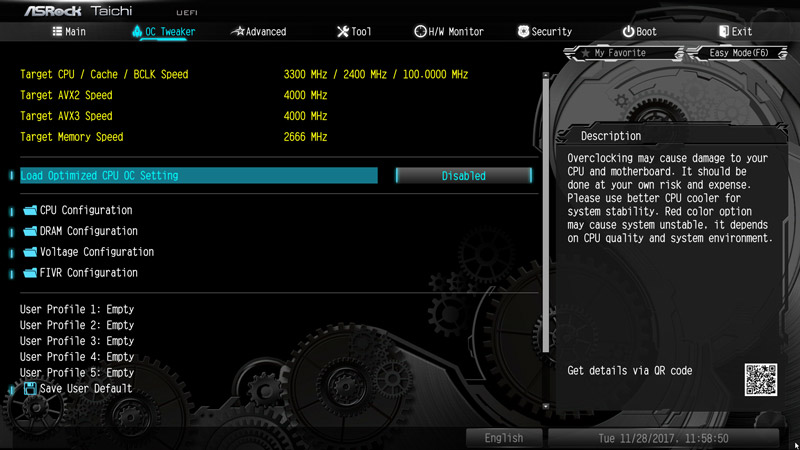
Let’s start with the OC-Tweaker above – as soon as you switch the overclock mode from Auto to All Core, for example, you can change the multi of the Intel Core i9 CPU. Intel Skylake-X processors have an unlocked multiplier, so that you can easily increase the desired CPU frequency. With the Intel Core i9-7900X CPU (standard clock 3300 MHz at a CPU ratio of 33x) the ASRock X299 Taichi motherboard offers a multiplier range from 7x to 80x without increasing the bus frequency.
There is also a CPU Mesh Max and Min multiplier for the new Intel Skylake-SP Mesh architecture (formerly Ringbus) available.
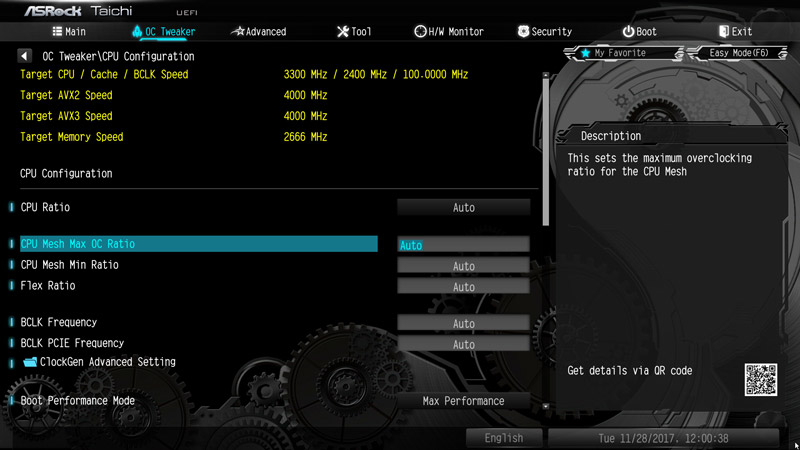
However, there are many more OC options for the Skylake-X CPU overclocking.
Thanks to the extra Hyper BCLK Engine II clock generator, the BCLK/PCIE frequency can be set from 90 MHz to 2000 MHz. Of course, Intel Skylake-X processors derive a lot of values from this frequency, which can quickly become too high. For this reason, the BCLK host clock should only be increased with caution, for example to overclock the memory modules even higher.
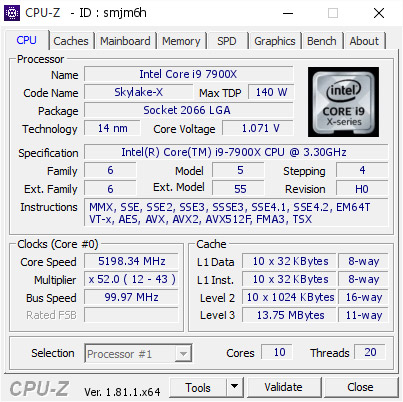
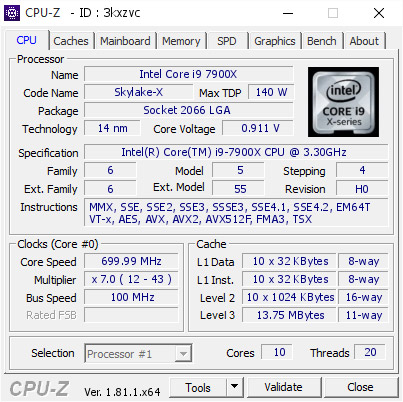
How easy overclocking is, we tried with the Intel Core i9-7900X CPU and are like in Intel OC Forum at Intel Core i9-7900X OC reported, from 3300 MHz to just under 5200 MHz. Not Prime stable, but it is 1000 MHz higher than the OC result of the AMD Ryzen Threadripper 1950X CPU! Here you can see the confirmed CPU-Z Tool with 5198.34 MHz at 1.071 Volt (Auto +0.2V). And it would certainly be possible to do even more with some fine work.
ASRock X299 Taichi RAM settings …
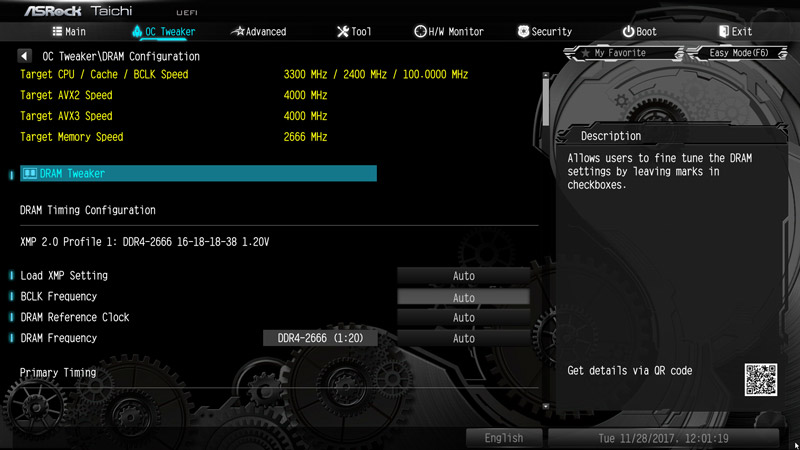
The DRAM Configuration Menu contains all important memory settings.
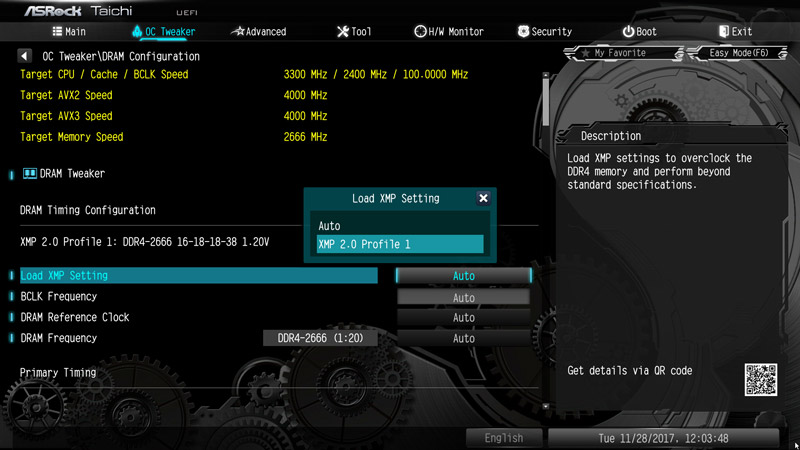
Thanks to Load XMP Setting support, XMP memory modules can be set up correctly with just one mouse click in the UEFI BIOS.
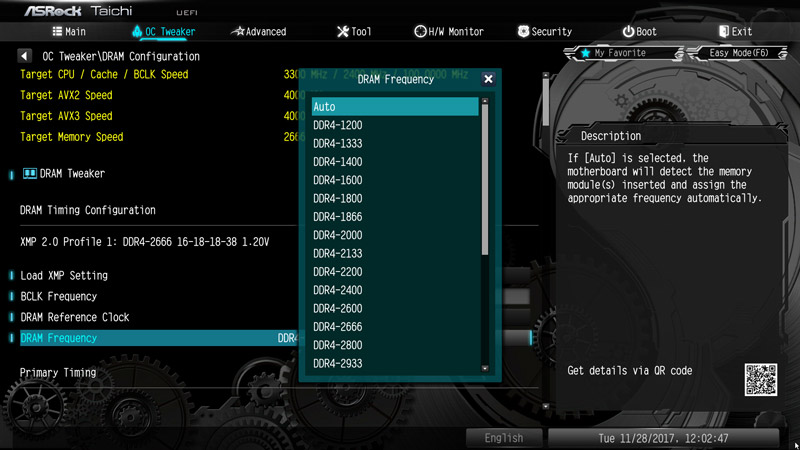
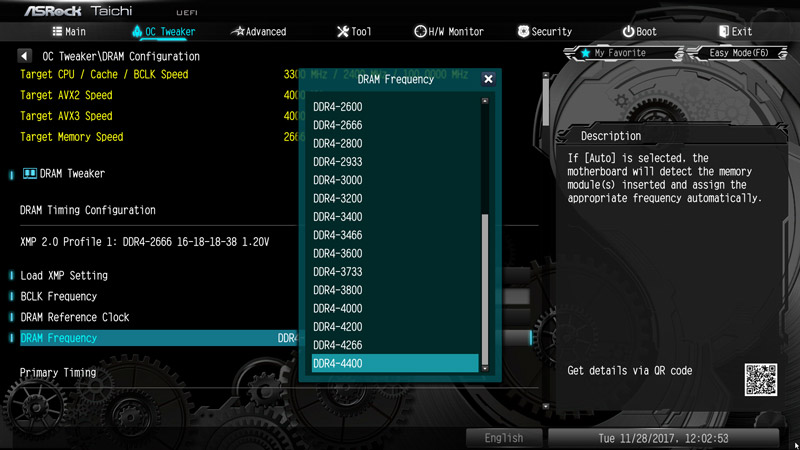
Alternatively, you can select the values yourself. With the DDR4 memory clocking you can e.g. set values of DDR4-1200 …
… up to DDR4-4400.
All DDR4 timings can also be adjusted manually.
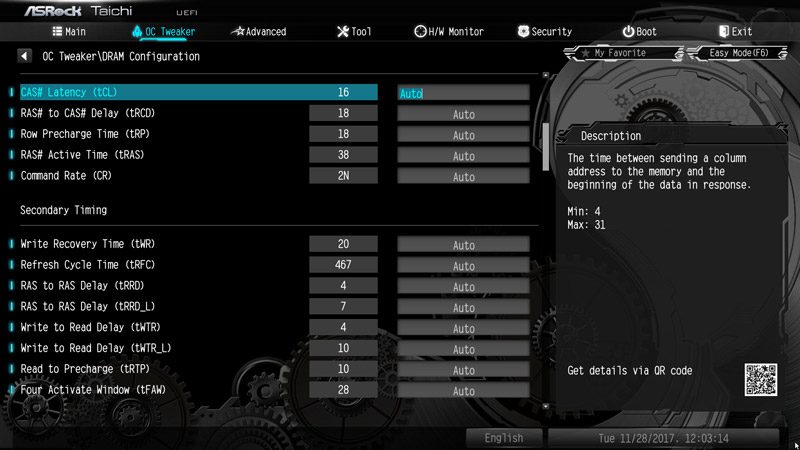
The ASRock X299 Taichi also offers a DRAM tweaker menu with all SPD and XMP memory values for direct selection.

ASRock X299 Taichi voltage settings …
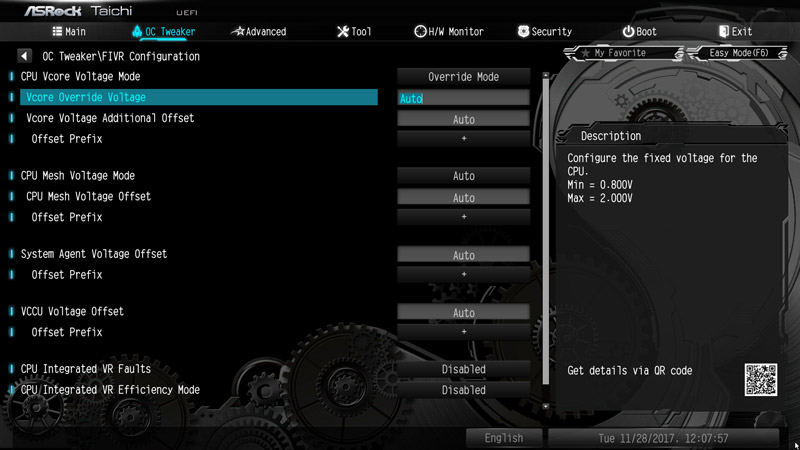
Now we come to the voltage settings that can be adjusted in the UEFI. The X299 divides the voltage settings into FIVR and Voltage Configuration.
With the CPU Input Voltage you can set the value Offset or Fixed Mode.
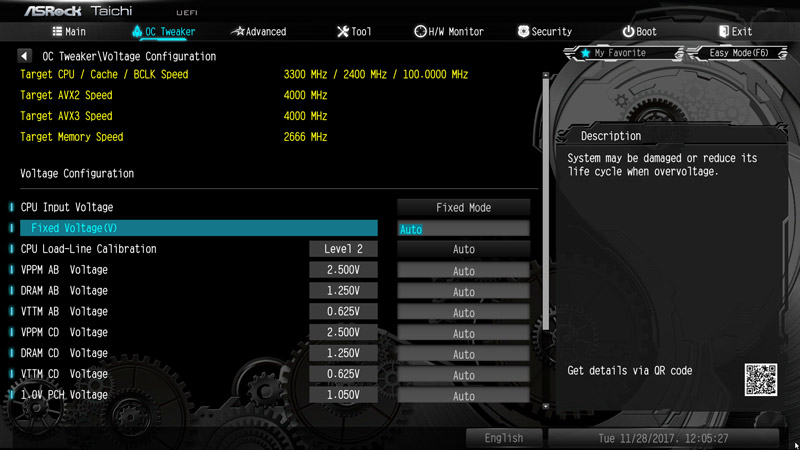
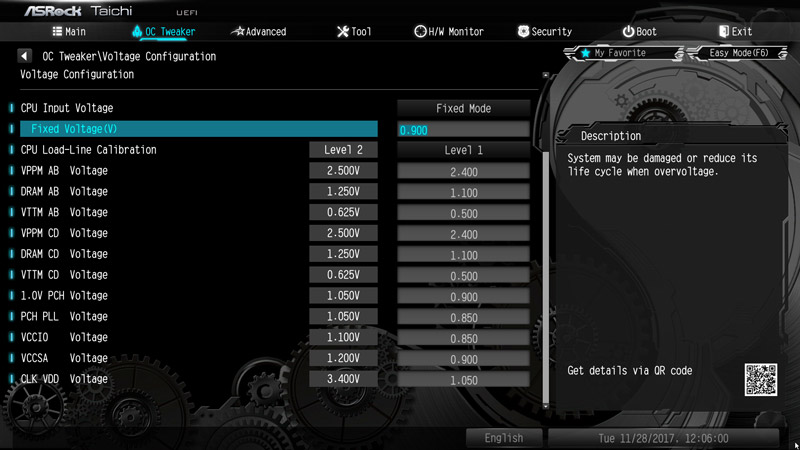
In addition, the X299 motherboard has numerous voltage settings such as 1.0V PCH Voltage, PCH PLL Voltage, VCCIO Voltage, VCCSA Voltage, CLK VDD Voltage, CPU Input Voltage, CPU Load Line Calibration and more, which makes it very easy to overclock the Intel Skylake-X CPU. By the way, the DDR4 voltage can be increased from 1.100 to 2.000V in the Voltage menu subdivided into AB/CD, and there are VTTAM AB/CD as well as VPPM AB/CD voltage values, with which you can easily undervoltage or overclock DDR4 modules.
In the FIVR Voltage menu you will find further settings.

There you can change the VCore, for example. With Fixed Mode, the Intel Core i9-7900X Test CPU can set a VCore up to 2.000V plus +/- 1.000V offset. This is of course too high for usual overclocking, but LN2 overclockers will be happy.
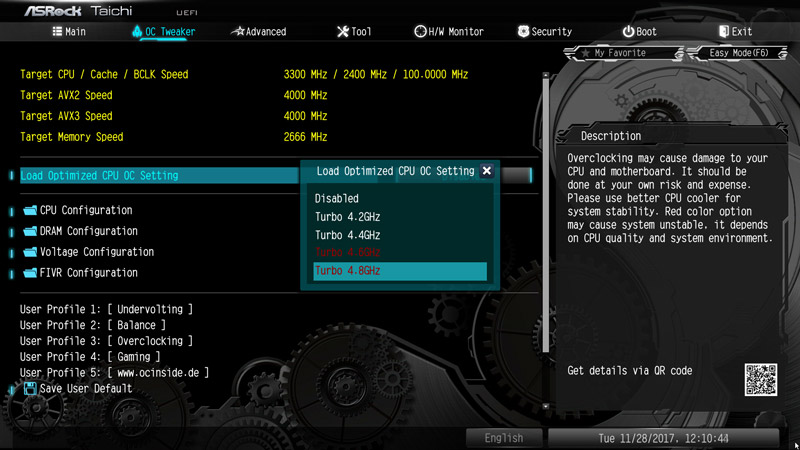
ASRock X299 Taichi easy overclocking …
If you don’t want to study overclocking, you can try your luck with Load Optimized CPU OC Setting. There you can overclock the system performance automatically in different turbo steps – at least if the luck plays along and it is possible with the components and the CPU. Simply select the desired increase and some components will be overclocked with the Load Optimized CPU OC Setting (or optionally also GPU overclocking) to a desired value e.g. Turbo 4.2 GHz, Turbo 4.4 GHz, Turbo 4.6 GHz or Turbo 4.8 GHz, overclocking cannot be simpler!
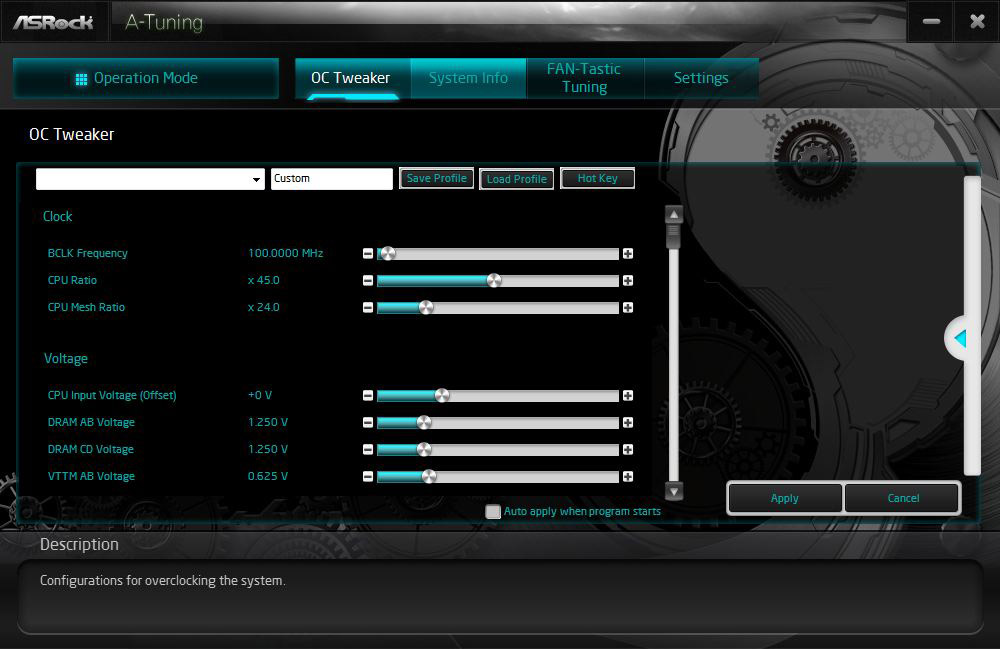
If you prefer to overclock in Windows, you can also use the ASRock A-Tuning Tool to adjust the voltage settings and CPU frequency listed above or, as in Intel OC tutorial explained it can be overclocked with the Intel XTU Tool (Extreme Tuning Utility).
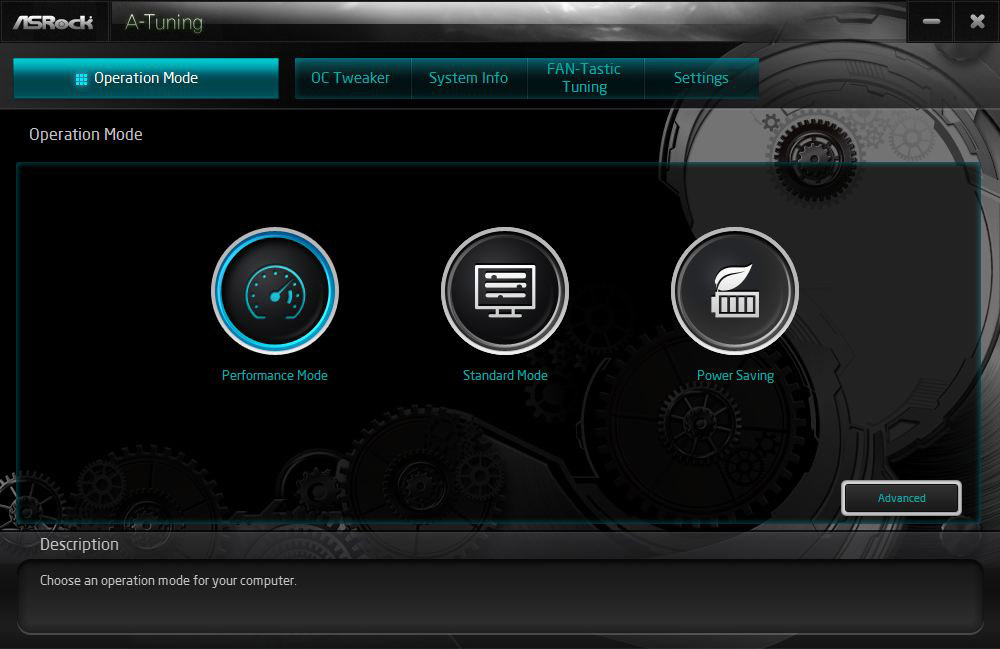
Here you can see some settings of the ASRock A-Tuning Tool.
Once the desired settings have been found, you can save up to five different BIOS settings with names in the UEFI under OC Tweaker.
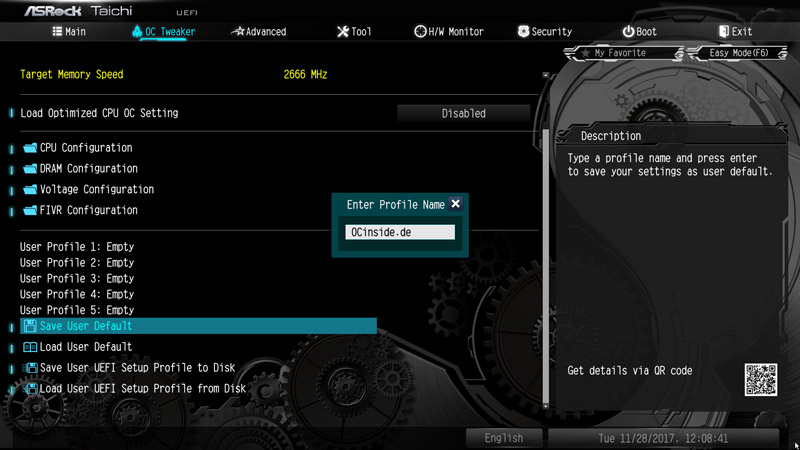
For example, you can save balanced BIOS settings, overclocking settings and undervolting settings or Office and Gaming settings in an user profile of the UEFI to load them very quickly at any time.

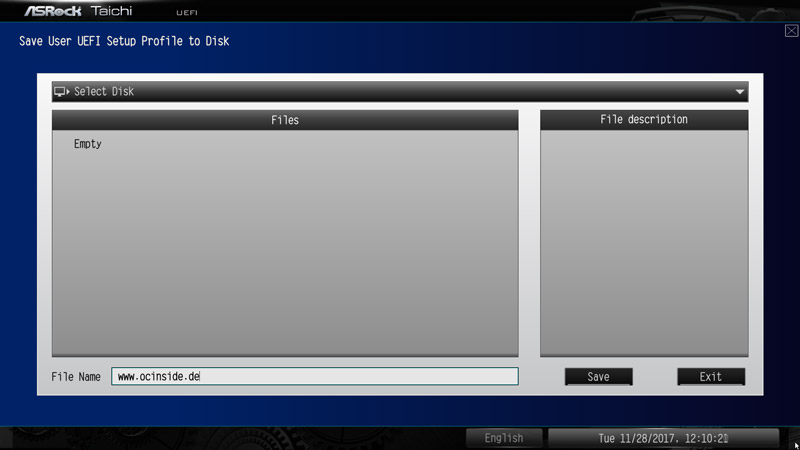
Also interesting is the Save User UEFI Setup Profile to Disk option. Just click it to save your own UEFI settings on the hard drive or an USB stick.
BIOS Undervolting …
The downclocking or undervolting is also tested in this review. It was possible to lower the Intel Core i9-7900X CPU frequency down to approx. 3200 MHz. Of course, underclocking is like overclocking outside of the manufacturers specification, so it is necessary to have some luck. ASRock gives several options for easy PC undervolting / downclocking.
However, there are many other UEFI settings to choose from, such as CPU Configuration, Chipset, Storage, Intel Thunderbolt, Super IO, ACPI, USB Configuration and Trusted Computing.
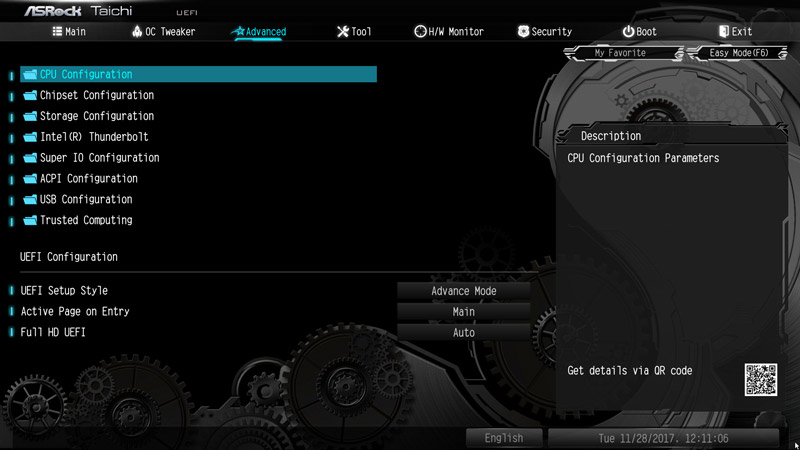
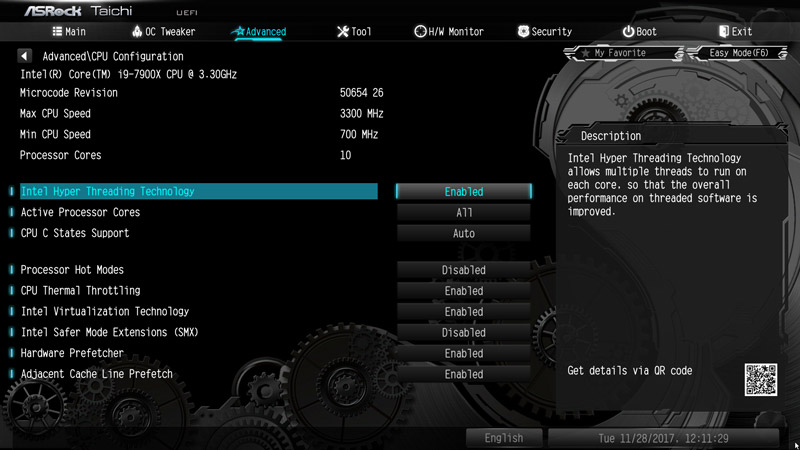
If you want to save power with the Intel LGA2066 PC, you should also go through the settings in the CPU configuration menu under Advanced.
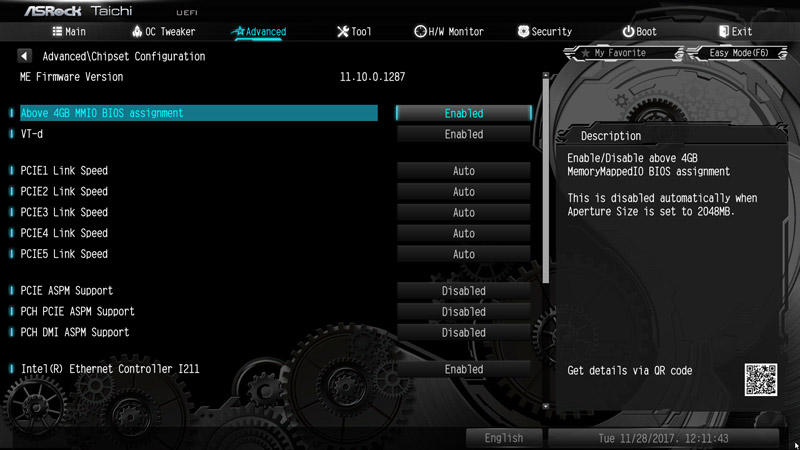
But also the settings in Advanced Chipset Configuration with the individual speeds of the PCIe slots, etc. are interesting.
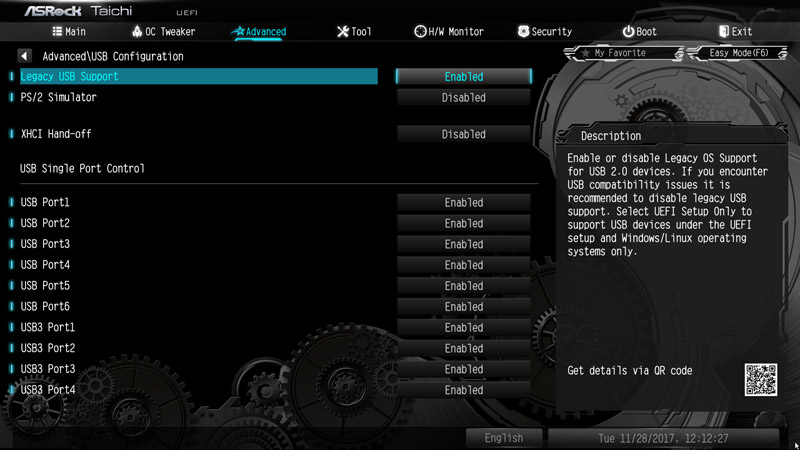
It is even possible to deactivate each USB port manually.
Fan control …
The UEFI Setup of the passive cooled X299 Taichi motherboard offers extensive temperature fan control options. The settings for the fan controller can be found in H/W Monitor directly below the temperature and voltage display.
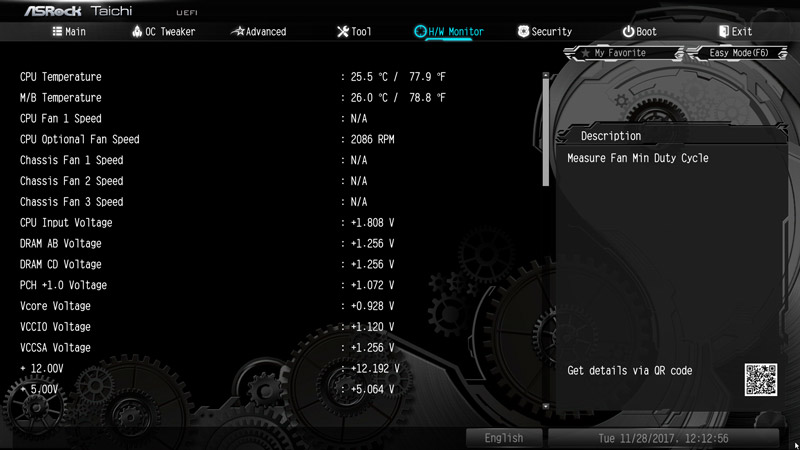
Here are settings for the CPU fan, chassis fans or W_Pump switch.
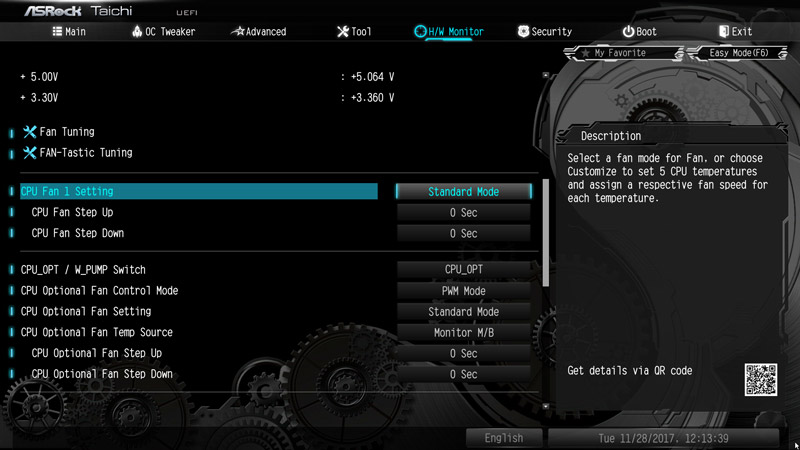
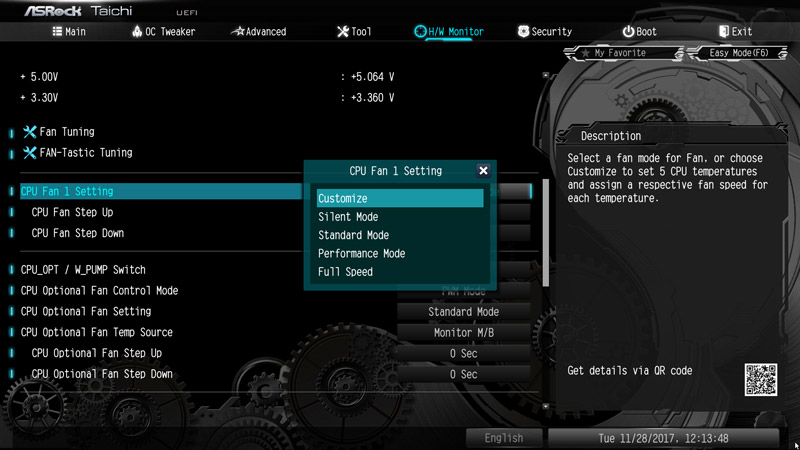
You have the choice between Customize, Silent, Standard, Performance and Full Speed.
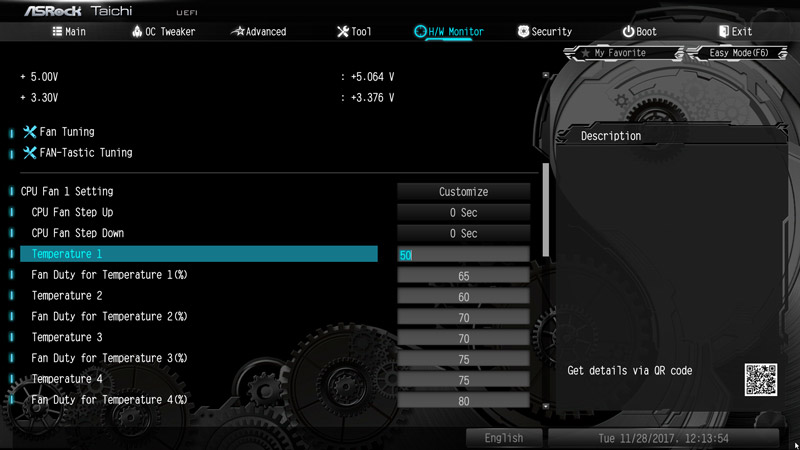
In Customize mode there are several temperature steps available to assign a certain fan speed.
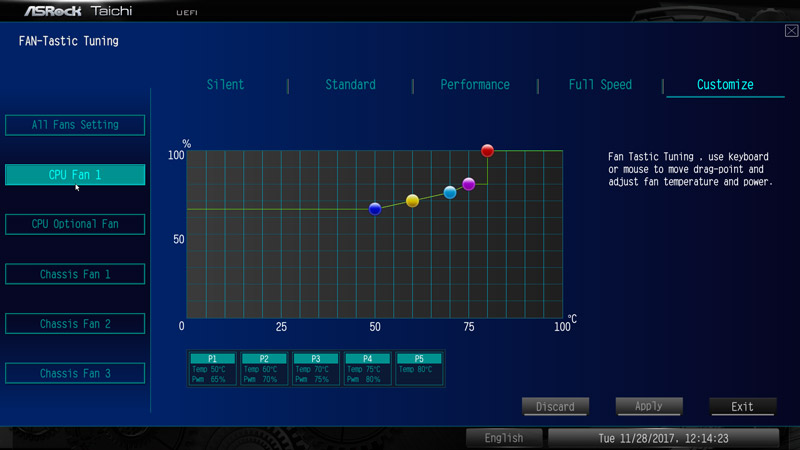
In addition, ASRock has integrated the graphical user interface for controlling the fans in the UEFI setup. The FAN-Tastic Tuning menu item can also be found in the H/W monitor and can be used for all settings. Simply select the respective fan connector on the left side and then select the mode on the right side: Silent, Standard, Performance or Full Speed.
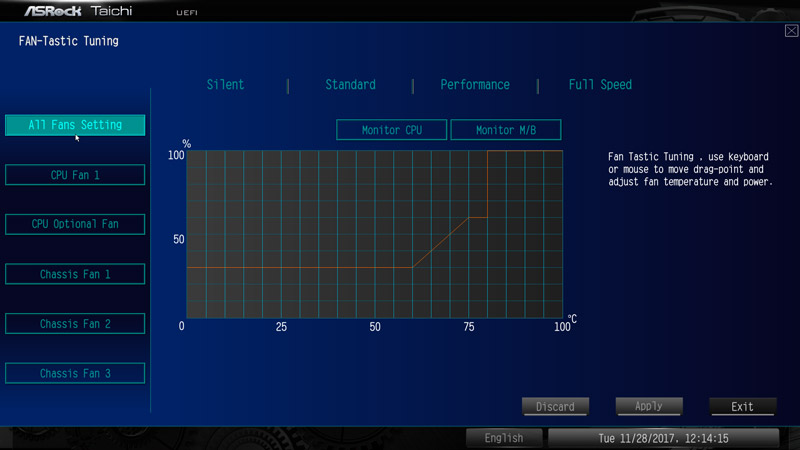
In Customize mode, you can set all values directly in the chart and save.
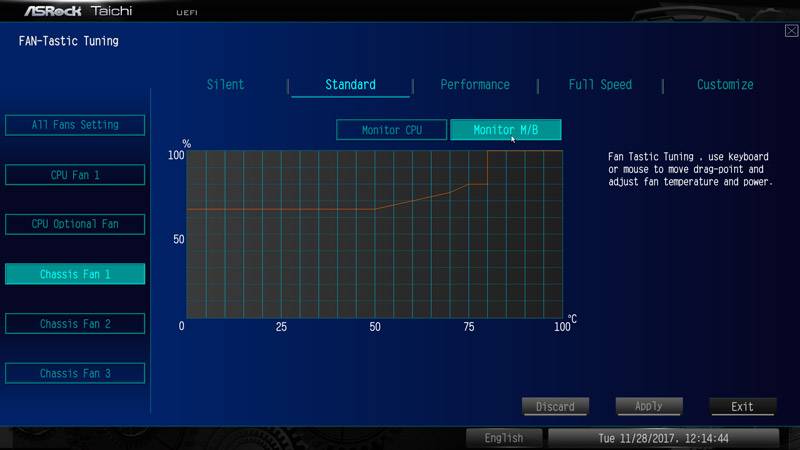
For the chassis fan connectors you can even select, which source you want to use for temperature measurement – Monitor CPU or Monitor Motherboard. Then click on apply and save the values.
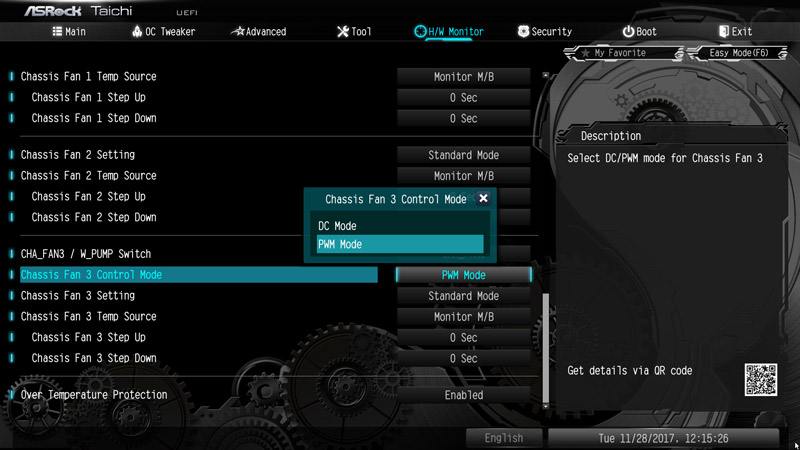
And even the control of the 3-pin chassis fans was thought with the DC/PWM mode switch.
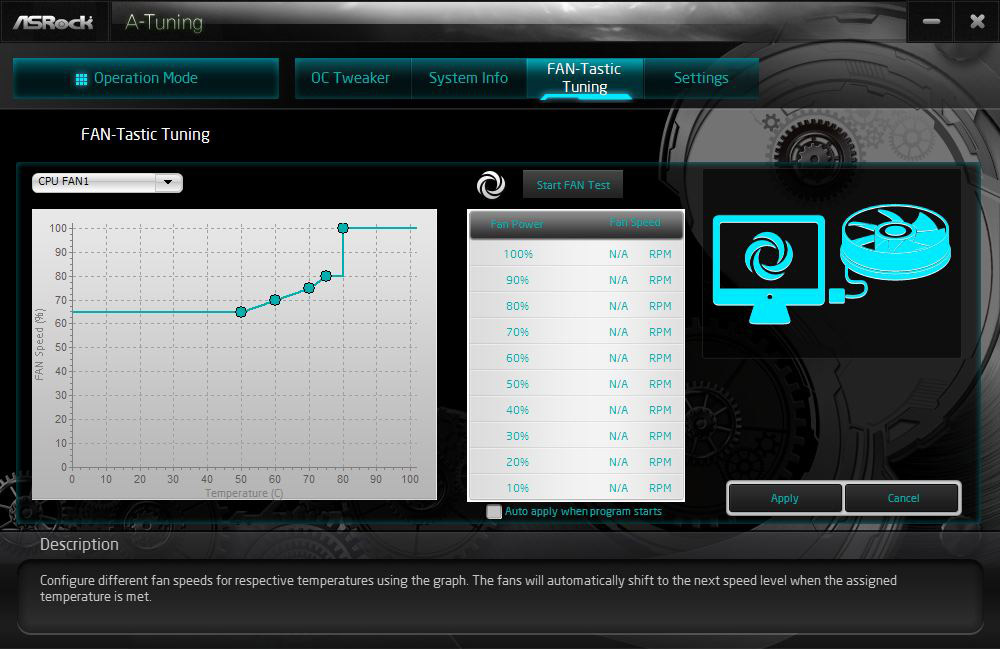
Who would rather set the values in Windows, you can use also the ASRock A-Tuning tool.
You can usually get along without an expensive Fan Controller, because the fans are controlled with this fan control based on CPU or motherboard temperature.
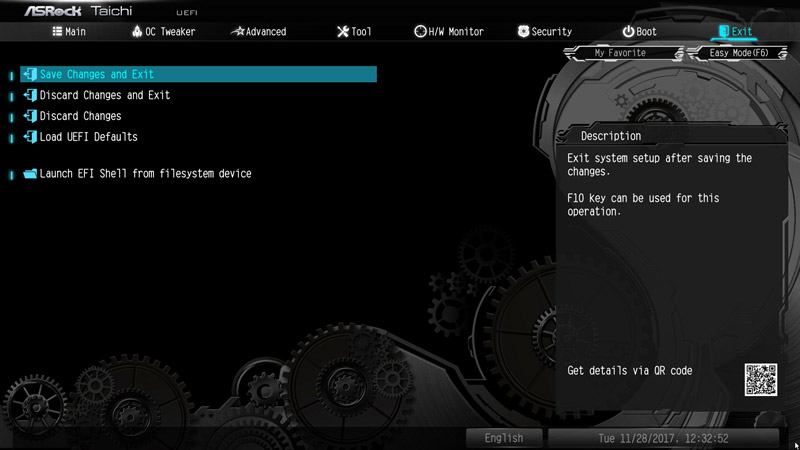
If everything is set, simply store the settings as usual with the F10 key and confirm with Z or with an English keyboard with Y.
ASRock X299 Taichi energy consumption …