

Practical testing …
Schnell zum richtigen Practical testing …
SSD Test system
SSD Firmware Update
SSD Software
Securely erase SSD
NVMe SSD in practice
NVMe SSD speed
NVMe SSD heat development
SSD test system …
We’ve tested the Crucial P3 vs Crucial P3 Plus NVMe SSD on a wide variety of systems with no problems, most recently here on the latest ASRock Z790 Steel Legend WiFi Intel LGA1700 DDR5 motherboard.
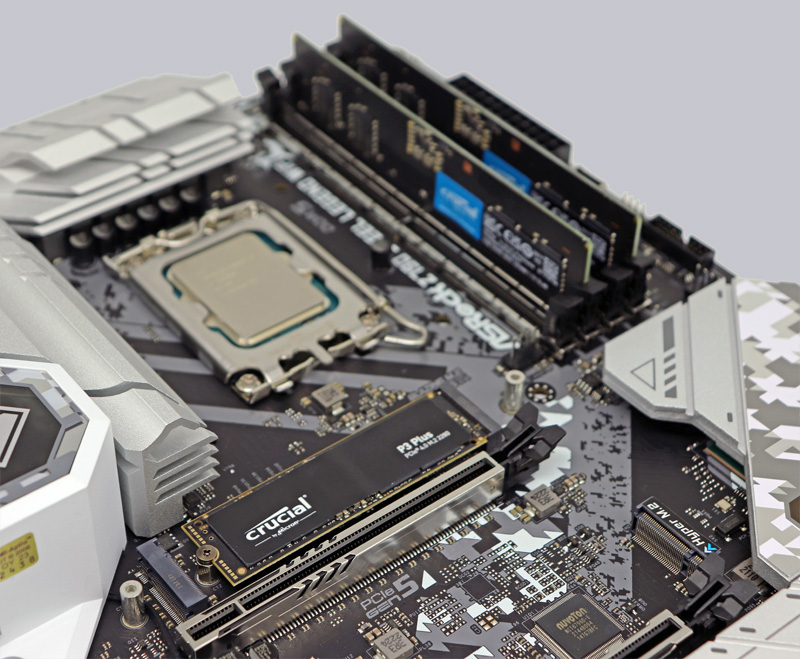
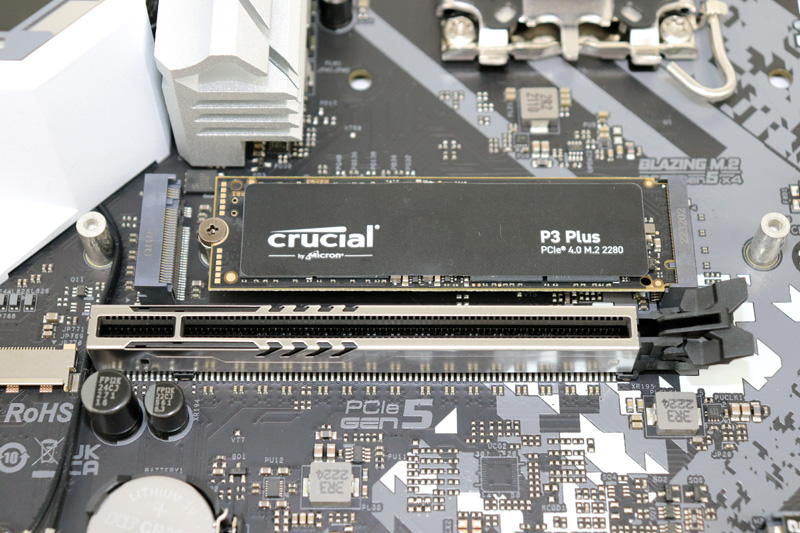
Here you can see the P3 Plus PCIe 4.0 M.2 2280 SSD, which we were even able to test in an ASRock Blazing M.2 PCIe Gen5 x4 slot. The faster M.2 slot doesn’t change the slower SSD interface, however, as the P3 Plus only supports PCIe Gen4 data rates. Just like the P3 PCIe 3.0 M.2 2280 SSD (without Plus) doesn’t get faster in a PCIe Gen4 x4 slot or even PCIe Gen5 x4 slot than in a PCIe Gen3 x4 slot.
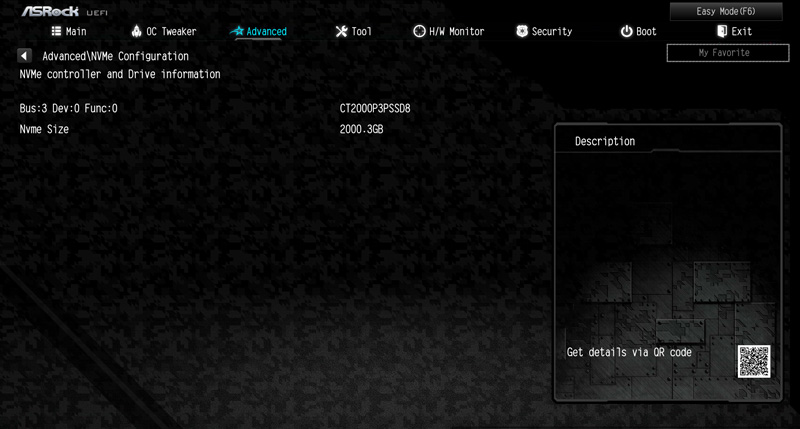
The P3 and P3 Plus SSDs were detected on all systems without any problems and are immediately listed in the UEFI, for example under Advanced in the NVMe Configuration.
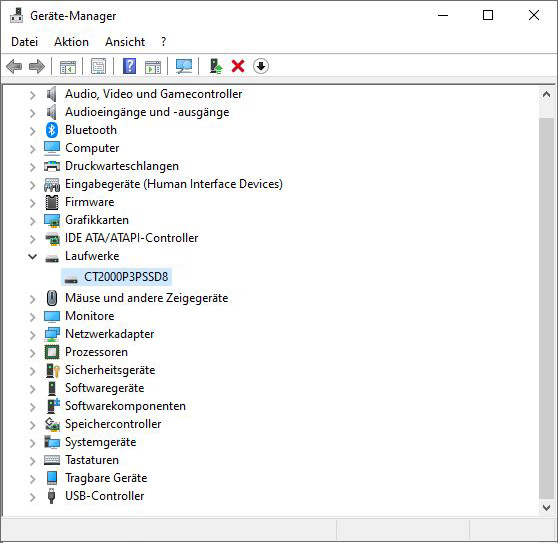
The NVMe SSDs are also immediately listed in the Windows 11 or Windows 10 device manager under drives.
After setting up the Crucial P3 or Crucial P3 Plus 2TB M.2 NVMe SSD test system and the quick installation, we now come to the firmware update.
SSD Firmware Update …
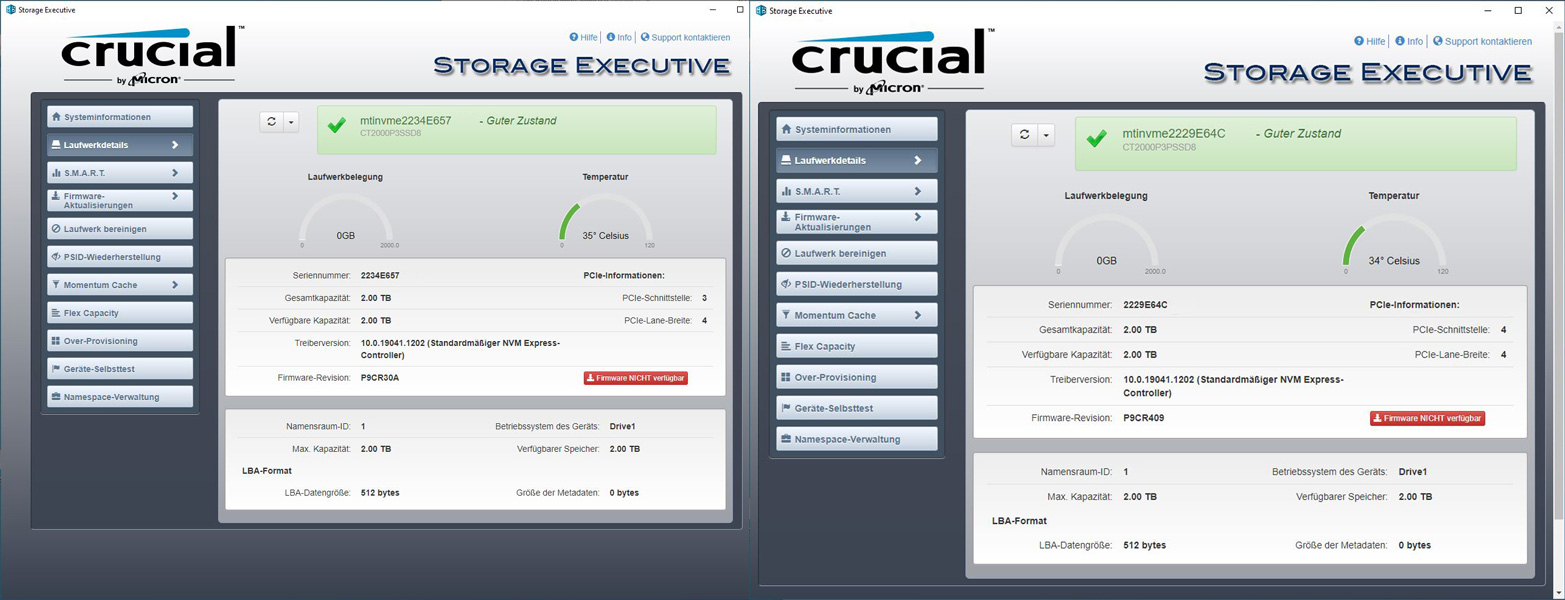
The P3 SSD was shipped with the P9CR30A or P9CR409 firmware. Crucial provides these two firmware versions, P9CR30A for the P3 and P9CR409 for the P3 Plus, as the latest SSD firmware. You can update the SSD’s firmware relatively easily with Crucial’s Storage Executive Tool, but you should, as always, back up important data before updating the firmware. Alternatively, you can still use the classic method to update the firmware: Download the Crucial firmware, unzip the included ISO file, transfer the ISO file to a USB stick with unetbootin (alternatively burn it to a CD or CDRW), boot with the USB stick and the firmware update starts.
SSD Software …
The Crucial Storage Executive Tool download can be found on the Crucial support website. After a short installation, the Crucial Storage Executive Tool clearly shows which SSDs and hard drives are installed, what the SMART values look like and, as mentioned before, directly updates the firmware if desired. It also allows enabling the Crucial Momentum Cache option and setting the Over Provisioning range to adjust the SSD durability vs performance. With the PCIe interface and PCIe lane width values, you can immediately see if the PCIe SSD is properly attached – very handy!
Erase SSD safely …
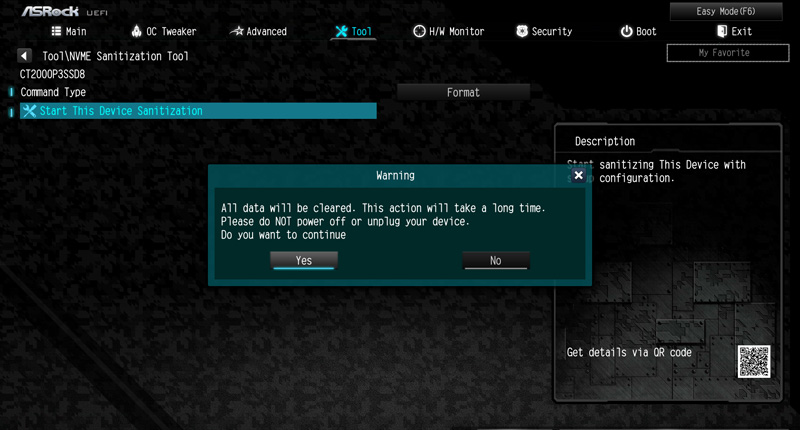
Meanwhile, some motherboard manufacturers offer their own solutions in the UEFI BIOS, which can be used to completely and safely erase the SSD within a few seconds. Here, for example, you can see the SSD Secure Erase Tool for SATA SSDs and below that the special ASRock NVMe Sanitization Tool from the recently reviewed ASRock Z790 Steel Legend motherboard.
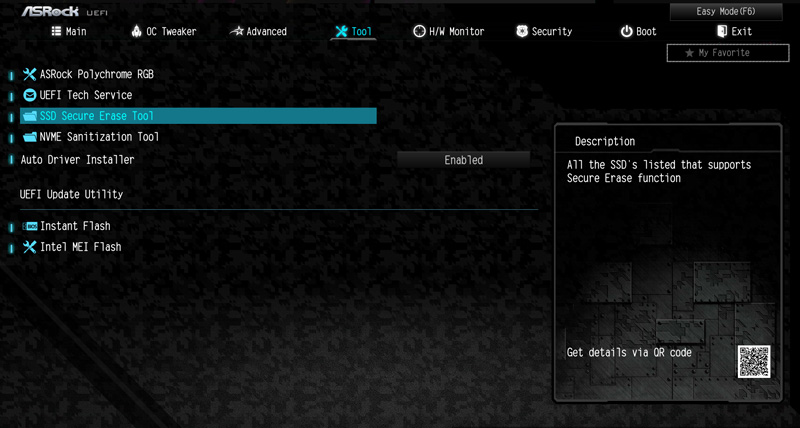
Simply select the menu item NVMe Format or NVMe Sanitize on the tool page in the UEFI for secure deletion without the possibility of recovery, for example if the SSD is to be sold. Then you start the SSD Sanitization and you get a completely and safely erased SSD after a very short time. The note “long time” is rather a short time, because it only takes a few seconds.
NVMe SSD in practice …
An light of recent events, we would like to give a few tips and hints for M.2 PCIe NVMe SSD installation. Because there are more frequent inquiries about the slow SSD speed via mail and in our hardware forums. A PCIe SSD – both in the form of a PCIe plug-in card and in the form of a PCIe M.2 module – requires a high bandwidth for its fast performance. If the Crucial P3 PCIe 3.0 x4 SSD or Crucial P3 Plus PCIe 4.0 x4 SSD or other PCIe SSDs are too slow or are not recognized, it is usually because the wrong slot was selected or the BIOS or UEFI was set incorrectly or too many PCIe lanes are already used.
We are happy to help in the PC Forum under Hardware – simply create a new post and write which motherboard is used and which PCIe M.2 SSD was installed. If no SSD has been purchased yet, our community will also be happy to offer a corresponding SSD buying guide.
NVMe M.2 SSD speed …
For example, the Crucial P3 requires PCIe Gen3 x4 and the Crucial P3 Plus NVMe SSD requires PCIe Gen4 x4, which is a PCIe 4.0 slot with at least x4 lanes, or an M.2 slot that provides 5000 MB/s bandwidth. At ASRock, current motherboards offer the Hyper M.2 slot with up to 64Gb/s and very recent motherboards even offer the ASRock Blazing M.2 PCIe Gen5 x4 slot with up to 128Gb/s. If only one PCIe 2.0 x4 slot or PCIe 3.0 x2 slot is available, a maximum of about 2000 MB/s is supported. This would already mean that some performance would be lost with these fast SSDs.
Here is a small list of PCIe speeds:
PCIe 2.0 x1 500 MB/s
PCIe 2.0 x2 1000 MB/s
PCIe 2.0 x4 2000 MB/s
PCIe 2.0 x8 4000 MB/s
PCIe 2.0 x16 8000 MB/s
PCIe 3.0 x1 985 MB/s
PCIe 3.0 x2 1969 MB/s
PCIe 3.0 x4 3938 MB/s
PCIe 3.0 x8 7877 MB/s
PCIe 3.0 x16 15754 MB/s
PCIe 4.0 x1 1969 MB/s
PCIe 4.0 x2 3938 MB/s
PCIe 4.0 x4 7877 MB/s
PCIe 4.0 x8 15754 MB/s
PCIe 4.0 x16 31508 MB/s
The PCIe 5.0 x1 standard starts at 3938 MB/s (all values are maximum values without protocol overhead).
You can check the correct connection for example with the Crucial Storage Executive solid state drive software mentioned before.
The right NVMe driver for the NVM Express controller is also very important. We tested the Crucial P3 and Crucial P3 Plus NVMe SSD with the latest Windows NVMe driver. If you want to know more about M.2 SATA, M.2 PCIe, 2280, Gen2 x2, etc., you should take a look at the Plextor M6e review, where we have explained all important formats, connections and speeds of the M.2 standard.
SSD heat development …
Before we continue with the benchmark results, we would also like to take a look at the SSD’s temperature.
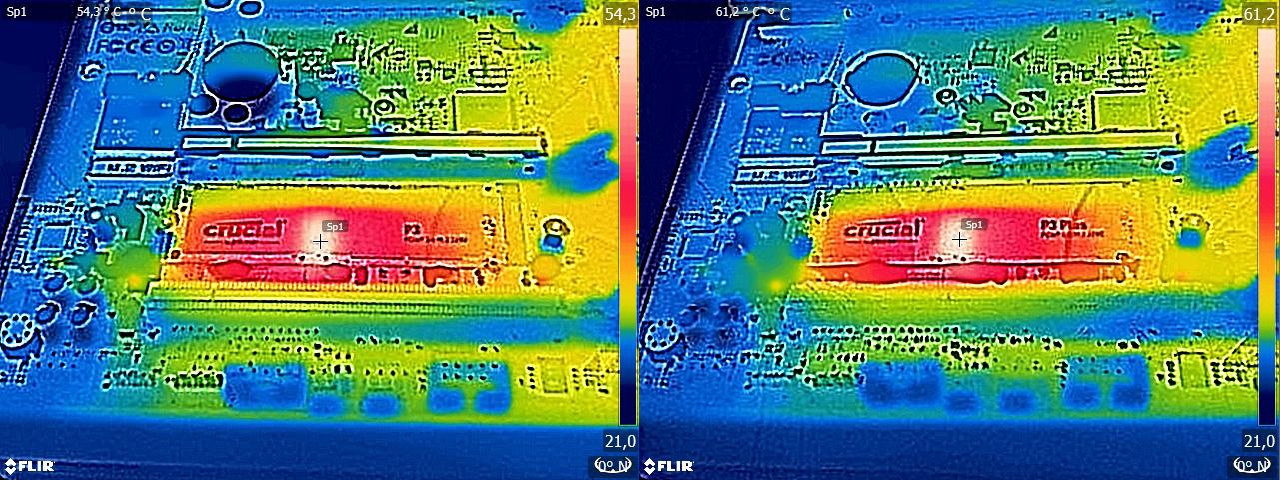
According to the internal temperature sensor, the temperature reached about 49°C after a longer benchmark load (see Crucial P3 data page) and that is even very low for such high-performance PCIe NVMe SSDs. As a special feature, we also check the SSD temperature again on OCinside.de with thermal images. For the thermal images, we use an infrared thermal imaging camera that supports image overlay and thus results in an interesting mixture of the infrared image and the real image.
Externally, we could measure a temperature of just over 54°C under load with the Crucial P3 and a temperature of just over 61°C under load with the Crucial P3 Plus. Even at such temperatures, the internal protection function will not kick in yet, so everything is completely within the green zone. The thermal image also shows that the temperature increase, as usual, only affects the controller IC and not the NAND modules.
Just recently, we had an interesting video featured on our OCinside YouTube Channel where we filmed a Crucial P5 Plus PCIe 4.0 NVMe SSD with our thermal imaging camera, starting from PC startup to a complete run through of an HD Tach Long Bench benchmark.
Note: Please allow our cookies first to see this external content!
Tipp:
Those who want to reduce the SSD temperature could, for example
a) Customize the power saving mode
b) perform an active SSD cooling by direct air supply
c) Apply a commercial thermal pad to distribute the heat on the upper side of the board.
d) buy a special Heat sink for M.2 SSDs *Ad.
e) order a M.2 PCIe card with heat sink *Ad.
The ASRock Z790 Steel Legend motherboard we used already has generously sized aluminum heatsinks integrated for the M.2 slots.
Let’s now look at the Crucial P3 and Crucial P3 Plus 2TB M.2 NVMe benchmarks.
Crucial P3 vs Crucial P3 Plus 2TB M.2 NVMe Setup and test results …