
Thrustmaster Hotas Warthog Review
Layout, Design and Features of the Thrustmaster Hotas Warthog Set …
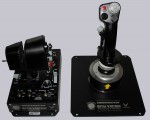
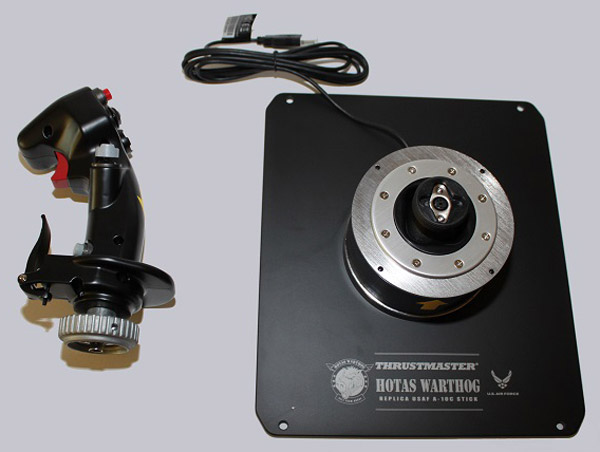
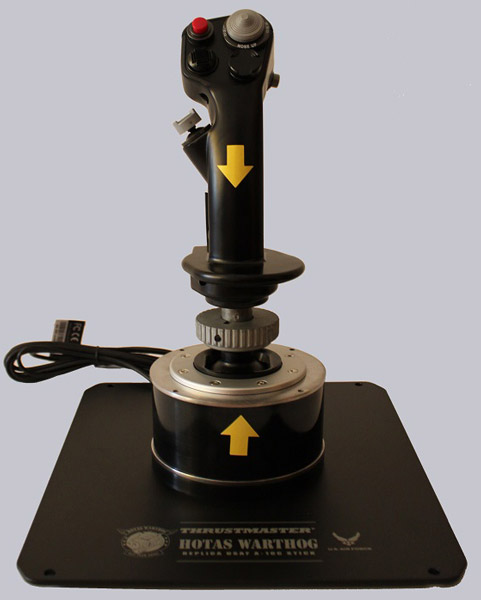
Thrustmaster Hotas Warthog Flight Stick …
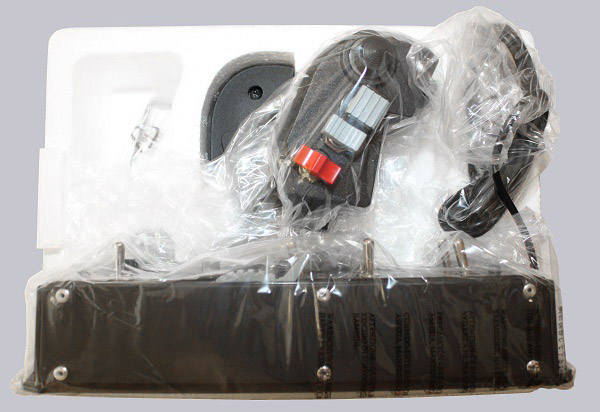
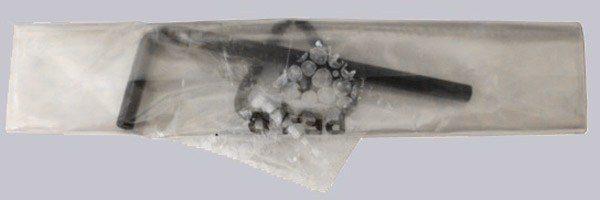
If you have now unpacked all parts of the box, you should see this:
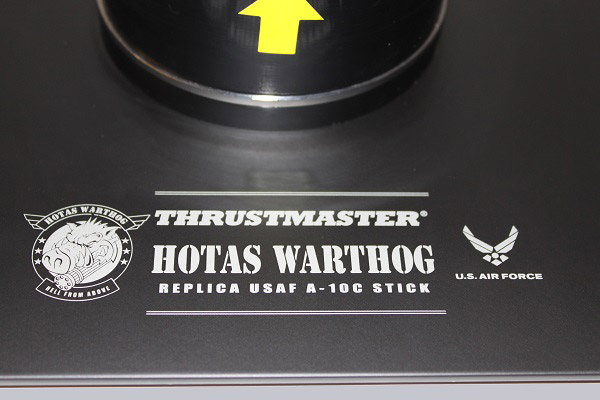
The imprint is already showing that this is not a standard joystick.
If you hold the stick alone in your hand for the first time you might be scared a little bit.
The stick alone already weighs 1.2 kg. Made of metal and fitted with high quality buttons, Thrustmaster shows in terms of durability, what others only dream of. Using a large metal nut, the stick is …
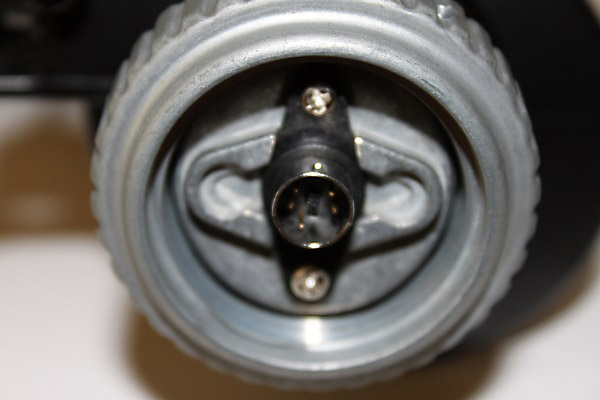
… after he was plugged in the main unit, screwed.
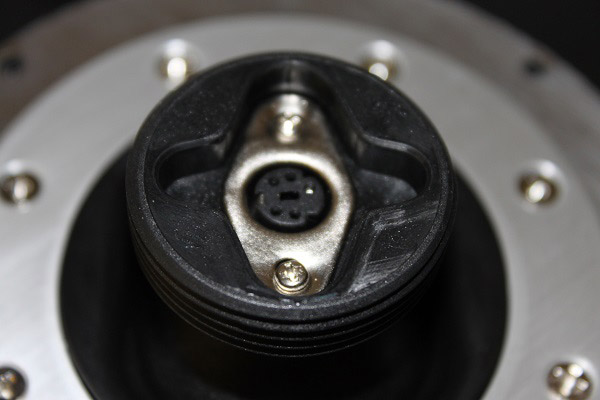
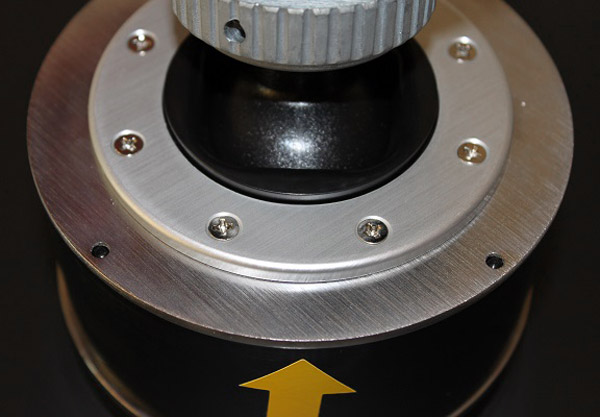
Optionally, now the ground plane can be removed, and the basic unit eg. be mounted in a Sim Pit. And the base plate has four mounting holes to mount the whole unit on a desk. Let us now come to the technology that is built into this stick. Owners of older joysticks are aware of the problem: After a few years of loyal service, the axes do suddenly no longer what they should. An enthusiastic click for calibration reveals the full extent. Flailing already in the middle position like a fish in the net, you realize suddenly that a full scale is not reached, no matter how much you push or bend the stick.
This is exactly where Thrustmaster placed the so-called Hall-effect sensors. They are sensors that can determine the positions based on magnetic fields and work as contactless and not mechanical. This of course brings a much higher service life than with sliding contacts/potentiometers. Only the ball joint is thus claimed, but is also made of very thick and high quality plastic and is completely lubricated with grease. With a little skill this grease can be replaced by another, in order to improve the sliding properties.
The base control board and the centering sits in the base unit in addition to the large center spring.
Regarding the spring it should be mentioned that it really has a strong pressure. This pressure draws the joystick, even at maximum movement always exactly back in the middle position, which is measurable even with the calibration tool based on the bit values! It would be desirable if the set contains another weaker spring to adjust the joystick to other aircraft types. But you get used to on this control and then are happy to hold no more “sponge” in hand.
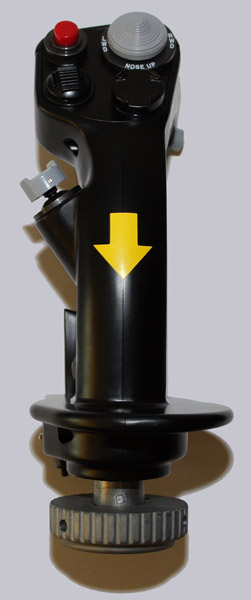
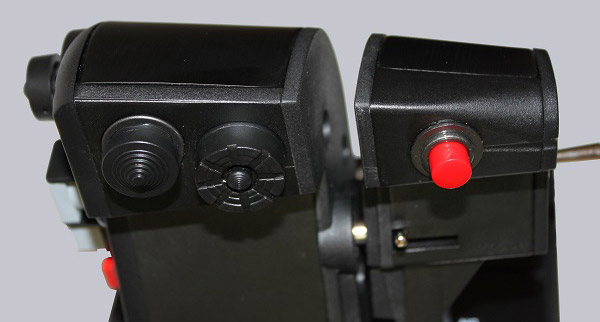
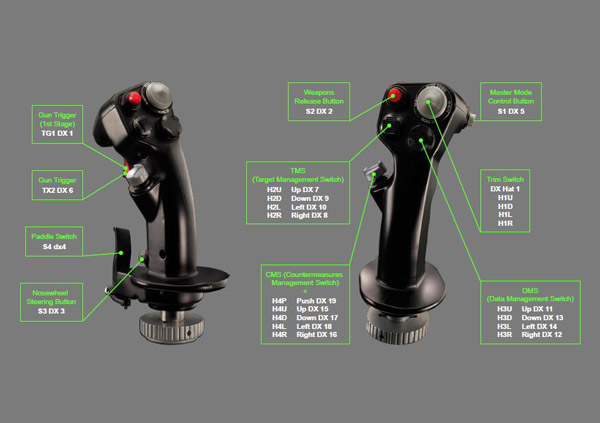
One point should find special mention here: The Hotas Warthog has no Z-axis. This means you can not steer left and right, turn the aircraft on the runway or to use the rudder the joystick. This has not been implemented for the benefit of precision and durability. So you need to map these functions additionally. There is also no Force Feedback implemented which has a favorable impact on the above two points. Even the fire button deserves special attention. This is a so-called double action trigger, as many probably know him their DSLR camera.
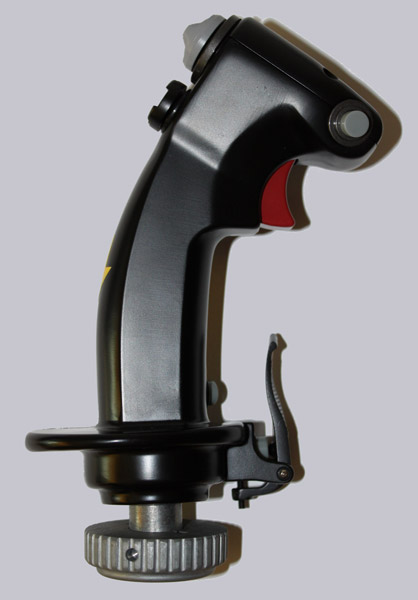
Pressing the trigger only slightly, to activate the first button. In the game A-10C from Eagle Dynamics, it is then, for example, so that your jet is stabilized in order to work accurately with the cannon. If you hold the fire trigger completely down, you activate the second button, which then fires the gun.
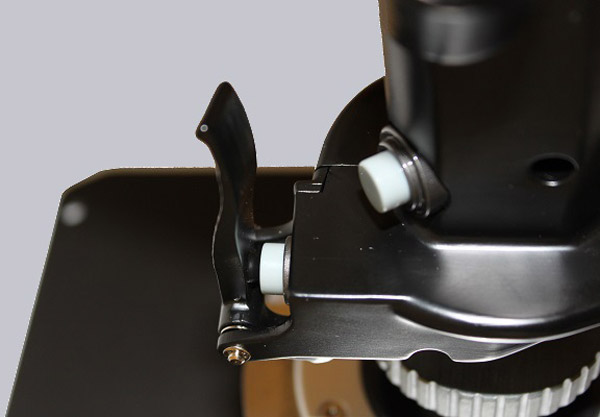
Manufactured in detail is the Pinky Switch therefore located at the rear lower end. This can be customized using a small screw.
A 1,90 meter long USB cable is attached to the main unit. That sounds like maybe long, but could be a bit short when laying behind the desk or in a home cockpit. Resourceful flight simulator fans operate their controls anyway with an active USB hub, after all, the thrust unit needs to be connected as well.
Thrustmaster Hotas Warthog Thrust unit …
So let’s take a look at the second device in the box – the thrust unit.
Solid and weight over 3 kg, the thrust unit is fixed and stable on the desk.
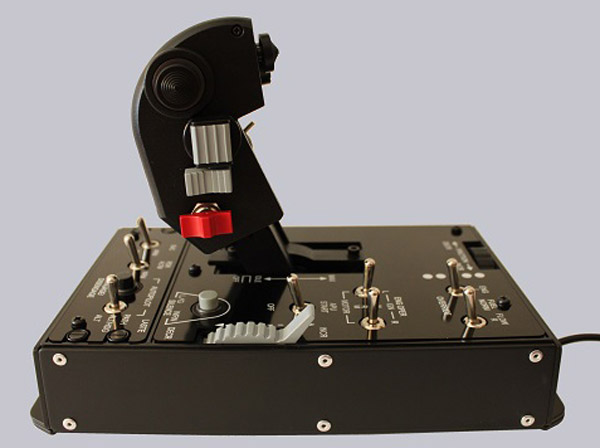
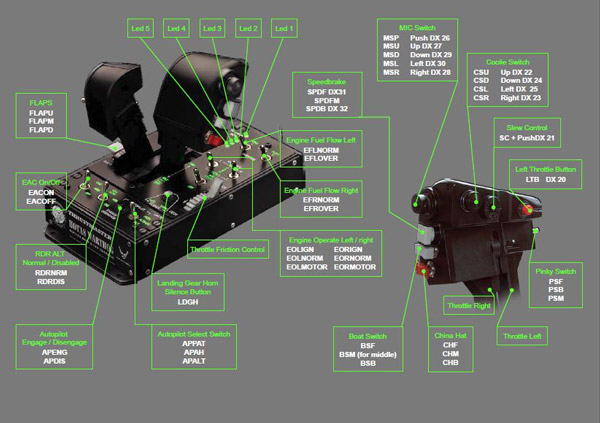
There are mounted two multi-function push lever. Just like inside the original A-10C. So may also several Hat’s …
… and of course, switches, levers, not be missing.
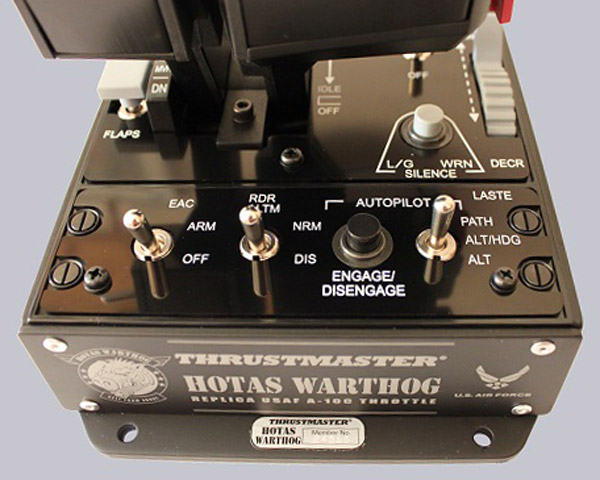
Even 5 programmable LED’s are installed in the form of small white dots on the upper side. The resistance of the thrust levers can be individually adjusted by means of a rotating wheel.
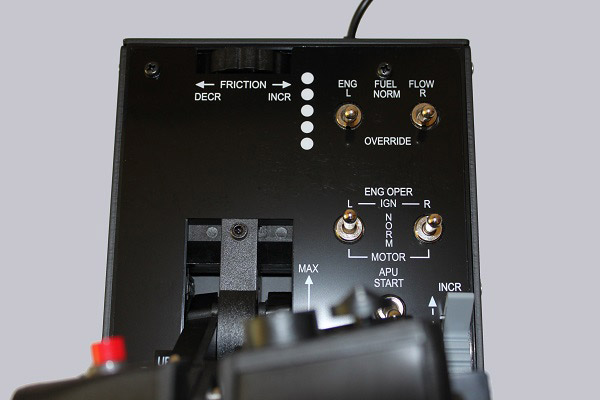
Also, the thrust levers can be separated by a small metal pin and thus controlled two turbines separately.
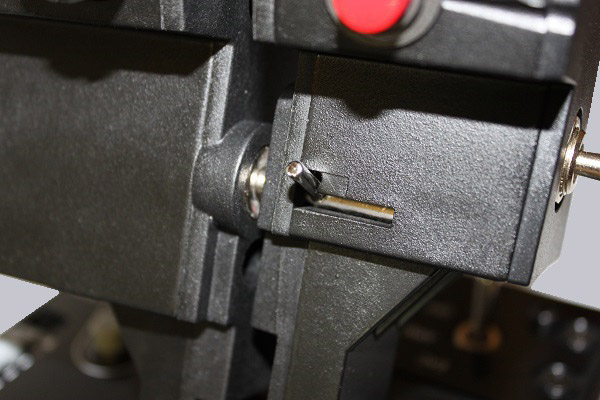
It is possible, lifting the lever up and pull it back, to lock it in the lower position. This may switch of the turbines or put them to standby. You can activate this function flipping a small flag between the two levers. It can be done with the included Allen key.
Then the afterburner can also be activated using the same procedure but in the upper position. Amazingly, the basic unit itself stands firmly on the table even when pulling the thrust lever, which indicates the high weight of the unit.
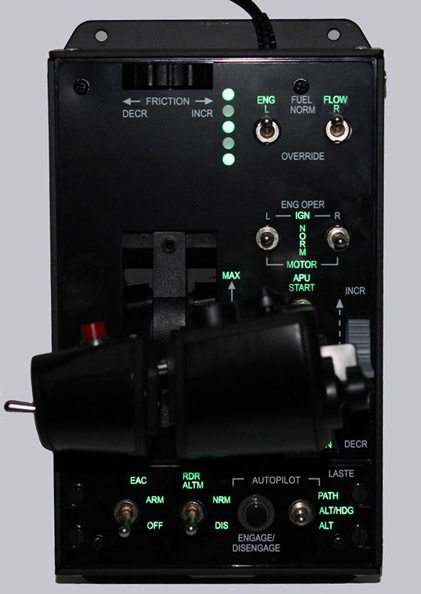
Almost all the labels have a green backlight that can be adjusted in 5 levels of brightness. The 5 programmable LEDs can for example, indicate the status of the landing gear or flaps. Even if you see that it is specialized settings for the A-10 in the functions of the buttons, so they can still be adapted in function to all other types of aircraft. Pressing the switches and buttons, you will notice that these are of very good quality and have a massive operation process. Again, great attention has been paid to quality.
The base also has four mounting holes that allow mounting on the desk.
Thrustmaster Hotas Warthog Software …
We come now to the software that controls and manage all functions of the Hotas Warthog set. Here, however, we just want to give you a short impression, because showing you everything would take amuch longer test. After installation, we have two programs: On the one hand, there is the TARGET GUI software.
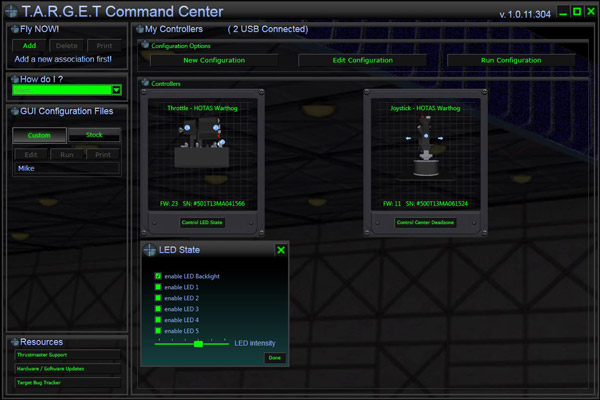
Here we can detect and configure connected devices.
Profiles with various key assignments and axis settings can be configured, stored, loaded and linked to games. Other Thrustmaster devices can be managed with it, such as The MFD Cougar.
There is also the possibility to change the assingment of the buttons …
… view the assignment of the throttles and determine the terms of the buttons.
Furthermore, an updater is included in the package …
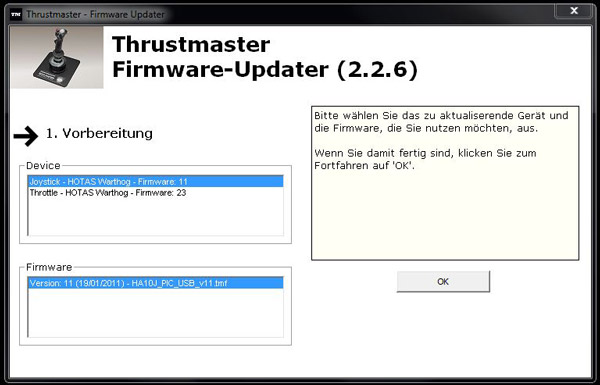
… with which you can update the firmware of both devices …
… or update the software.
The second program is called T.A.R.G.E.T. Script Editor.
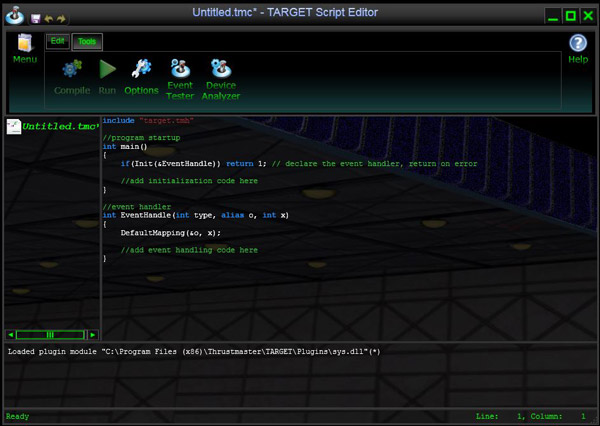
As the name suggests, scripts can be created hereby. A fixed sequence, for example, Activate fuel pumps, turbines and start APU shutdown, can be done by a button press. Unfortunately Thrustmaster used for this purpose a programming language similar to Java. A user who has no experience with it, so hardly can create a useful script with the editor. Here it would be nice having access to a graphical variant.
Another useful addition is the Device Analyzer.
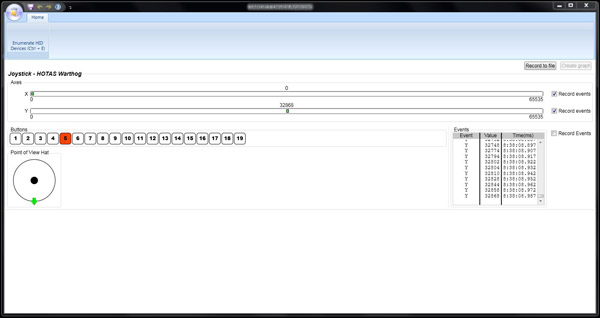
In this integrated tool you can check your HOTAS Warthog completely. All buttons are displayed visually when triggered. Also, the bit values of the Hall sensors or trimmers are shown. These values can be stored and displayed visually to eg the support in case of failure to be able to say exactly where the problem lies.
Now we come to actually test the Thrustmaster Hotas Warthog.
Thrustmaster Hotas Warthog Operation and Results …