
Anycubic i3 Mega S improve electronics
To relieve the motherboard, we have now connected the heating elements to their own MOSFETs instead of the printer’s mainboard. The installed parts are total overkill, but they also have decent heat sinks. You also have to pay a lot of attention to the quality of these modules. The heatsinks of our two MOSFETs were extremely poorly mounted, so they would hardly have had any effect.
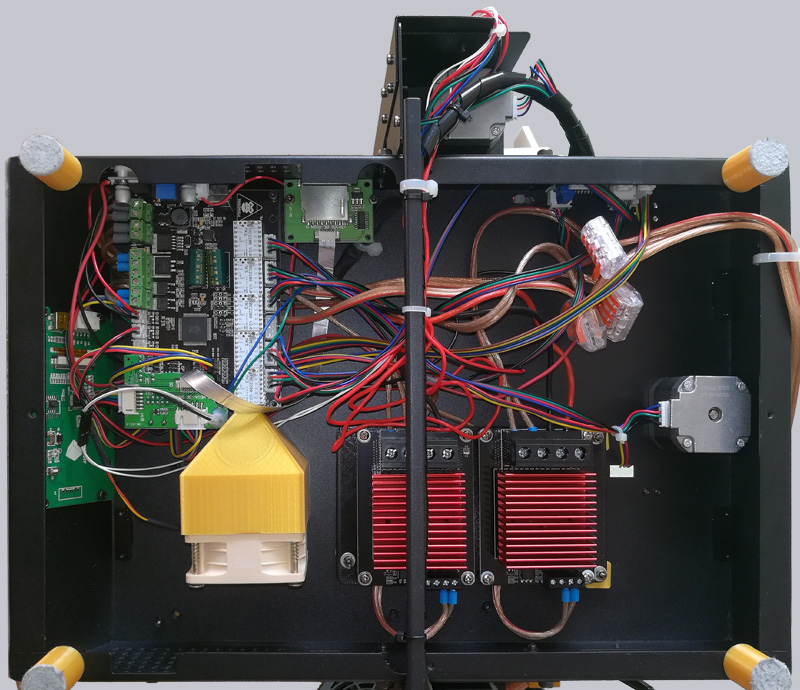
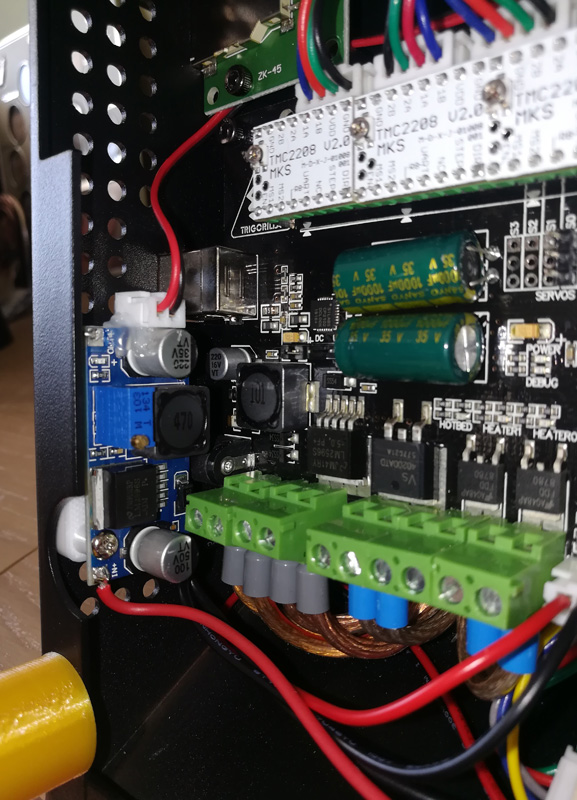
We have also installed TMC2208 motor drivers, which means that the travel movements of the axes are now much quieter. Up to 80mm/s the axes are now barely audible. To the right of the motor drivers, we have equipped a funnel with a good 60mm fan that cools the underside of the motor drivers. As mentioned before, there is an additional fan placed underneath the printer at the installation site, which blows additional cool air over the electronics. On the left side in the center area of the mainboard we have installed a step-down converter, which supplies the two fans at the hotend with about 7V at any time.
We removed the Chinese power supply without certification marks before the first startup and replaced it with an external PC power supply that meets all important safety features and standards. We also cut off all tinned wire ends in screw terminals and mounted wire end ferrules.
Now we come to the Anycubic i3 Mega S conversion conclusion …