

How to nickel plate …
What is required?
It doesn’t take much to nickel plate components yourself at home. You may even have most of it at home already. The following components in particular are required.
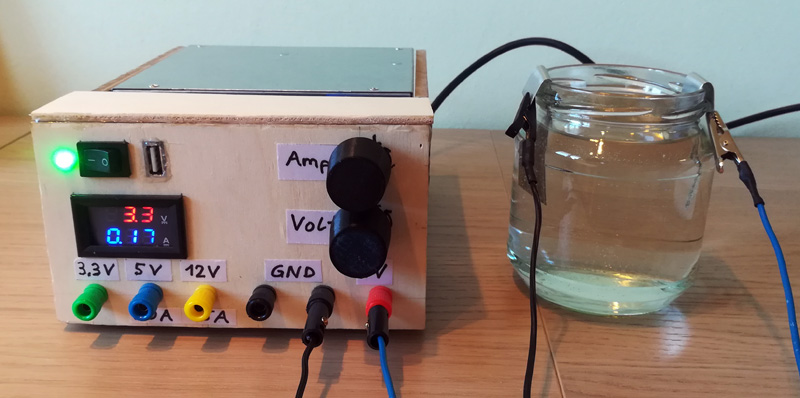
Power source
Theoretically, a couple of large 1.5V cells will do, but a 5V cell phone charger can get you started. Ideally, though, you’d take an adjustable DC voltage source, such as a small lab power supply.
How to build your own adjustable power supply from an old PC power supply with little material effort is shown, among other things, by our resourceful members in the OCinside.de forum.
Pure nickel
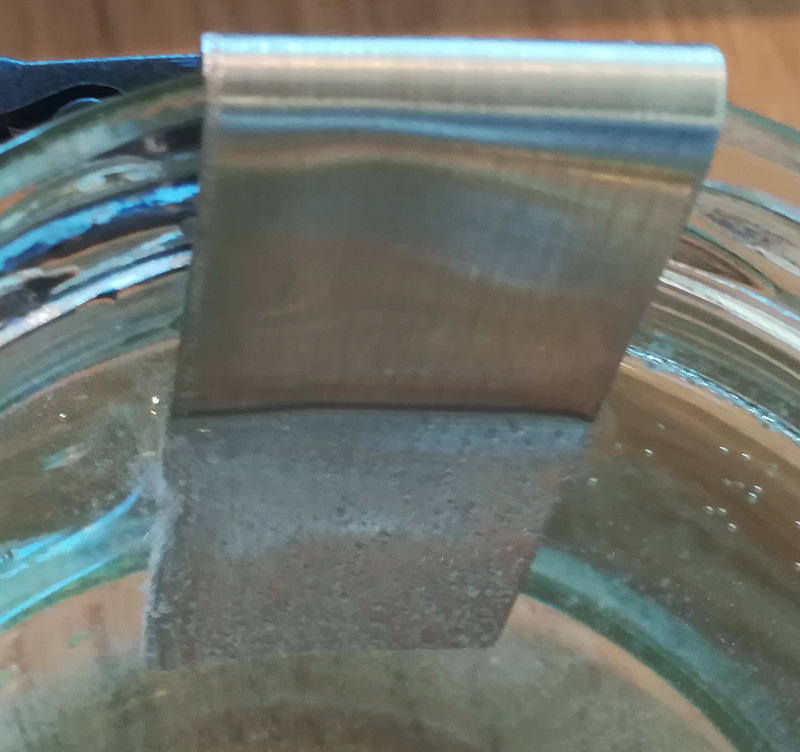
Of course, you also need nickel to nickel plate anything. Nickel is available as convenient sheet metal strips at reasonable prices from various online retailers. Two strips are needed to make the nickel electrolyte.
Making nickel electrolyte
Before we get started, we would like to point out that nickel electrolysis uses or creates environmentally harmful substances that must not be released into the environment. Waste or residues must not be disposed of with household waste or down the drain, but must be handed over to approved disposal companies! In addition, the process should only be carried out in well-ventilated workrooms.
In order to nickel plate a component, a liquid must first be enriched with nickel. The enriched liquid is called nickel electrolyte. To do this, take a stable, clean container made of glass, for example, and fill it with vinegar. Then hang the two nickel strips over the edge in the vinegar and attach the two poles of the adjustable power supply to them.
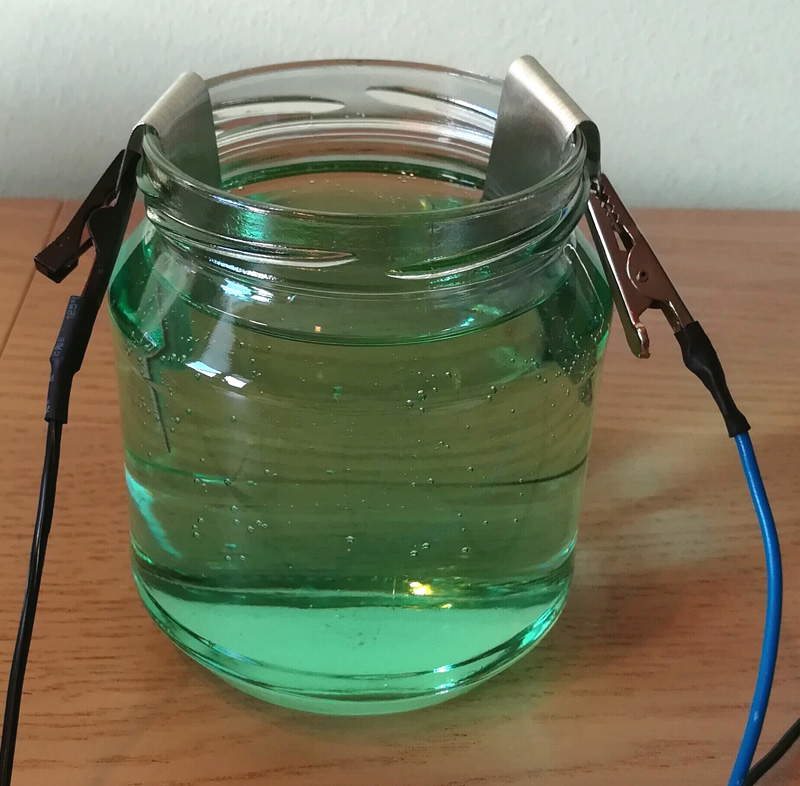
Then set a voltage of about 3V and add saline to the liquid until the current increases to about 0.2A.
The nickel enrichment process works when small bubbles form at the negative pole and the liquid takes on a green color.
After about 20 minutes, one has created a ready-to-use nickel electrolyte and can start nickel plating. The color of the electrolyte is then strikingly green.
How to nickel plate the object
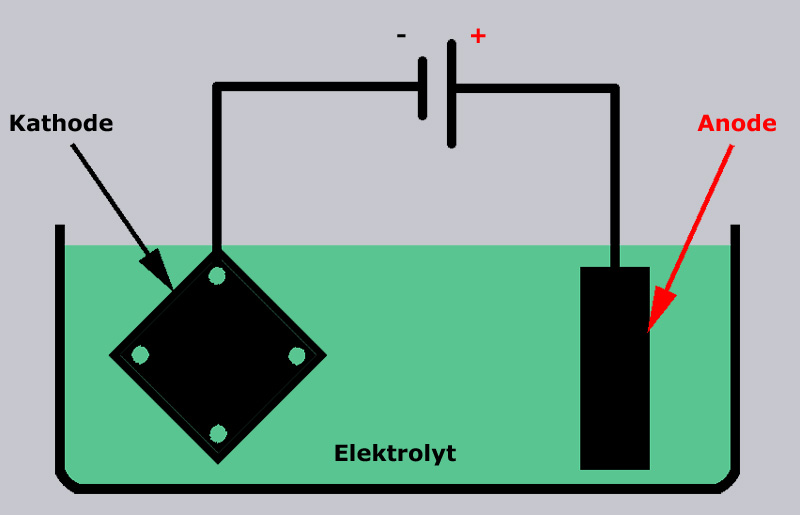
After the object has been thoroughly cleaned and degreased (e.g. with pure alcohol), we hang them with the negative pole (cathode) in the nickel electrolyte, while the positive pole (anode) from the power supply is still connected to the nickel strip, which is still hanging in the electrolyte. The voltage should be in the range of 2-4 volts and the current should be around 10-50 mA per cm² of component surface. Nickel plating is not a sporting competition and you should take your time and not overdo it with voltage and current.
Degrease and nickel plate the component
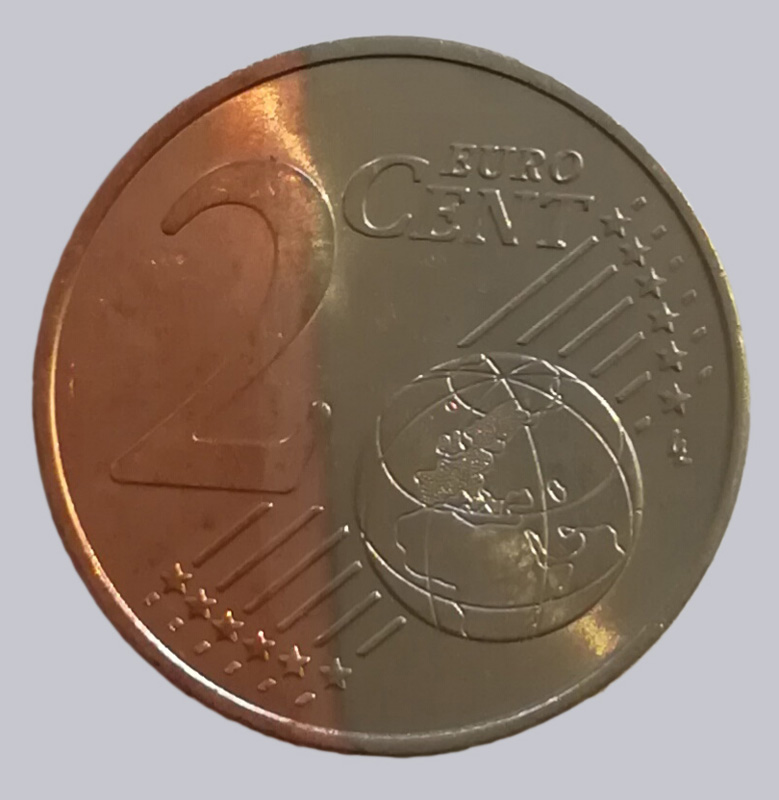
For the first test, we take a copper-plated 2-eurocent coin and try to nickel plate it. After a few minutes, we can already clearly see the first nickel deposits on the coin. Typically, small bubbles form again on the component during the procedure.
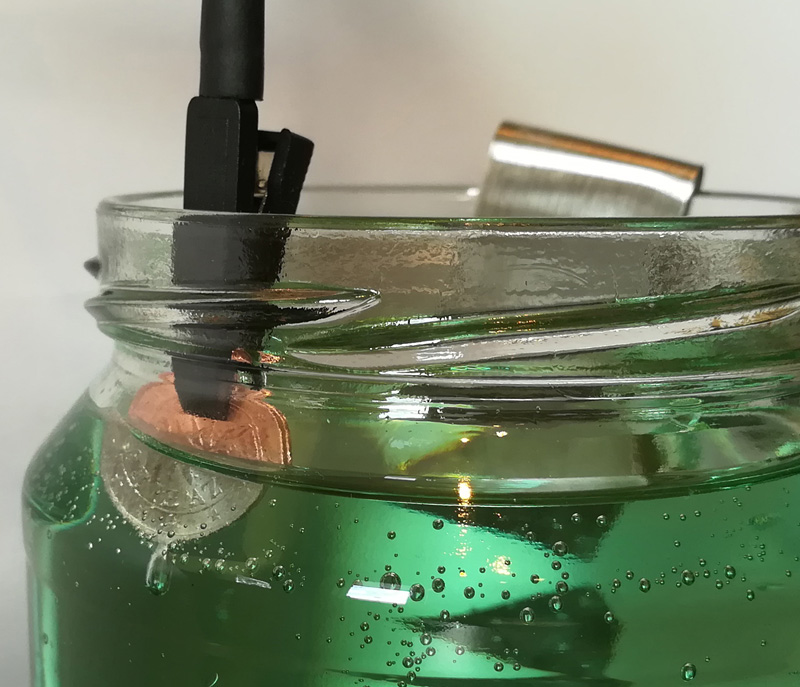
The longer you nickel plate, the thicker the nickel layer becomes. Normally, however, 10-20 minutes are sufficient. Our test specimen accepted the nickel cleanly and flawlessly. The difference to copper is clearly visible. Of course, a component is only nickel-plated where it also comes into contact with the electrolyte.
The brightness of the nickel layer can be increased by adding boric acid and/or saccharin, but we are content with the simplest possible electrolyte without many additives. The function is in the foreground in our case.
AIO Water Cooler Coldplate Surface Nickel Plating …