
Installation …
The installation principle reminds us strongly to the Antec H2O H1200 Pro, which unfortunately not convinced us. However, Cooler Master has changed significantly some of the details.
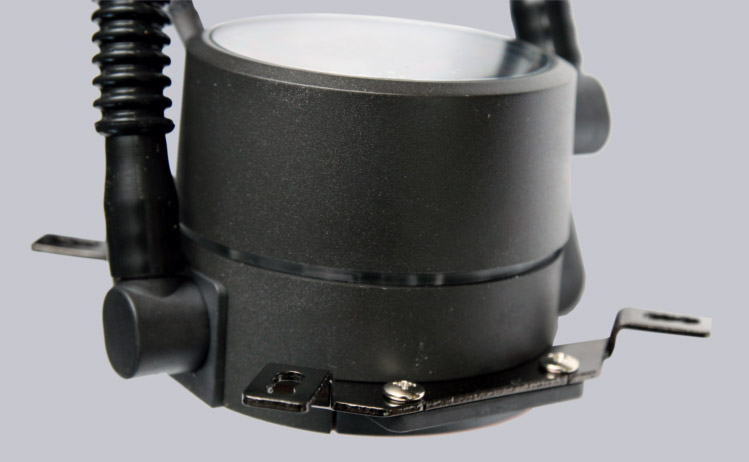
First of all, there is no frame for the pump, which could slip. The Socket (here Intel) matching brackets are inserted into a crack in the pump housing and then tightly screwed.
The threaded rods are fixed with as known with small plastic clips in the right position on the backplate and carried forward.
The included thermal paste can be badly applied.
The easier way is to give a thermal compound size of a half pea in the middle of the processor, that the cooling plate takes over the application.
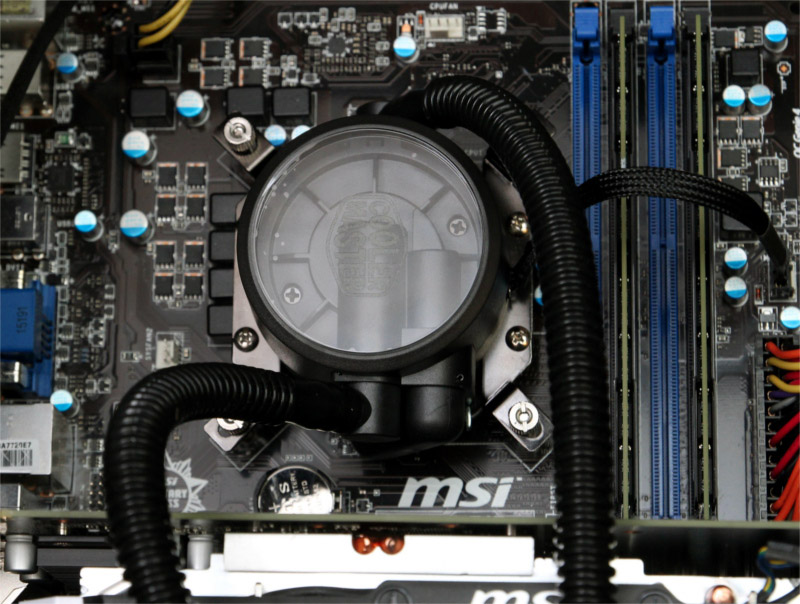
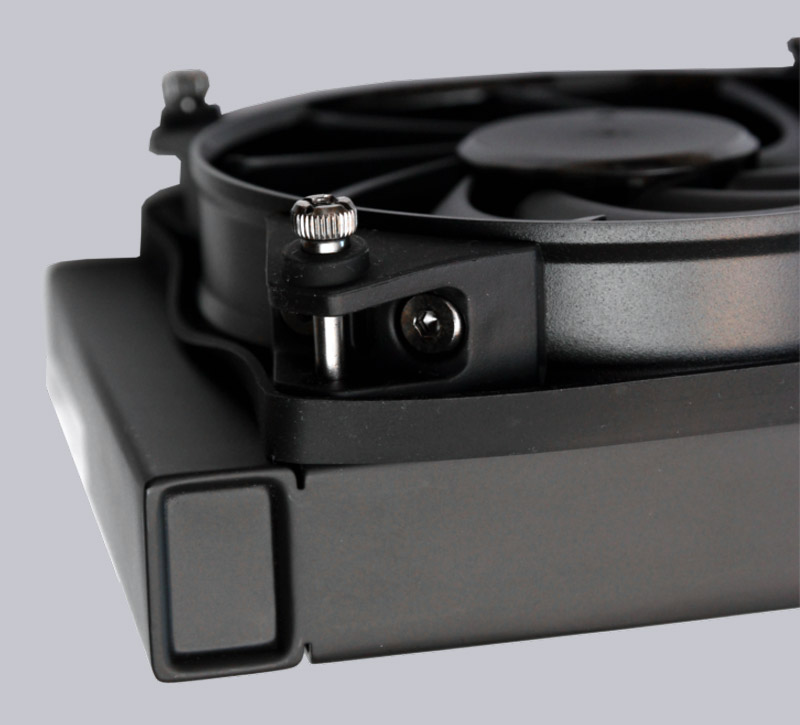
Now, only the pump unit must be attached to the threaded rods in a suitable alignment by means of the nuts. Thanks to the unusual height, the unit can be very good accessed and hold in position. Because the nuts for mounting with a screwdriver, it is no problem to attach them according to the instructions. However, we were wondering why here are used on slot – instead of Phillips-head screws. As a result, a second screwdriver is necessary and the risk also rises to slip. (The bubbles on the Plexiglas are by the protective foil).
Then you can attach the radiator fully stress-free. By means of the enclosed long screws, the fans are connected to the radiator. These screws have built a thread in the head, so that the entire structure with short screws can be mounted on the housing.
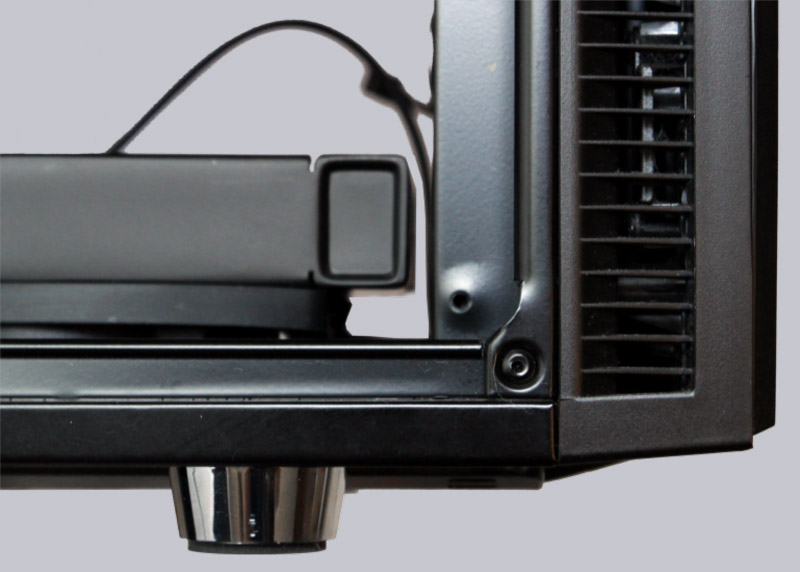
Due to its design there is a gap between chassis and fans, resulting in that air is sucked from inside of the case side.

The installation of the radiator should be no problem. In our test case, it was possible to install the radiator on top, front, or at the case bottom, even if it was sometimes somewhat close in the chassis.
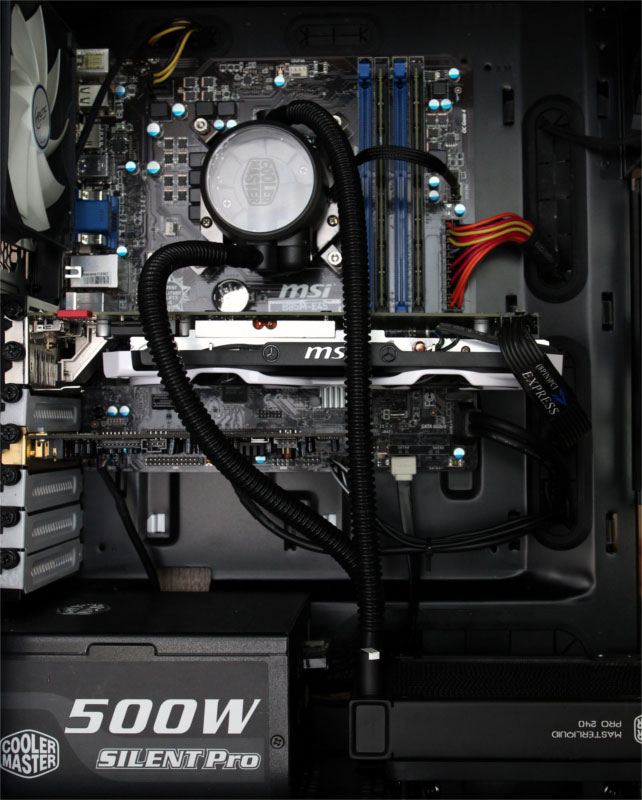
In the finished test setup, you can see also the tube length is sufficient up to the bottom.
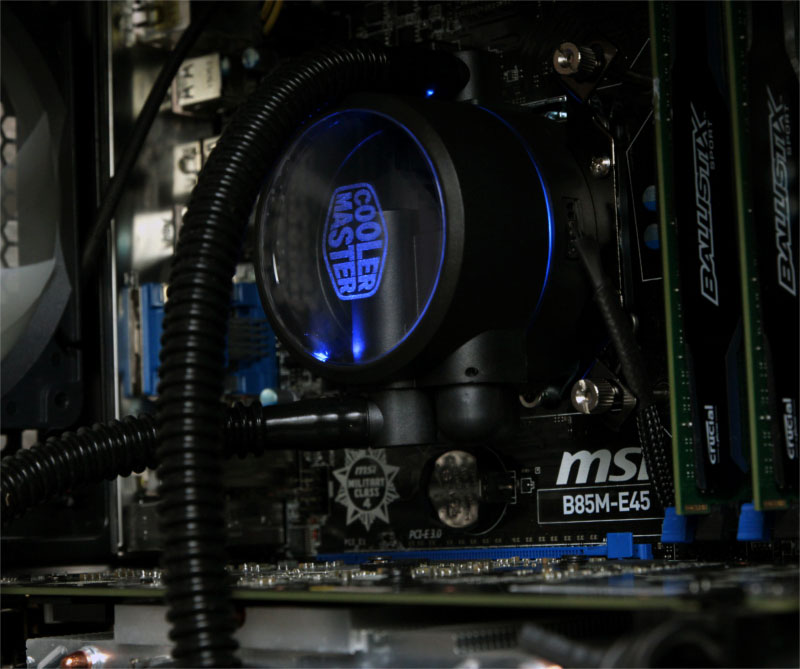
After starting the system, the last feature of the MasterLiquid Pro 240 becomes recognizable. Behind the plexiglass and the ring between the two chambers, each is installed a blue LED. We think that Cooler Master might have been more courageous, for example with multiple RGB LEDs as in some modern graphics cards.
Overall, we can say that the Assembly was not the fastest, but the most relaxed we have done so far.
Cooler Master MasterLiquid Pro 240 setup and test results …