
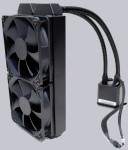
The water cooling system is already nearly finished delivered, so an installation of individual water cooler components like the connection of a pump, reservoir, radiator and cutting tubes is not necessary. Anyway, the manual recommends to check the system for leaks. So Coolermaster makes it therefore very simply for the user, because you just have to install the prefilled water cooling like an air cooler on the motherboard, install the two 120mm fans along with the two antivibration rings and the screws on the radiator and tighten the radiator to the chassis. You should make sure that the PC-case has holes for the installation of the radiator.
Here you can see the mounting parts, which is designed for Intel Socket 775/1156/1366/1155/2011 systems and for AMD Socket FM2/FM1/AM3+/AM3/AM2+/AM2 systems:
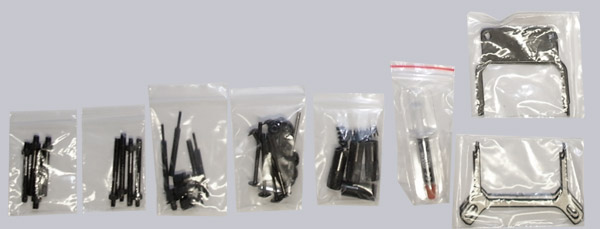
The installation of this water cooler is similar to an air cooler: For Intel and AMD systems an own mounting frame is delivered, each consisting of 2 halves and special screws. This metal frame is pressed into the space provided in the CPU cooler and screwed the respective spacer screws on the original backplate of the mainboard. The spacer bolts has different thicknesses, so it’s essential to select the right spacer screws.
Before you place the heatsink on the CPU, you should now mount the radiator inside or outside of the case. Here, the screws must first pass the chassis holes, and then into the holes of the two fans, and then into the holes of the rubber rings, and then screwed into the threads of the radiator However, take care about the direction of the airflow, there is a small sign at the side of each fan.
After this is done, we can begin with the installation of the heatsink and pump of the Coolermaster iceberg 240L. First apply some of the supplied thermal paste on the CPU, place the heatsink on the CPU, set each a washer on the bushing of the metal frame and screw the CPU cooler with metal frame by the thumbscrews. Subsequently connect the power connectors of the fan and connect the pump to free power connectors on the motherboard, or with an optional adapter to the power supply – That’s it! The manual explains how to install step by step with several images, but they are unfortunately not good recognizable.
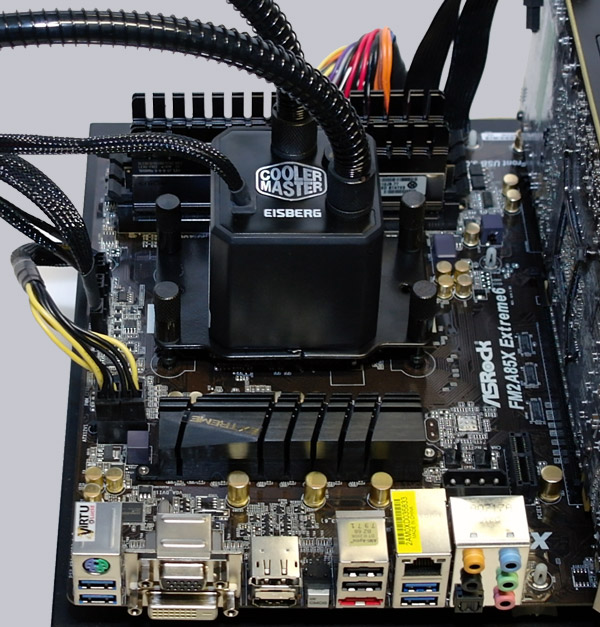
Here you can see the CPU heatsink mounted on an ASRock FM285X Extreme6 motherboard we’ve tested recently.
And here we see a complete water cooling PC system, which we have used for some OC tests.

Cooler Master Eisberg 240L Setup and Results …