
BIOS and Overclocking …
Get fast to the right UEFI settings …
ASRock Z690 Taichi UEFI EZ and Advanced Mode
ASRock Z690 Taichi OC Tweaker
ASRock Z690 Taichi voltage settings
ASRock Z690 Taichi memory settings
ASRock Z690 Taichi Advanced options
ASRock Z690 Taichi Tools
ASRock Z690 Taichi H/W Monitor
ASRock Z690 Taichi miscellaneous
UEFI EZ and Advanced Mode …
To enter the UEFI of the Z690 Taichi, you have to press F2 or Del when booting the computer, as usual with ASRock. After a short moment of waiting, we are already in the UEFI. Alternatively, you can also start the UEFI via Windows by holding down the SHIFT key while clicking on “Restart”.
By default, the UEFI starts in ASRock’s EZ mode, which is a simplified graphical representation of the UEFI with mouse support. The extended, BIOS-like mode can be reached by pressing F6. But first let’s have a look at the EZ mode.
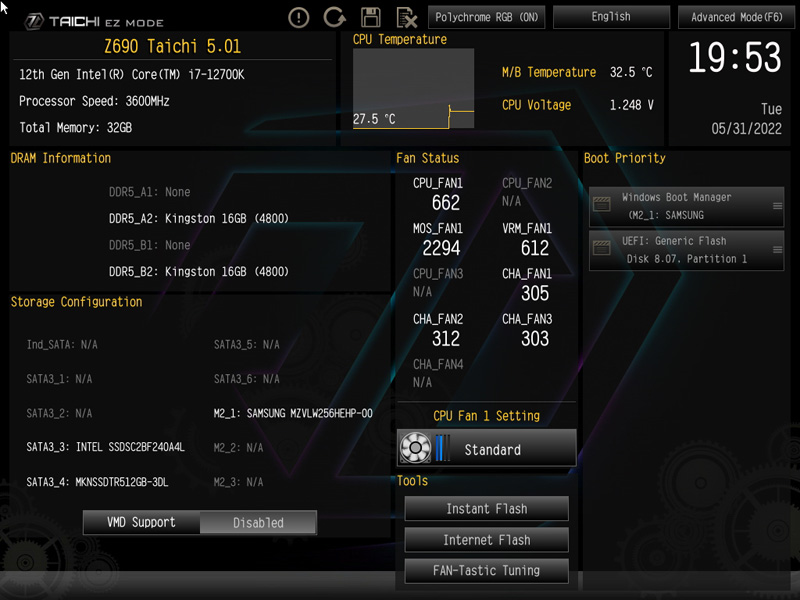
In the EZ mode of the UEFI, a simple overview of all important system functions awaits us. Starting at the top left, we find information about the processor as well as the working memory. Conveniently, you can immediately see if the working memory modules are installed correctly and if the XMP profile is enabled. Clicking on XMP (if available) allows selecting it accordingly.
Directly below that, we find an overview of the connected hard drives or SSDs. It is practical here that you can check whether the installed SSDs support Intel’s VMD. However, it should be noted that according to Intel, this functionality is only supported in XEON processors, which are currently not yet released for the LGA1700.
In the right part of the overview, we find the temperature and current voltage as well as the speed of the installed fans. The “Cooler Type” field below that allows us to quickly and easily adjust the fan profile to the cooling, but we’ll get to that later. Below that, we can update the UEFI and call up the “FAN-Tastic Tuning” menu. Finally, the various boot media are available on the far right.
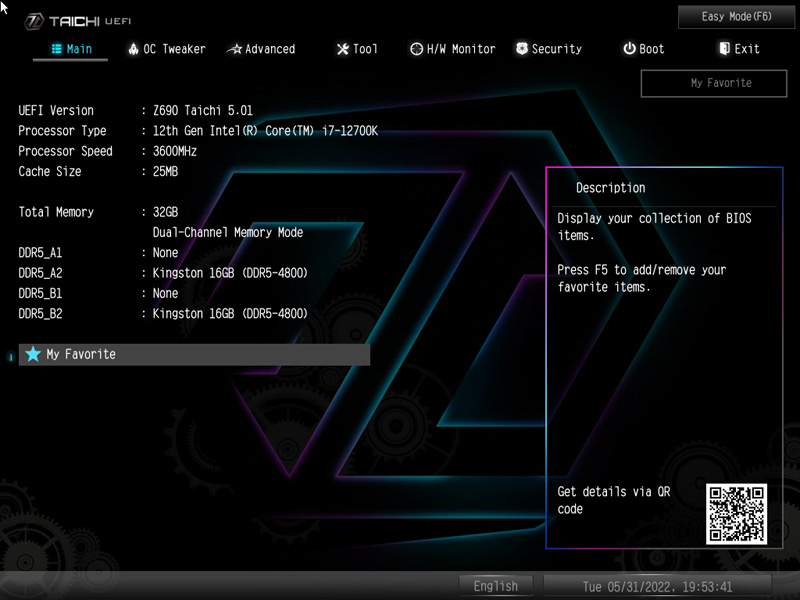
Next, let’s switch to the advanced mode with F6. In contrast to EZ Mode, we only find processor and RAM information summarized in a table, but a lot of new menu items appear in the new menu bar at the top.
OC Tweaker
The second menu item we find is called “OC Tweaker”. As usual for ASRock, we find everything important for overclocking here. New here is especially the “CPU Cooler Type” item, which was already mentioned in EZ Mode. Here you can tell the UEFI which cooler you have installed. Unfortunately, the description does not explain how this affects overclockability, temperature and power limits.
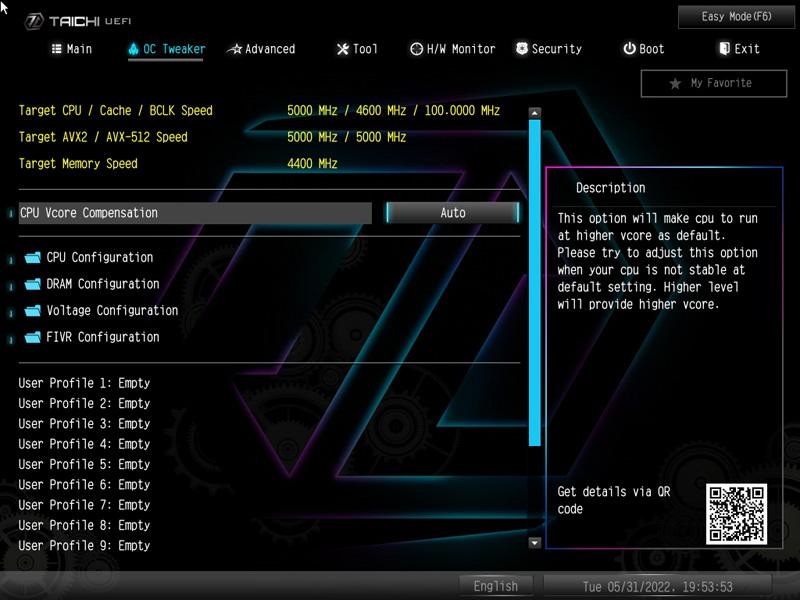
Let’s start with the first subitem “CPU Configuration”.
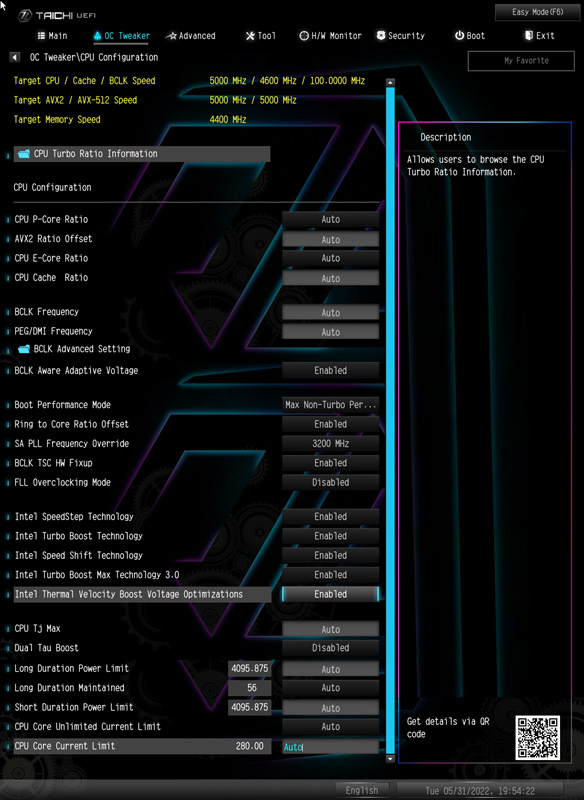
If an Intel K CPU with an open multiplier is installed, the multiplier can be set here. The differentiation between performance and efficiency cores is new. These can be separately overclocked or underclocked. A very practical menu item is also “Boot Performance Mode”, which ensures that the system always boots without the set Turbo multiplier, regardless of it. That means you can always call the UEFI in case of doubt to correct the settings if the system is not stable. In the past, it could happen that you had to completely reset the UEFI to get the system running again if the settings were too optimistic.
In addition, we find all the important settings to run the processor outside of its specifications. At least in terms of clock frequencies, power and temperature limits.
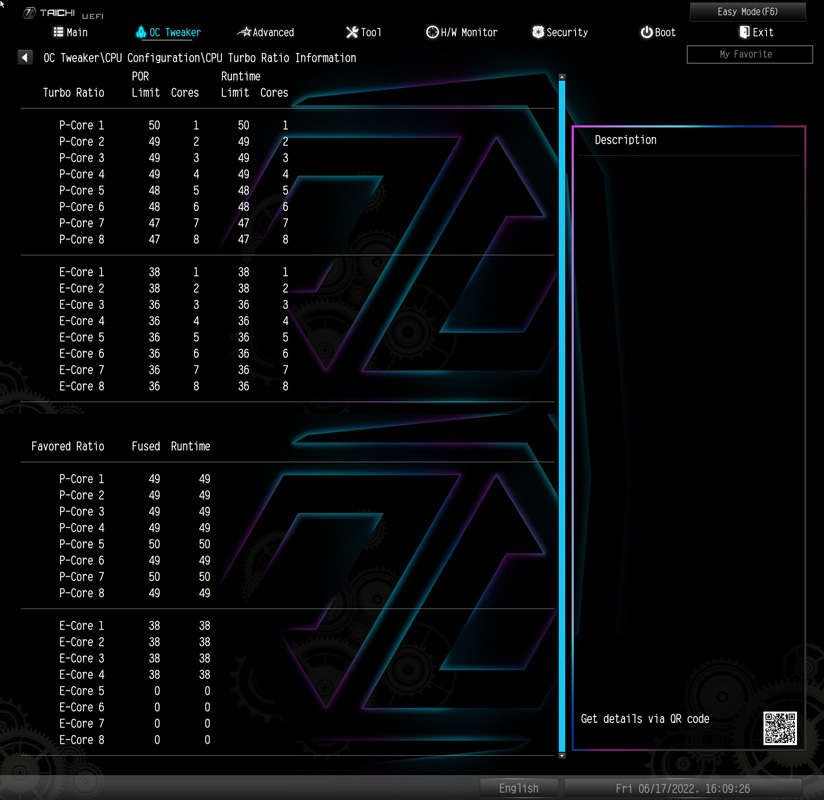
Since the Z690 chipset also allows overclocking individual cores, the “CPU Turbo Ration Information” overview is extremely helpful. Here you can easily see at a glance which core clocks best ex-factory. In our i7 12700k, these are the P cores 5 and 7.
Voltage settings …
As for the voltage settings, we can find them under “Voltage Configuration”.
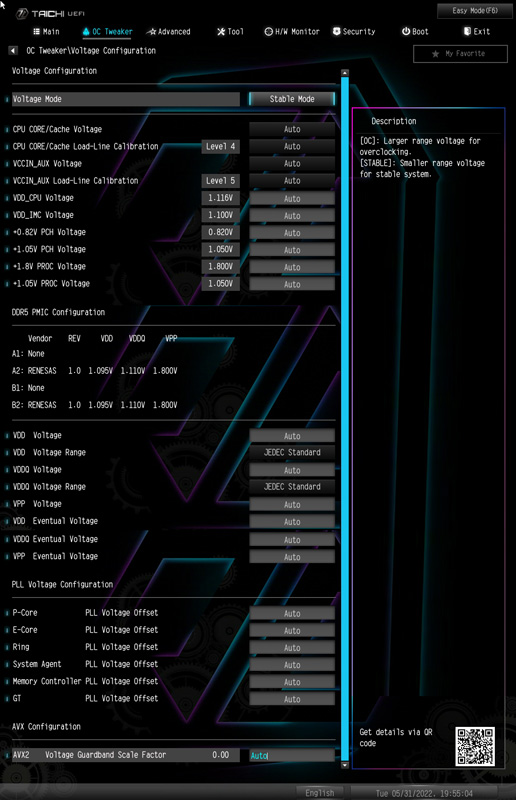
Here you can find everything the overclocker’s and undervolter’s heart desires. In addition to the voltage settings for the CPU, we also find voltage options for the iGPU (if present) and the RAM. The “PLL Voltage Configuration” item is crucial here, as you can use it to set an offset for simply put, everything. Be it the P-cores, E-cores, the memory controller or the integrated graphics unit.
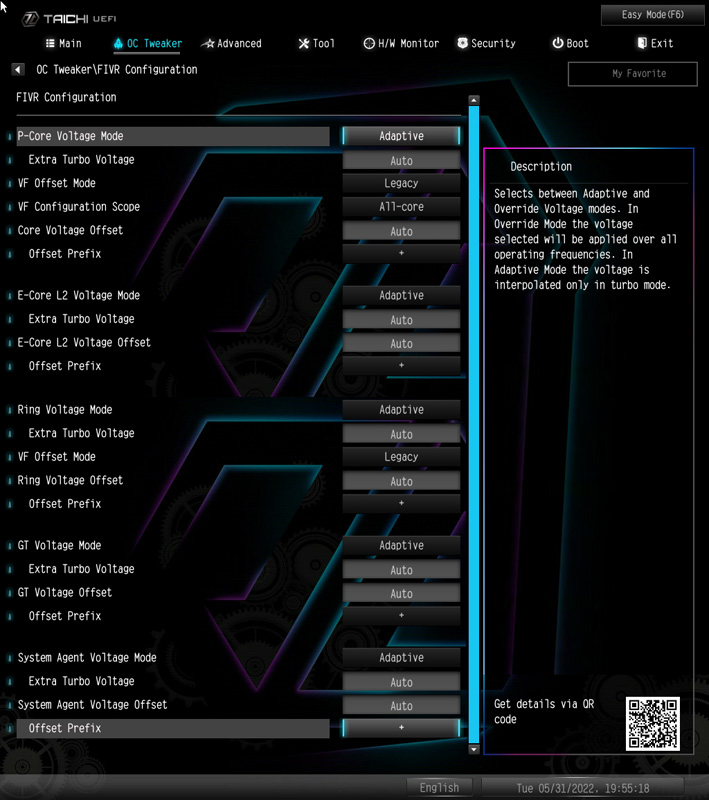
There’s life in the old dog yet … After Intel deleted the FIVR (Fully Integrated Voltage Regulator) for Skylake and Kabylake, it now appears again in the UEFI for Adlerlake. The voltages can be adjusted and modified much more precisely via this, but you should know exactly what you are doing.
If you want to read more into the topic, you can take a look at our Intel OC Guide.
Memory settings …
The text continues with the memory settings.
To get there, you have to select “DRAM Configuration” under “OC Tweaker”. After that, you can simply select the XMP profile of the respective memory or configure each parameter individually to your heart’s content. Since our DDR5 working memory does not have an XMP profile, the menu item is simply not displayed here.
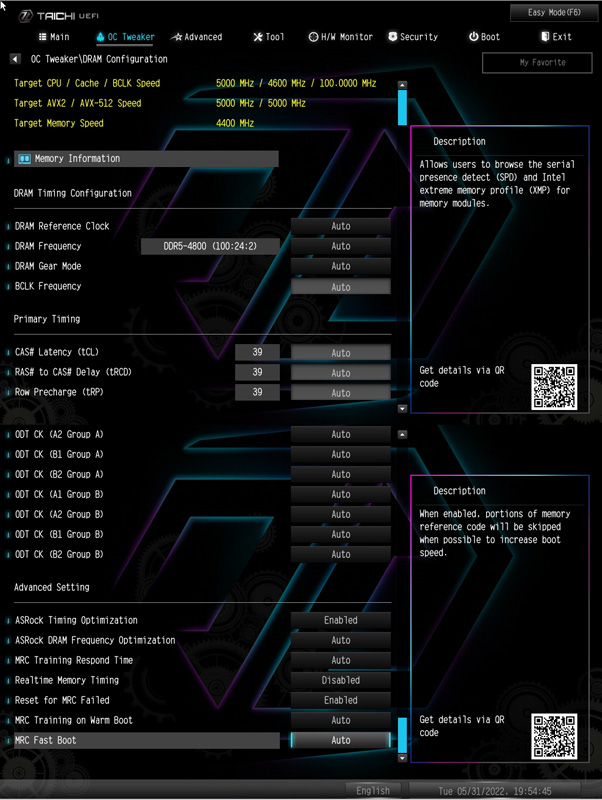
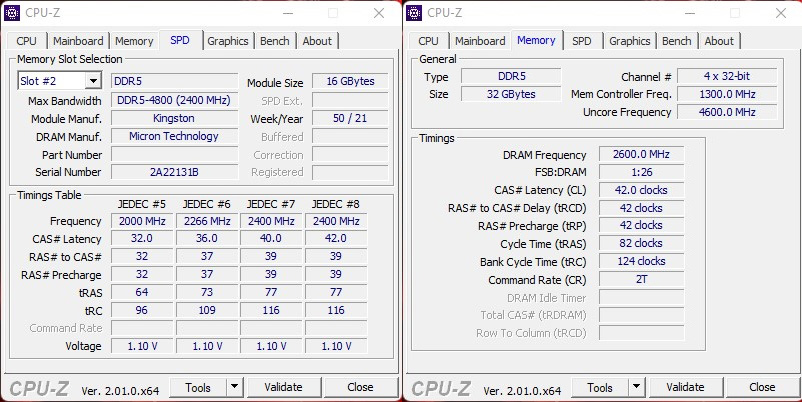
By the way, there is also one for the installed RAM, similar to the CPU overview. In our eyes, this is extremely helpful if you want to get a bit more out of the RAM and are looking for some timings.
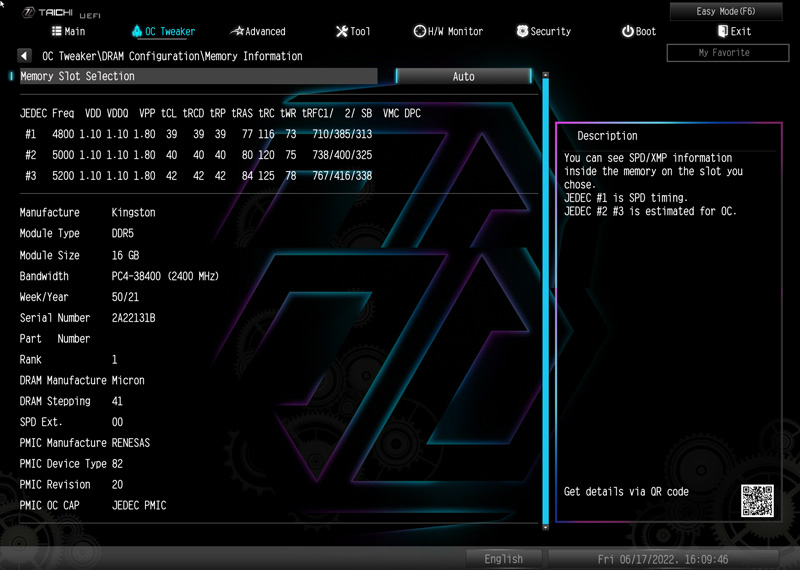
By the way, we could get 5.2 GHz out of the two standard DDR5 bars from Kingston at 1.2V.
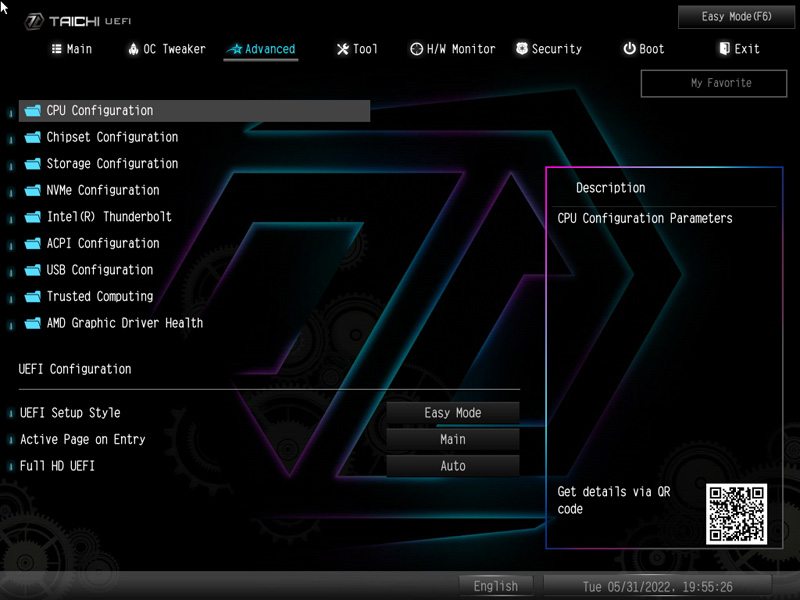
Advanced options …
The third menu item is called “Advanced”, here we find the advanced options for all subsystems of the chipset. Here you can also configure in which mode the UEFI is called and which menu item is the active one. This saves a few clicks or keystrokes, especially when overclocking.
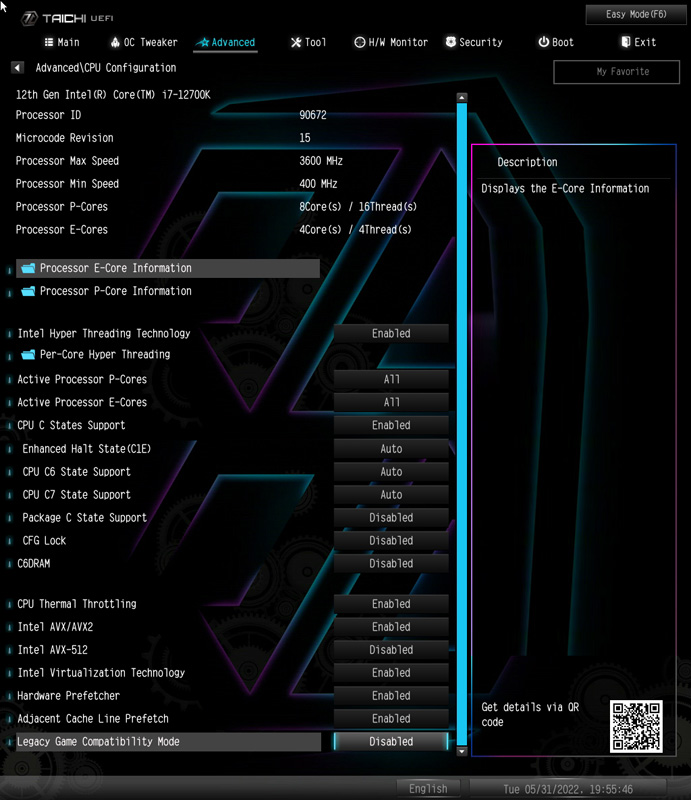
Let’s start with the “CPU Configuration”, apart from overclocking, there are all important settings for the processor here. For example, you can enable or disable virtualization support, Hyper Threading and override the thermal limits. The menu item “Legacy Game Compatibility Mode” is new here. You can deactivate the E-cores with it, since some older applications or games currently have problems with the different cores.
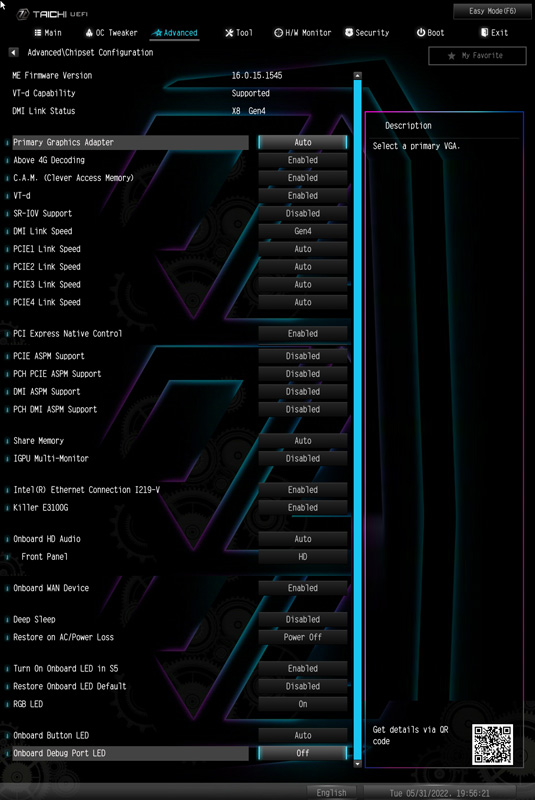
All relevant settings for SR-IOV, PCIe slots, the integrated GPU’s multi-monitor support, its graphics memory, network, audio and Bluetooth are found under “Chipset Configuration”. In addition, the three network cards can be disabled or enabled here.
“Storage Configuration” deals with the SATA and M2 settings, as the name suggests. Besides RAID, Intel’s VMD can also be configured here, which only works with an XEON processor according to Intel. This is an extended RAID technology for M.2 SSDs.

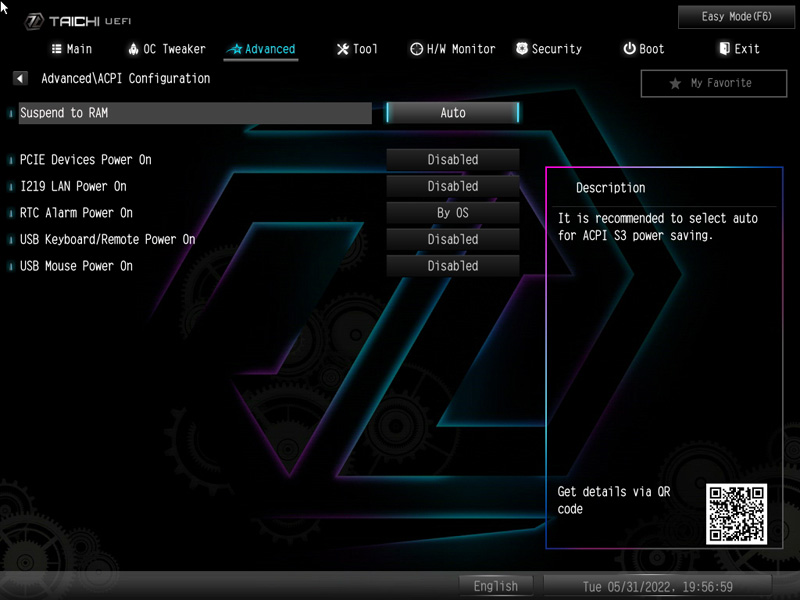
Under “ACPI Configuration” you can configure under which circumstances the computer should be switched on automatically. The classic options PCIe, RTC, network and USB mouse or keyboard are available here.
The only small gimmick under “USB Configuration” is the overview of which USB devices are currently connected.

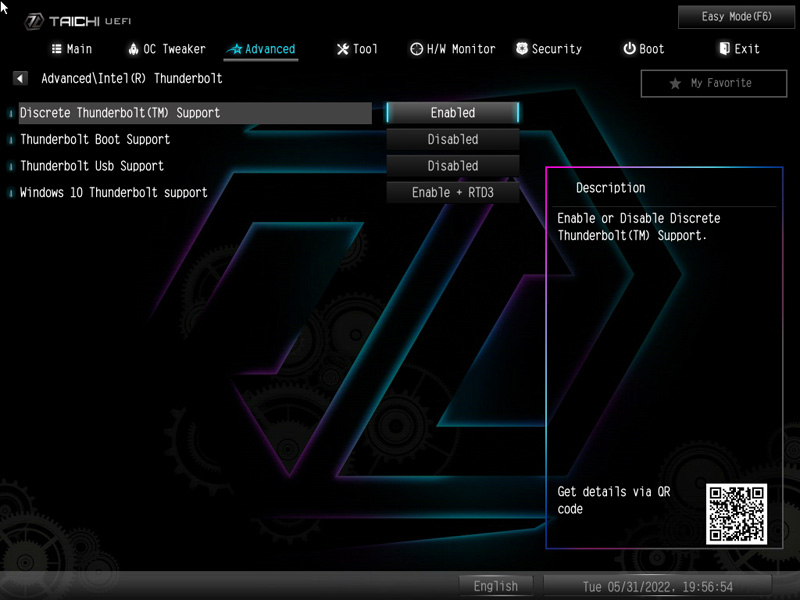
The most necessary settings for Thunderbolt are also available.
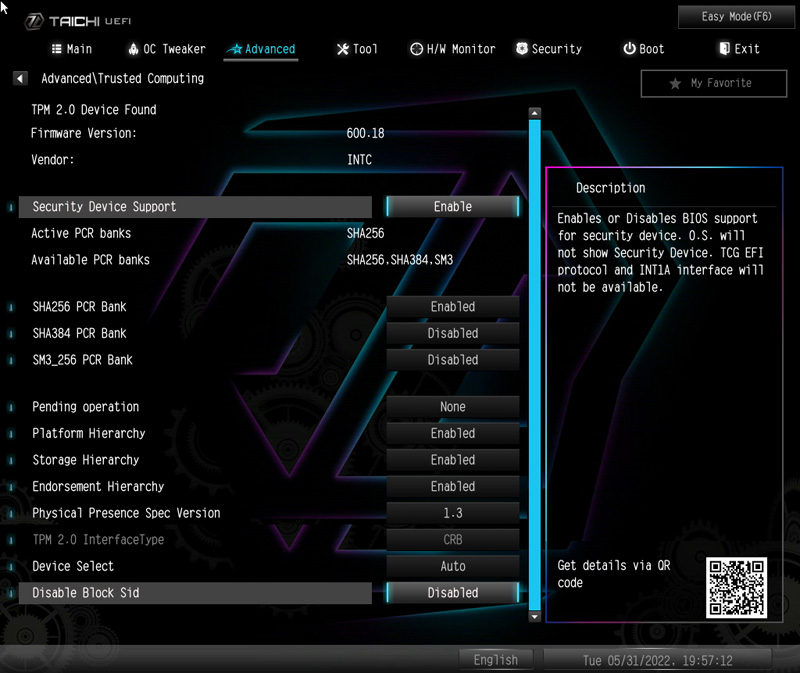
It gets more lavish under “Trusted Computing”. Besides TPM 2.0, which is obligatory for Windows 11, you can activate various security gadgets here.
Tools …
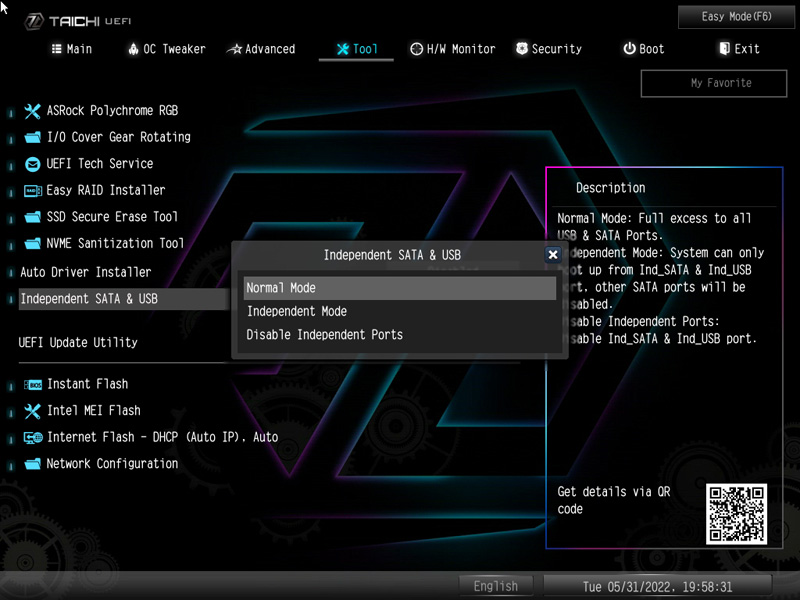
The menu item Tool contains all other features like Polychrome RGB, Easy RAID driver installer, an SSD eraser, as well as an M.2 NVME recovery tool. By the way, the setting to enable the isolated USB/SATA port can be found here.
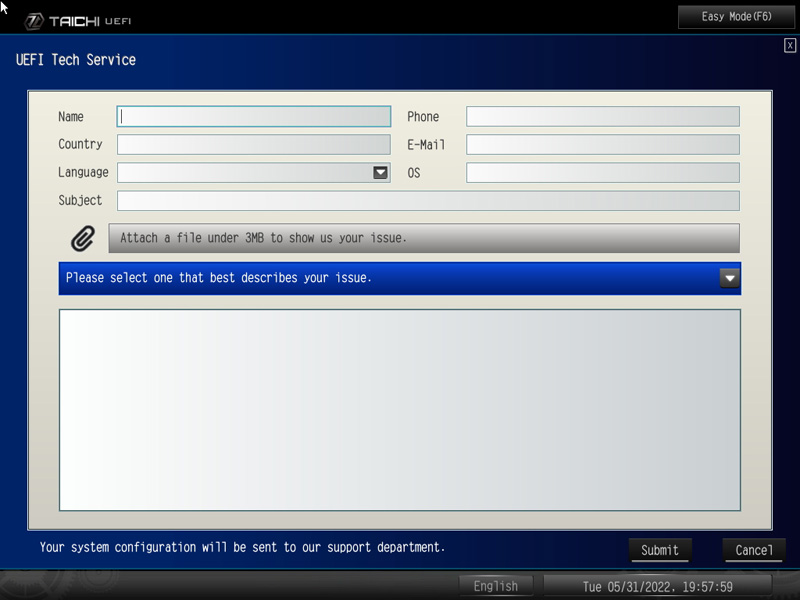
The “UEFI Tech Service”, a service from ASRock that you can use in case of problems with the motherboard, is also on board. You can also install a UEFI update directly via the Internet, if available.
H/W Monitor …
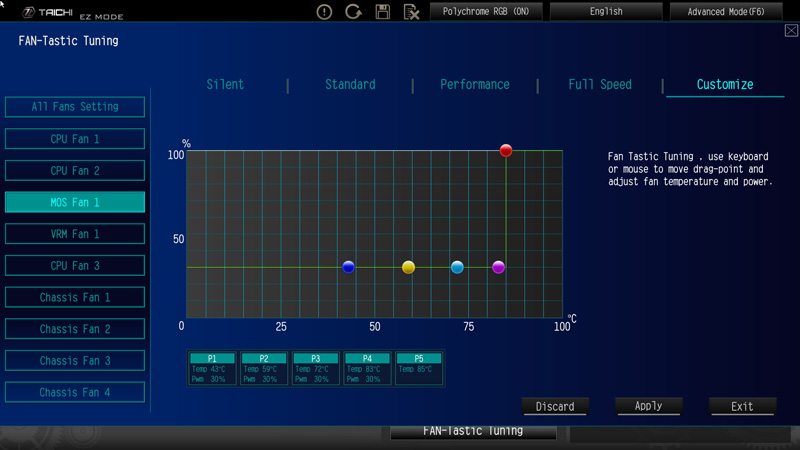
The next menu item is called H/W Monitor. If you are looking for information about the system, you will find it here. As usual, you will find a good overview of voltages, temperatures and fan speeds in the H/W Monitor. You can also selectively set each fan with a separate fan curve or use ASRock’s predefined fan profiles.
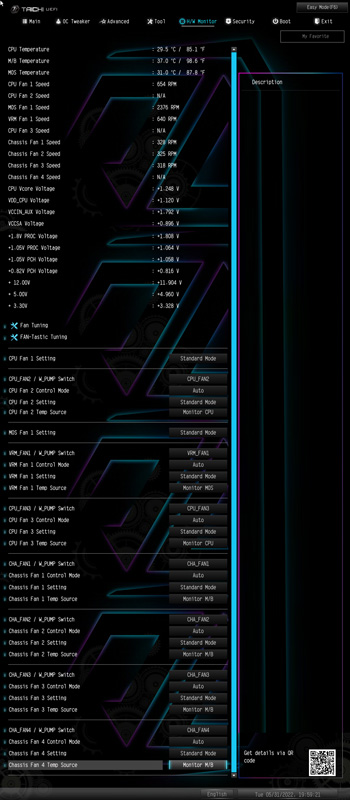
The “FAN-Tastic Tuning” menu also offers the possibility to adjust everything graphically via mouse, both for all fans and individually.
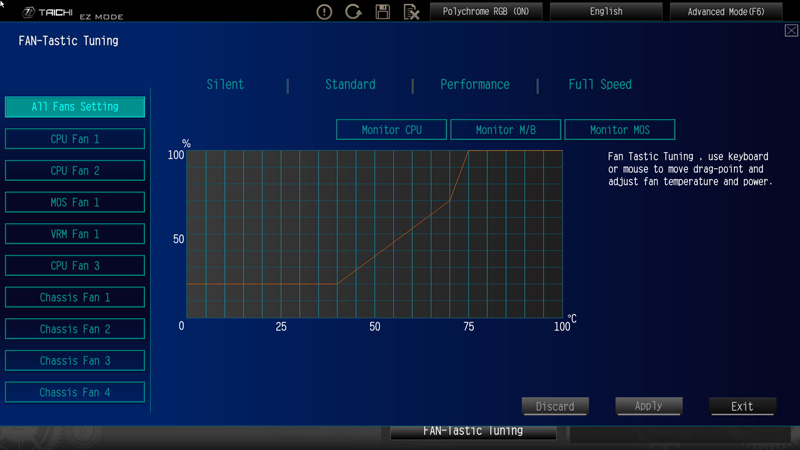
By the way, if you value a quiet system, we recommend fixing the MOS fan to 30%, which makes it inaudible and still does its job.
If you want more info on this, feel free to check out the ASRock Steel Legend Z490 review.
Miscellaneous …
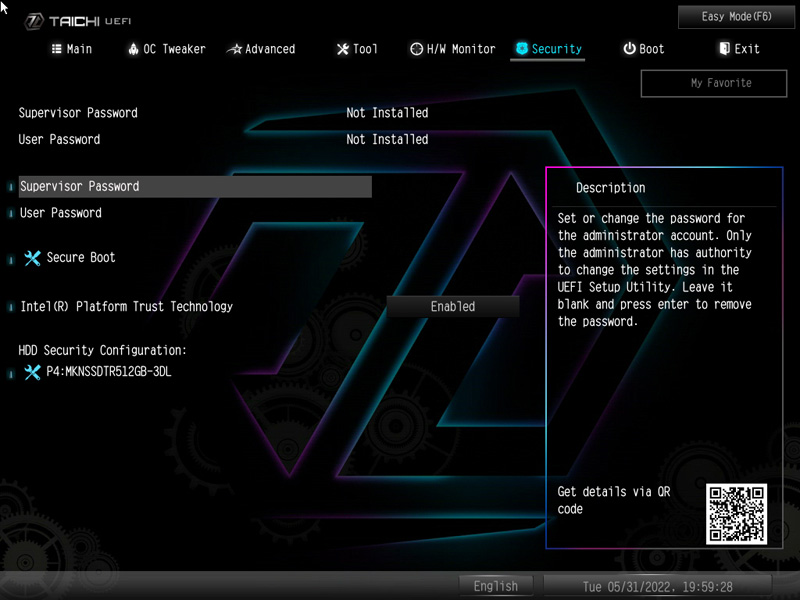
At the end of our little excursion through the vastness of UEFI, there are 3 menu items. The first one is “Security”, here you can configure a secure boot, set the UEFI password and the HDD/SSD security settings.
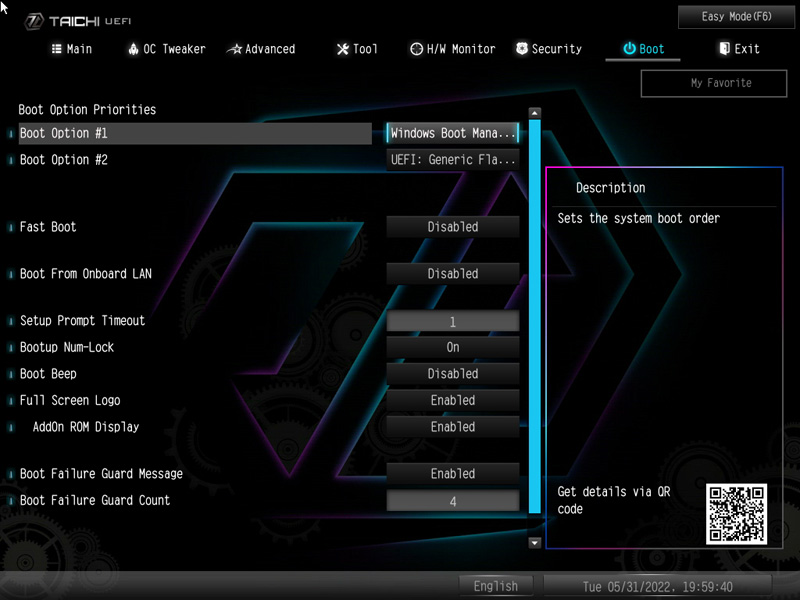
Under Boot we can set the boot order of the system, as well as some other settings such as CSM (BIOS Compatibility Mode), Full Screen Logo or Boot Beep.
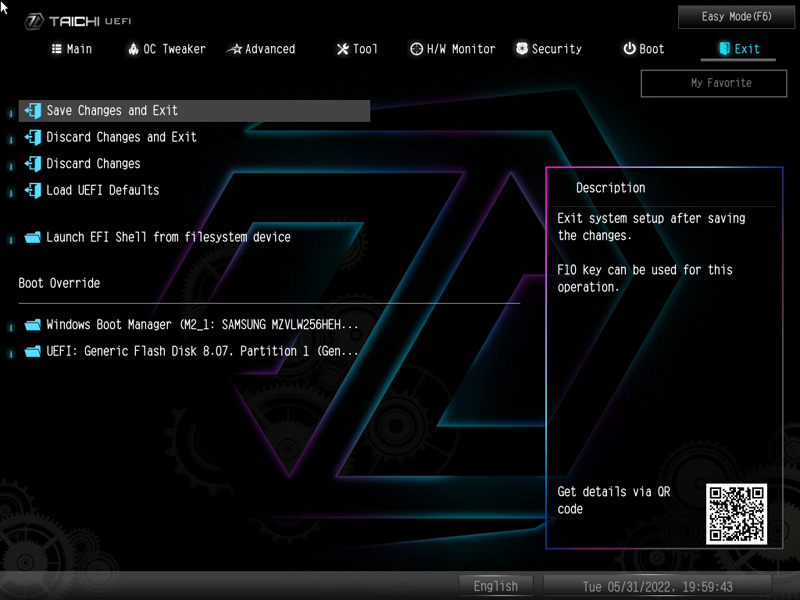
In the last menu item Exit we can finally save our changed settings or start directly into the integrated EFI shell to install an operating system.
ASRock Z690 Taichi Benchmarks …