

Installation of the VPN server …
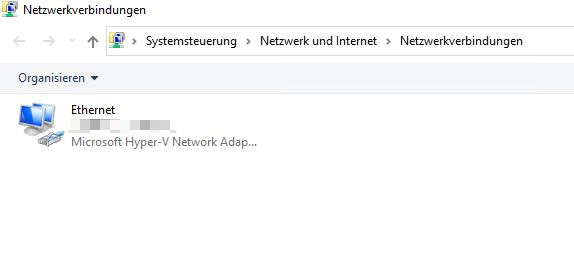
After we have installed and activated Windows 10 on the PC, we go to the Control Panel and open the Network Connections.
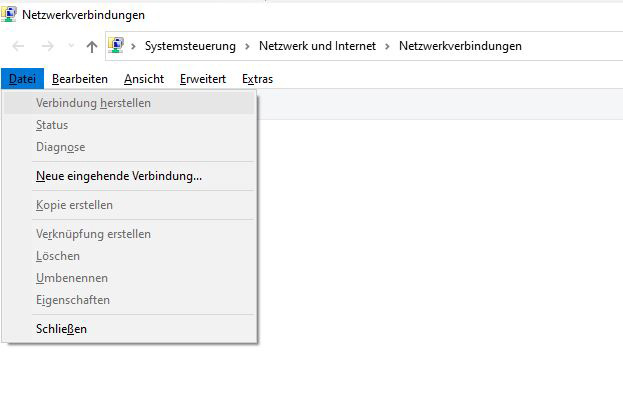
Next we need to press ALT + D. Now a menu bar should appear where we select “New incoming connection …”.
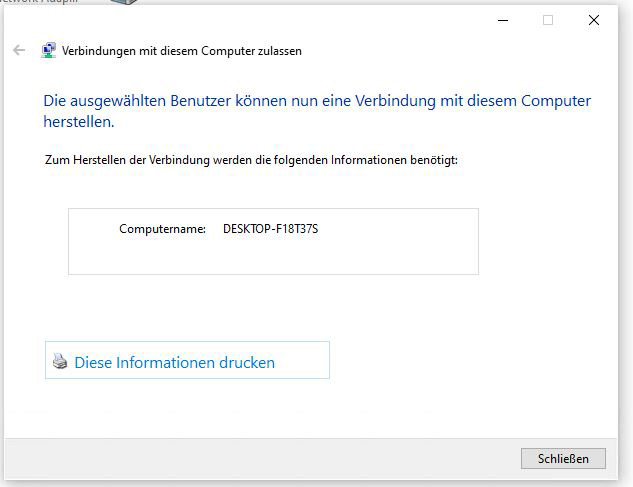
In the window that appears, we need to select users who are allowed to connect to our server.
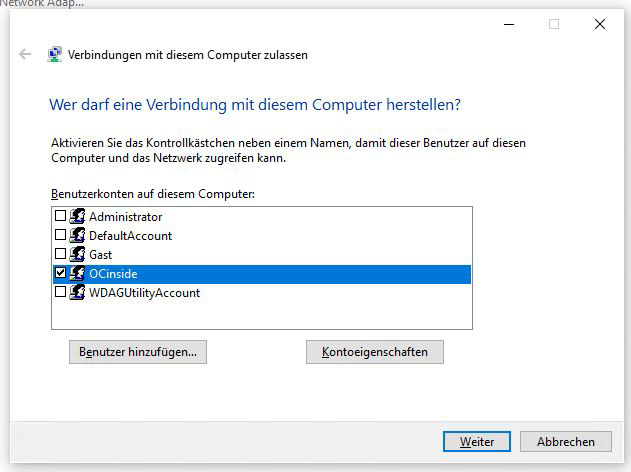
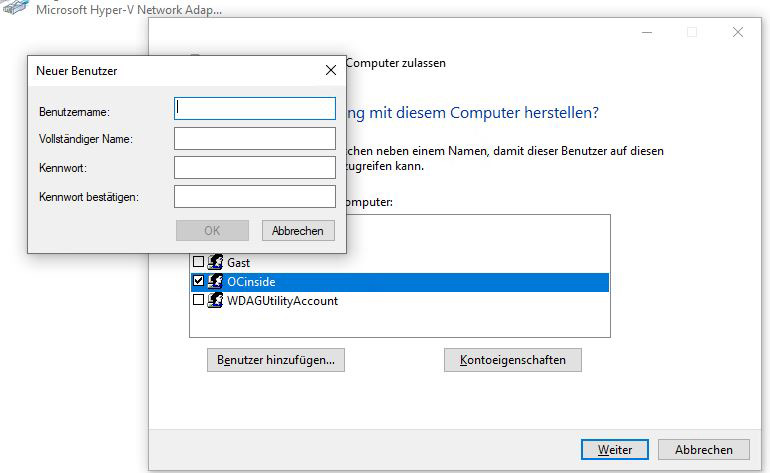
Here it is recommended to click on “Add user…” and create a few users if you want to install several remote PCs. It should be noted that Windows 10 supports a maximum of 20 simultaneous network connections. So it makes no sense to create more than ~10 users. For our workshop we use the locally created user OCinside.
In the next window we check the “Via the Internet” box and click Next.
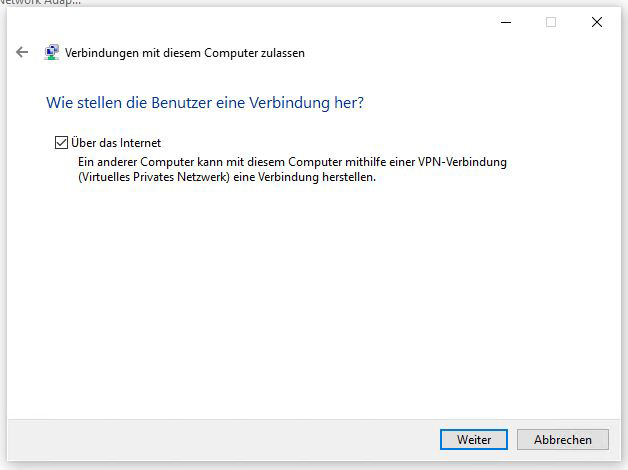
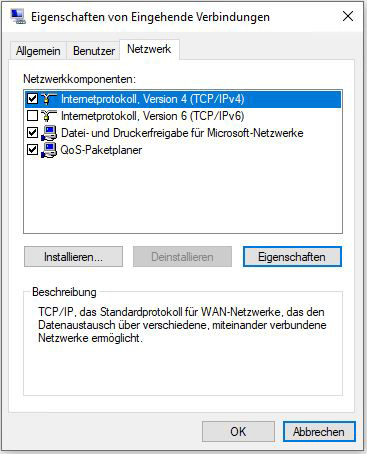
We can deselect IPv6, since we do not need it.
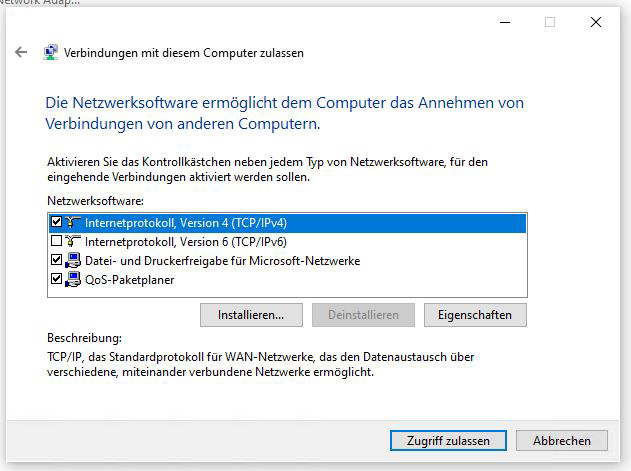
That’s it, our Windows 10 PC is thus basically configured as a VPN server.
Incoming connections …
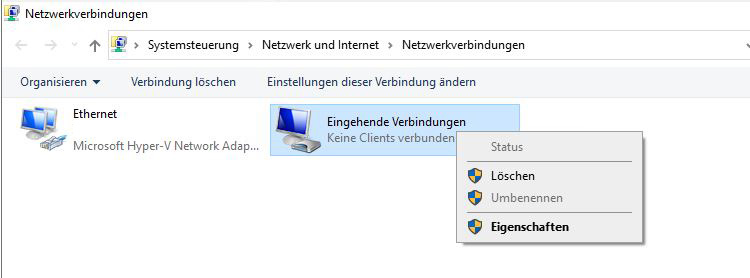
In order for the login to work later, we need to configure a few small things. To do this, right-click on the new icon “Incoming connections” and then select Properties.
Now select the Network tab and click on “Properties” for IPv4.
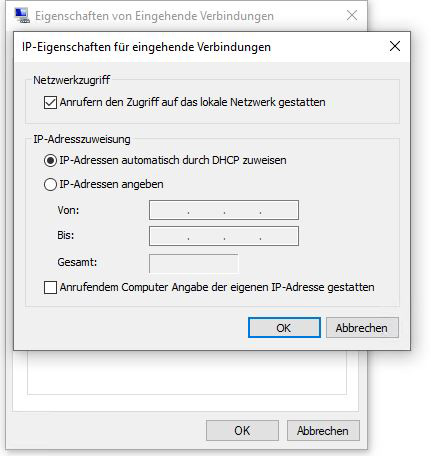
It is important that the “Network access” checkbox is set. The IP address assignment can basically remain as it is. The remote VPN clients get an IP address from the local DHCP server. Usually this is the router. This is also a good way to set up later that the remote VPN clients always get the same address. If everything is OK so far, confirm with OK. “On the server side, everything is now set.
Enable Ports …
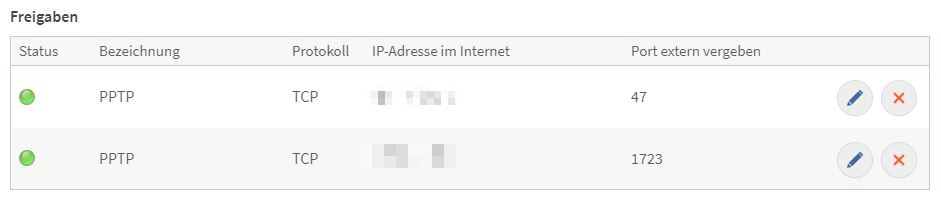
Speaking of the router, we must of course release the corresponding ports on it and route them to the VPN server. In our case this is port 47 & 1723 in the TCP protocol. We can easily assign these ports to the VPN server on our Fritz!Box. Of course, the whole thing also works with any other commercially available router.
Customize firewall …
Important: So that the Windows Firewall does not make afterwards a line through the calculation, one must release naturally also the Ports 47 & 1723 (in each case TCP) input-sided!
That’s halfway there!
In order for the remote PCs to find their way home, they must know the public IP address of the router. Since this changes regularly for private DSL connections, a dynamic DNS can be used. This can be set, for example, if available, via the Fritz!Box under “Internet”, “Shares”, “DynDNS”.
Set up DynDNS …
An alternative is the free DNS service Afraid. To use this, you would have to create an account at https://freedns.afraid.org Afterwards, one installs one of the suggested tools on the VPN server just installed. We can recommend “Dynamic DNS for FreeDNS”, for example. This can be downloaded here: https://freedns.afraid.org/scripts/freedns.clients.php
So we are through with Part 1 of our workshop, on the next page follows the configuration of the remote PCs …