

Client configuration …
After we have configured our VPN server and set up a DynDNS in the first part, we now have to configure the clients so that they can call home and do this even after a power outage or an Internet failure.
As a client, in principle the same hardware can be used as for our server, since this also does not have to perform too much. Here, too, you can safely use an appropriately large HDD or SSD.
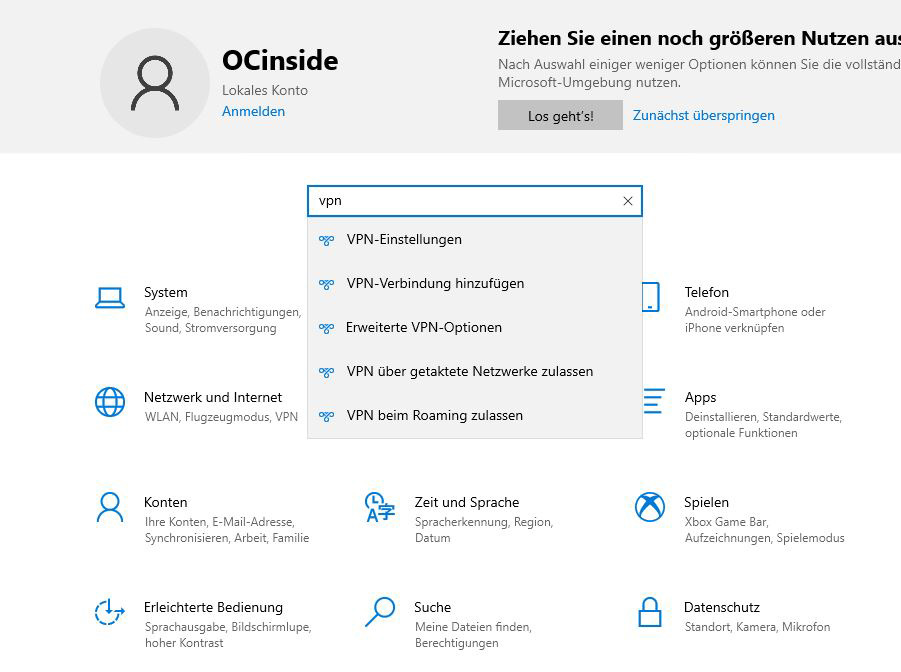
After the client has also been set up normally with Windows 10, we click into the “Settings” app and search for “vpn”. Then simply select the item “Add VPN connection”.
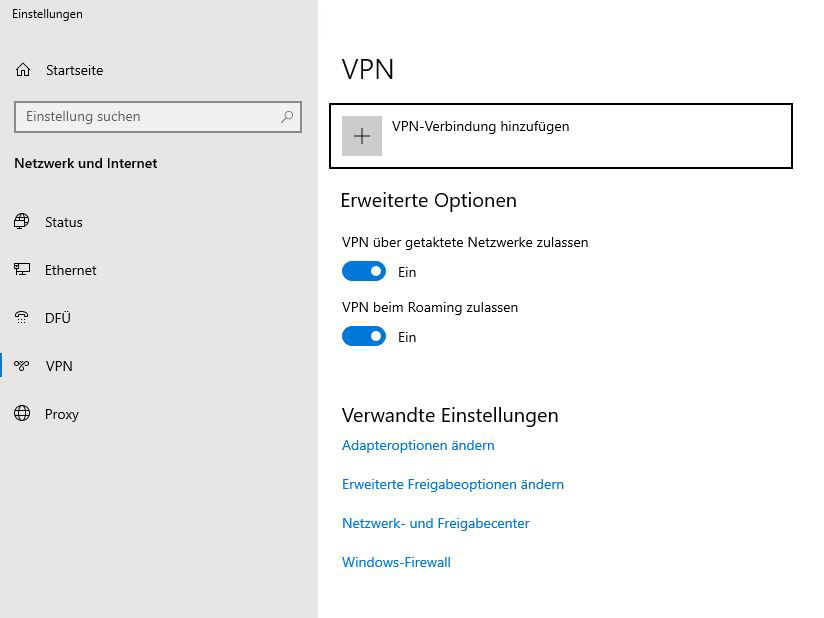
Next, Windows opens the correct menu right away. Here we only have to click on “Add VPN connection” …
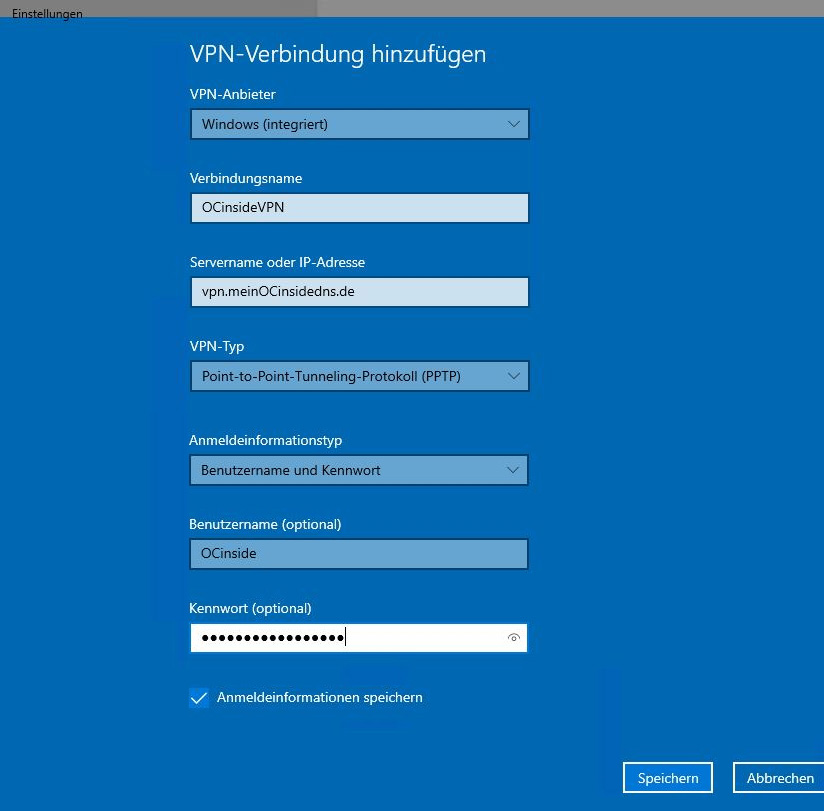
… and fill in everything in the next window. The connection name can be chosen freely, the server name is the DynDNS name and the VPN type is PPTP. You can also enter the user name and the password here.
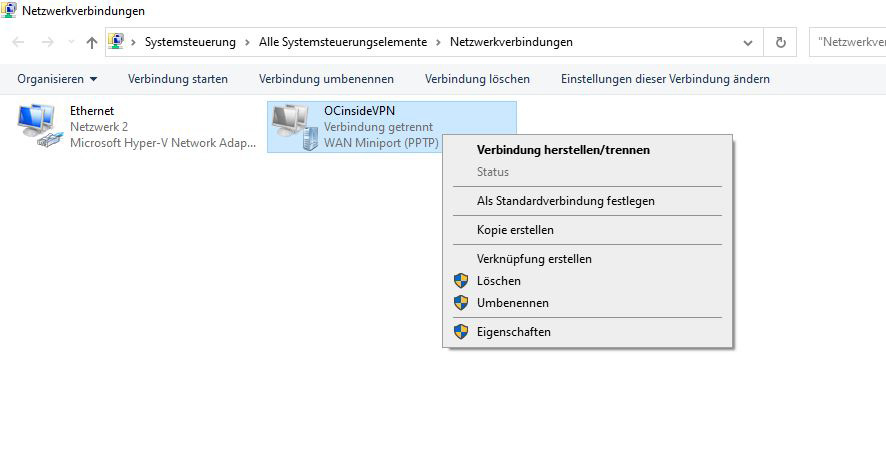
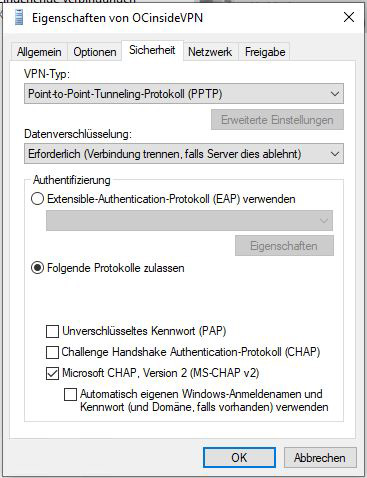
If you think, well, that was easy … Microsoft has, as so often, thrown a spanner in the works. In order for the VPN connection to work, a few settings have to be made, which unfortunately cannot be reached via the APP menu. Therefore, you have to switch to the network connections and right-click on the VPN connection you just created and then select “Properties”.
Under the Security tab, select the Microsoft CHAP2 protocol under “Allow the following protocols”. In addition, you should select “Required” for data encryption in any case. After all, not everyone should eavesdrop 🙂
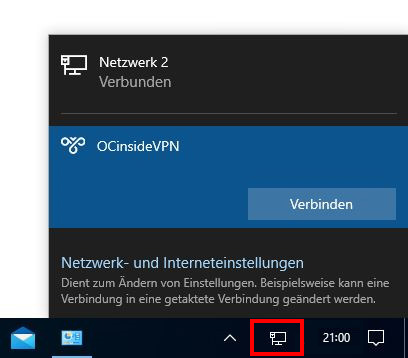
Once this is over, you can start a first attempt by left-clicking on the network icon.
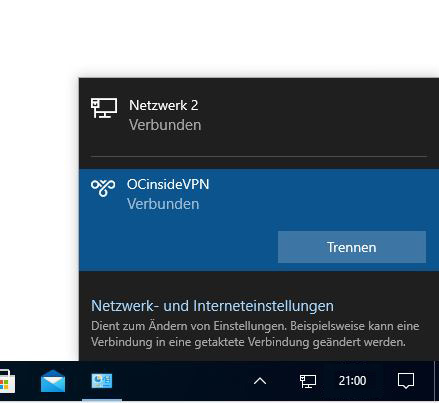
Assuming everything worked, you should now see “connected” under the VPN.
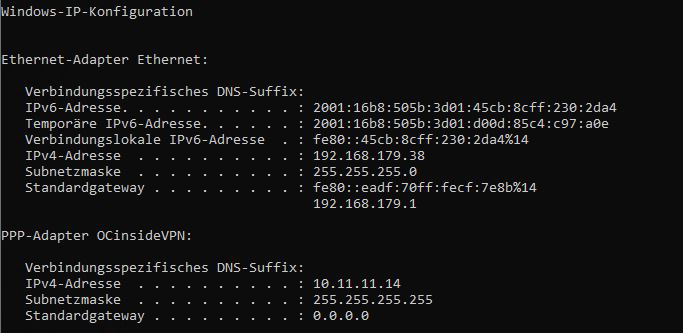
If you now take a look at the network configuration, you can see that it is a client in 2 networks. The 192.168.179.X network is in this case the network of the router to which the PC is connected. The 10.11.11.X address is from our home network.
So far so good. In part 3 we will continue with the automatic dial-in of the clients and the backup of the data…