
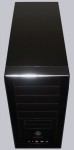
The case front consists of a skillful combination of an aluminum frame, black plastic decoration and mesh steel. All five 5.25″ and two 3.5″ drive bays are also provided with mesh panels and give the iSolo-230 case a special kick. In the meanwhile mesh screens are very often used by chassis manufacturers as material, because they are air permeable, but nevertheless build a shielding, keep off some noise and reduces the weight.

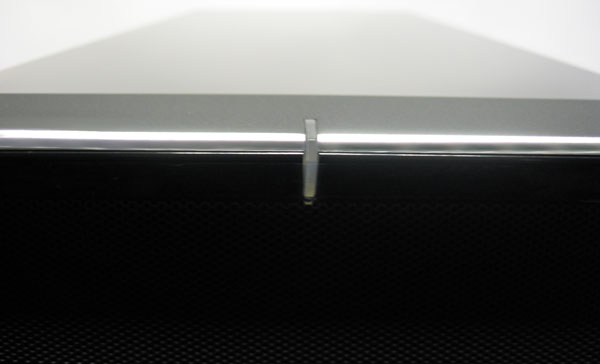
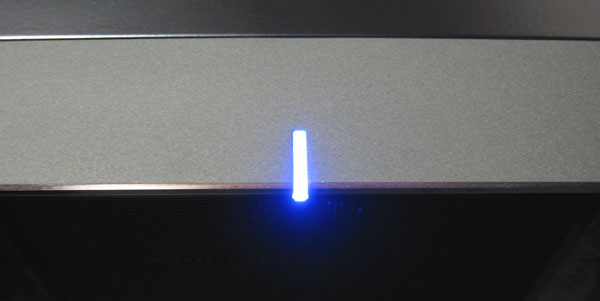
Here is a picture of the lovingly integrated blue LED at the top front edge of the chassis, which can be used for example as hard disk drive activity LED.
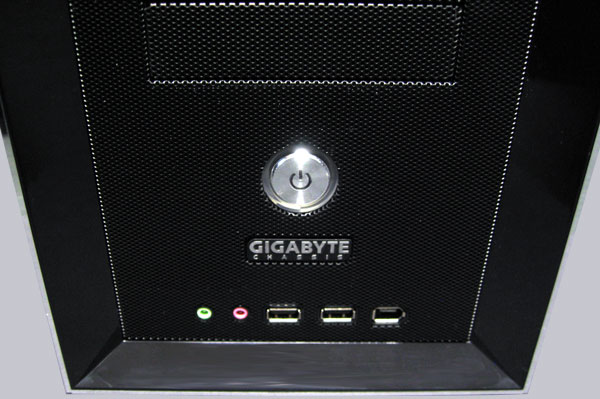
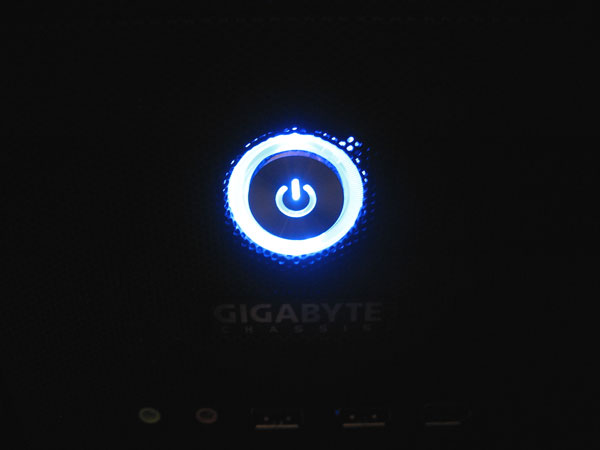
In the lower range the large power button is attached, which is also blue illuminated. The position of the power button, the 3.5mm headset jacks, as well as the two the USB and firewire ports are however rather uncommon for a placement on the floor. So this enclosure belongs thus rather on the desk e.g. next to the monitor.
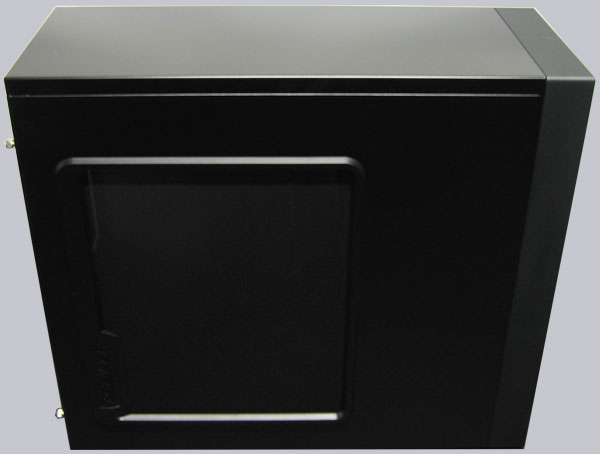
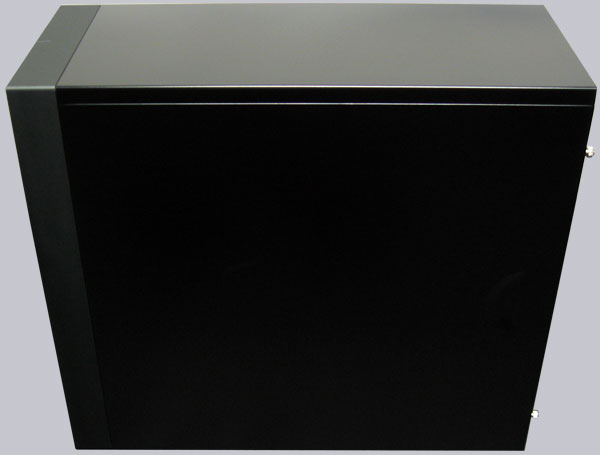
One side panel of the iSolo 230 case is provided with an air-permeable cutout, which enhance the airflow, but provides of course also a higher noise backdrop outside the chassis. A cover for the window was not provided. Both side panels are by the way provided with knurled thumb screws and can be easily removed.
Here is a picture of the opposite side panel. The motherboard holding plate is not removable and the drives are held with special clips, but it’s nevertheless helpful to open the case to get a better access to all drives and cables.
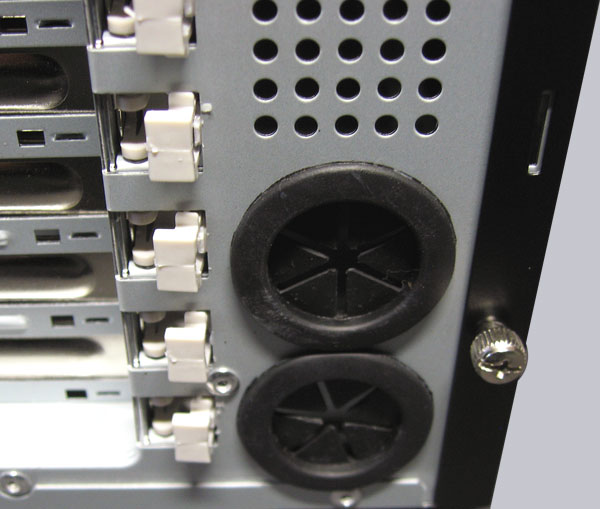
On the rear side of the Gigabyte enclosure dominates the large 120mm fan, that is already pre-mounted and blow the hot air solid and silent out of the chassis. Another special thing can be seen in the lower right corner of the iSolo 230 back.
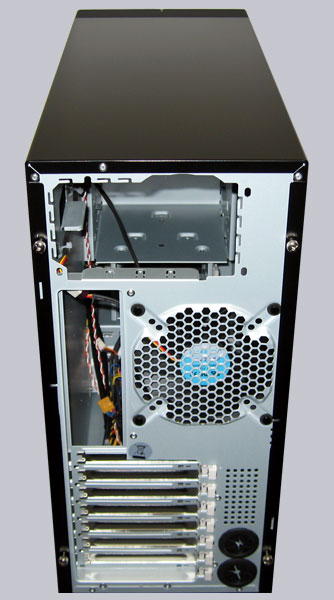
Gigabyte makes it possible for the user to integrate a water cooling system into the enclosure at any time, without drilling the annoying holes into the case. Because the Gigabyte iSolo 230 enclosure offers already two drillings with rubber protectors, which are meant to assemble both tubes of the water cooler unit like e.g. the Gigabyte 3D Galaxy. Thus the installation of a water cooling device is really easy, because both the attachment of the radiator and drillings for the water tubes normally means headache for some users. A nice feature, completely without surcharge!
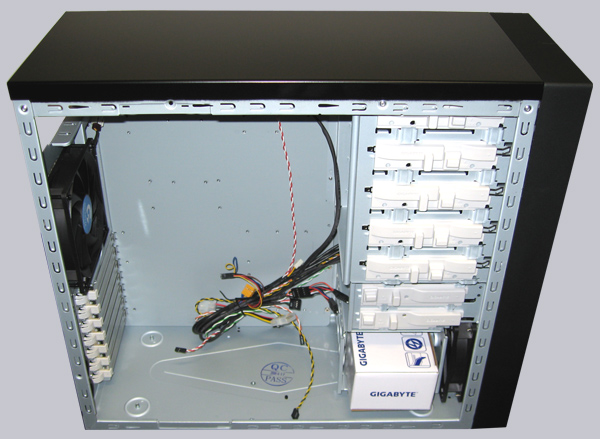
Now it’s time to take a look into the nice processed and very well folded chassis. The first thing we notice are the white holding devices of the drive and slot assembly, because all drives and expansion cards are mountable without tool. Only the motherboard and power supply screws need a screwdriver. The necessary screws for them are in the small cardboard box, which is well stored for the transport in the bottom right hard disk cage – the box does not fly around inside of the case as often usual in other enclosures. Both integrated 120mm fans can be seen on the picture, the front fan suck cold air inside of the case and the hot air is blown out of the case at the rear.
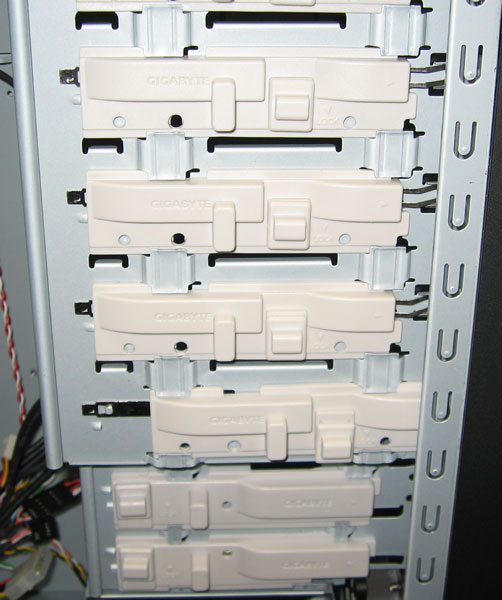
But let us first go on with the clever drive mounting system for an easy drive installation. All external 5.25 inch and 3.5 inch drives can be mounted without tool.
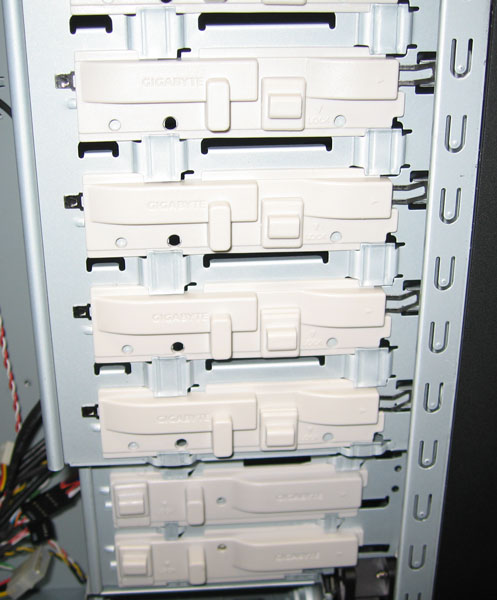
Just push the drive into the desired drive bay and slide the large mounting plate forward and lock it by moving the smaller latch downward as shown on the next picture. That’s it, this holds all drives perfectly in each external drive bay. BTW: The complete front panel can be removed in order to be able to remove the mesh panel more simply.
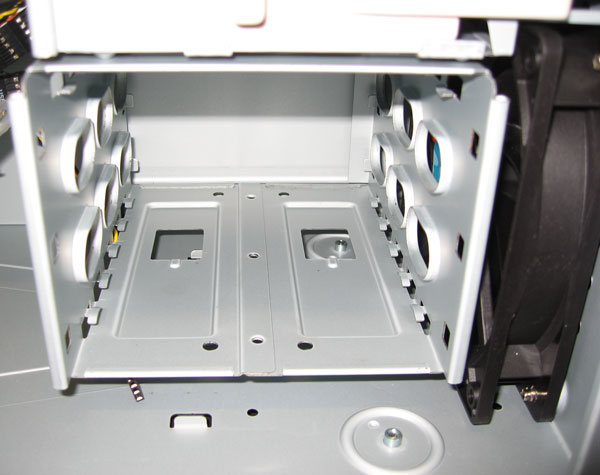
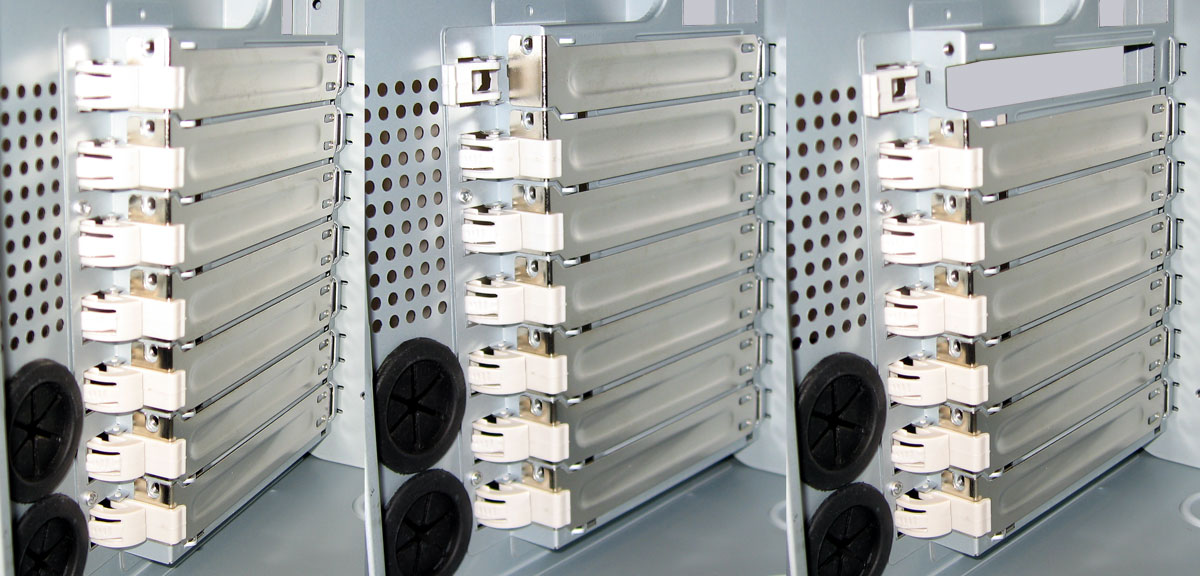
The internal drive assemblies are mounted another way, because first we have to put two of the six provided rails laterally on the harddisk and then we can slid them into the special cage. The side assembly is quite interesting, because it’s easier to reach the back of each drives. Additionally the airflow of the front 120mm fan can pass better through all drives, because the cables do not interrupt the air flow.
Apropos air flow – here is once again a picture of the full 120mm fan, which is already pre-installed at the case back. The wiring is by the way original.
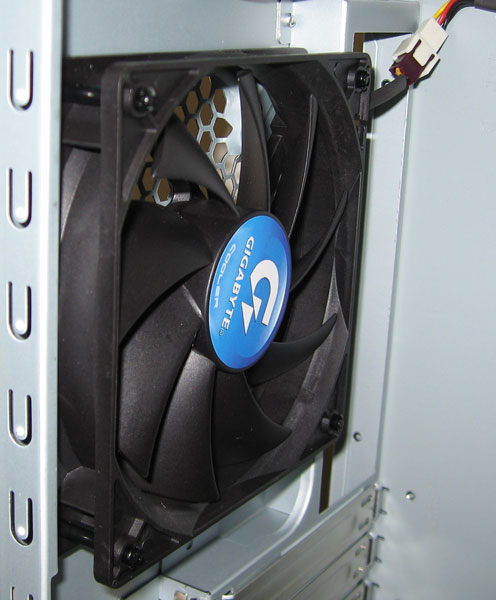
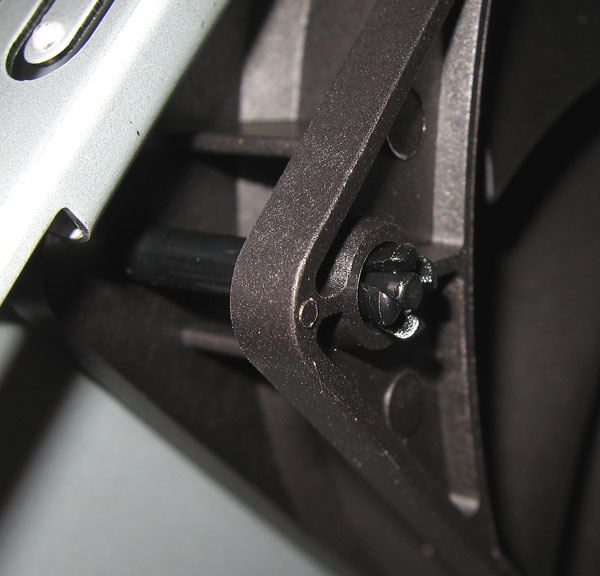
If we take a more detailed look to the assembly, we notice a quite primitive attachment. That does not make a solid impression, but it serves its purpose and attach the fan with less vibrations to the case.
Also the expansion cards are installed without screws in the Gigabyte iSolo 230 chassis. If desired, the small small mounting plates can be removed, in order to intall the cards with conventional screws. That is very exemplary, because some cards which need several slots have sometimes difficulties with special slot mounting plates and not everyone is a fan of these plastic mounting plates. Who would like to see a larger picture of the slot mounting system, can click on the following picture.
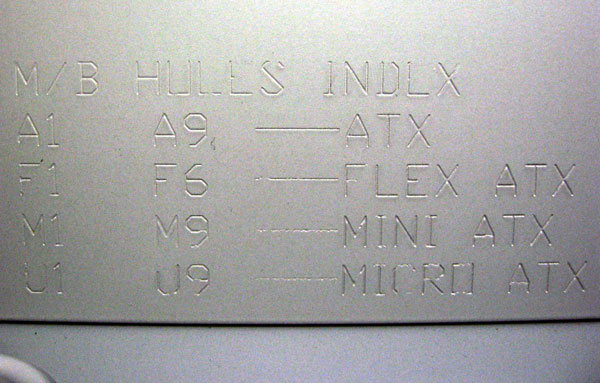
Another exemplary detail can be found on the motherboard holding plate. Gigabyte is an old hand at motherboards and of course they know the size of mainboards. So they made a small marking next to each tapped hole and explains these with this in-punched legend.
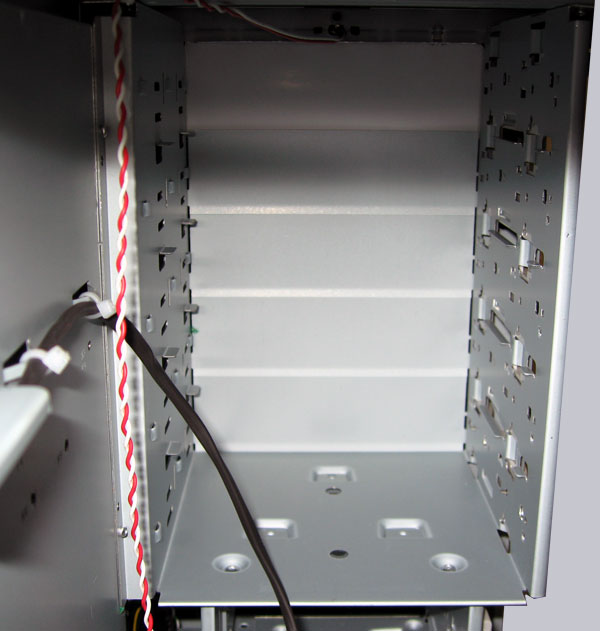
As one recognizes in the next picture, Gigabyte attached great importance to a proper wiring and offer on the one hand in different places eyes for cable straps and provide on the other hand also adhesive mounting plates for the wiring.
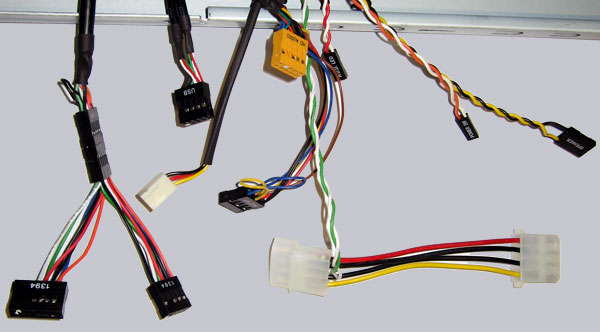
All connectors of the integrated cables are accurate marked and described perfectly in the provided guidance – once again exemplary.
Who is surprised about the large molex plug between the cables – the solution is the power button. Because the LEDs in the all around illuminated power button have a higher power consumption and should be not attached to the motherboard power LED connector.
The two 120mm fans do not need a very high power consumption thanks to the low RPM, so Gigabyte connect both with one y-adapter cable.
Everything wired? Well, then it is time to light up the upper integrated awesome blue Light Emitting Diode – LED.
And the power button trumps that! Such a power button is really an eye-catcher and of course it helps to find the big button.
Result and general impression of the Gigabyte iSolo 230 Case …