
AIO Cold Plate Gasket Replacement Instructions …
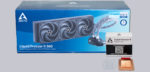
In order to be able to examine every detail of the Arctic Liquid Freezer II Service Kit, we first have a 360° view again.

Important! Please open the AIO only when the service kit has already arrived. Who is unsure whether his water cooling is affected, should not remove the cold plate to check! Because if the water cooling is affected, then you destroy the rubber gasket when removing the cold plate. The EPDM rubber gasket and the Cold Plate react chemically with each other because the EPDM gasket was not sufficiently vulcanized, which Arctic says can cause a chemical reaction between the sulfur residue on the gasket and the copper Cold Plate. Because of this, black residue can be seen on the Cold Plate. When you lift off the Cold Plate, you tear off the top layer of the gasket along with it. If you do not have a replacement gasket at hand, it will no longer seal when you reassemble it and should therefore not be operated under any circumstances.
We also strongly recommend carrying out the conversion with the water cooling system completely removed! The risk of water leaking into the PC would be far too great if the conversion was carried out inside the PC. You should have a few kitchen towels ready on a flat work surface to dab up escaping cooling water drops. A Philips Phillips screwdriver is absolutely necessary. Before you pick up the screwdriver, however, you should make a few more preparations so that you don’t have to take the new cold plate out of the plastic packaging later with the opened cooler in one hand.
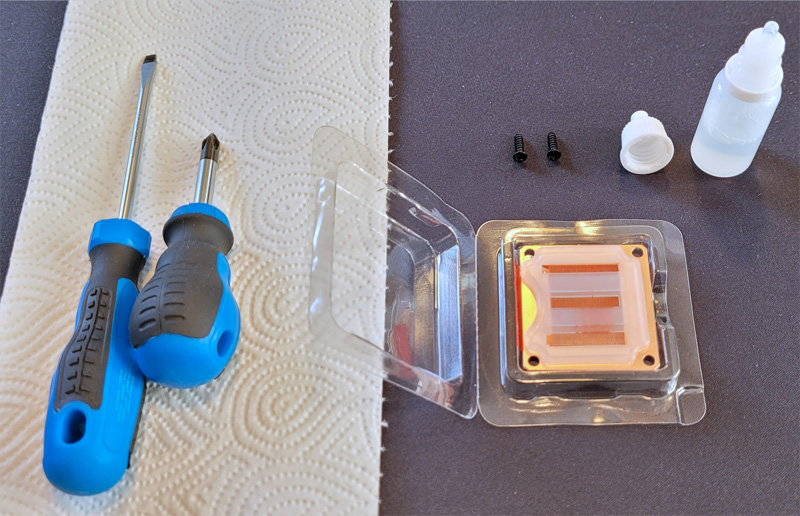
The following should be prepared:
– Open the vial with cooling liquid
– Open the packaging of the Cold Plate
– Take the 2 screws out of the bag
– have a (short) Philips screwdriver ready
– optionally have a flat-blade screwdriver ready
– Have some paper towel ready
Disassemble cold plate …
To remove the cold plate, lay the radiator flat on a level surface and hold the cooling block slightly above the radiator with the cold plate pointing horizontally upwards. It is very important that the cooling block is always held slightly above the radiator during the complete conversion, otherwise coolant would inevitably leak out.
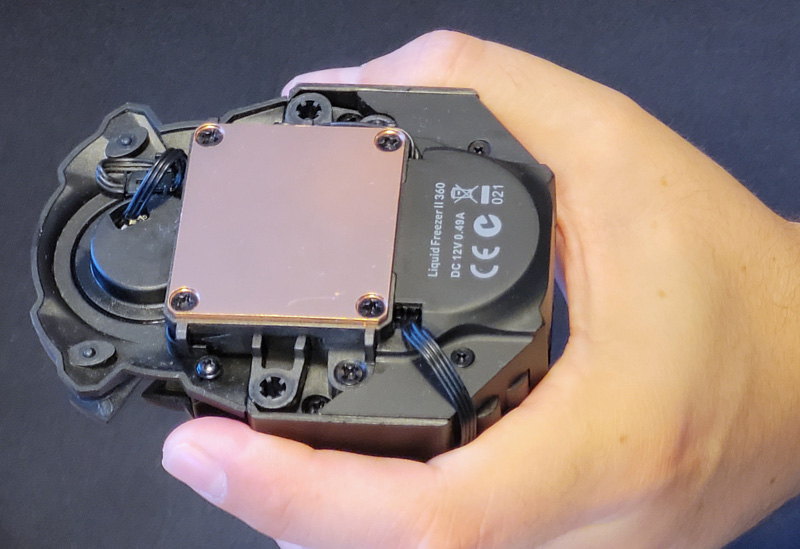
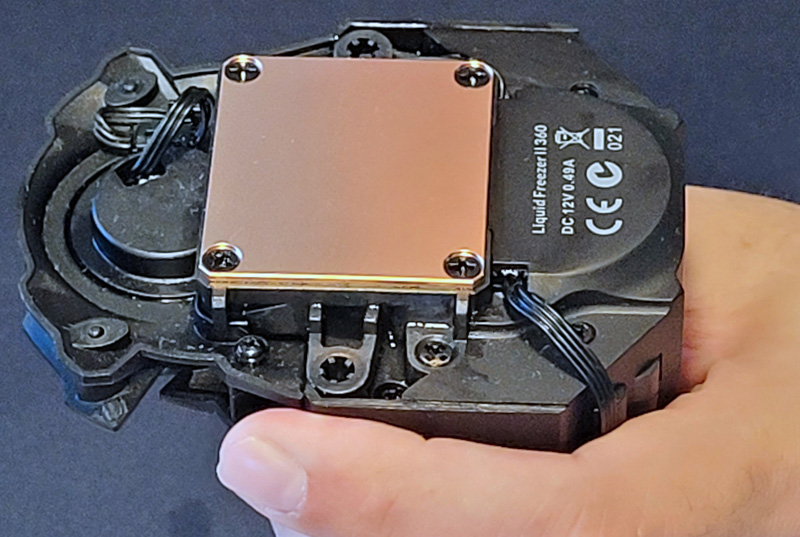
With the other hand, start unscrewing the 4 screws in the corners of the Cold Plate with the Phillips screwdriver.
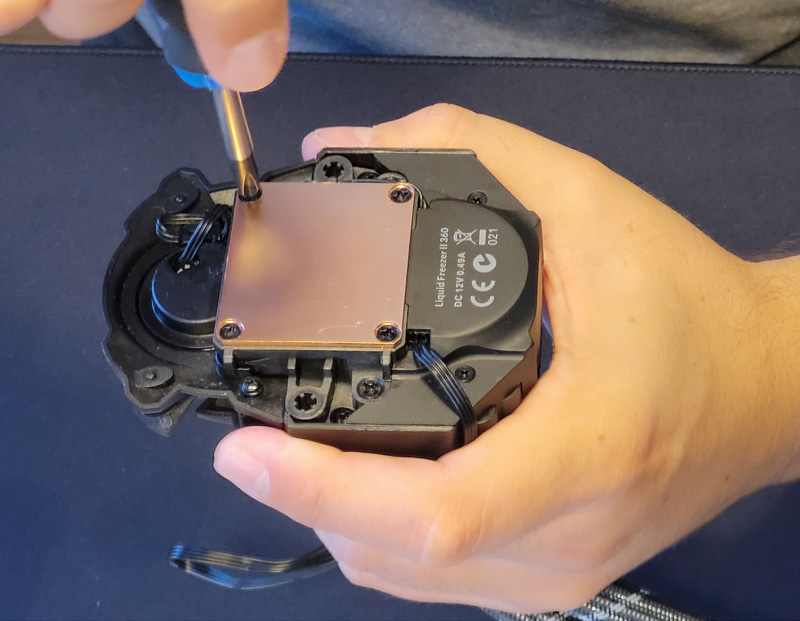
The two screws near the VRM fan are longer than the other two screws. The long screws will continue to be used and the short screws will be replaced later during assembly with new, longer screws that are included in the kit.
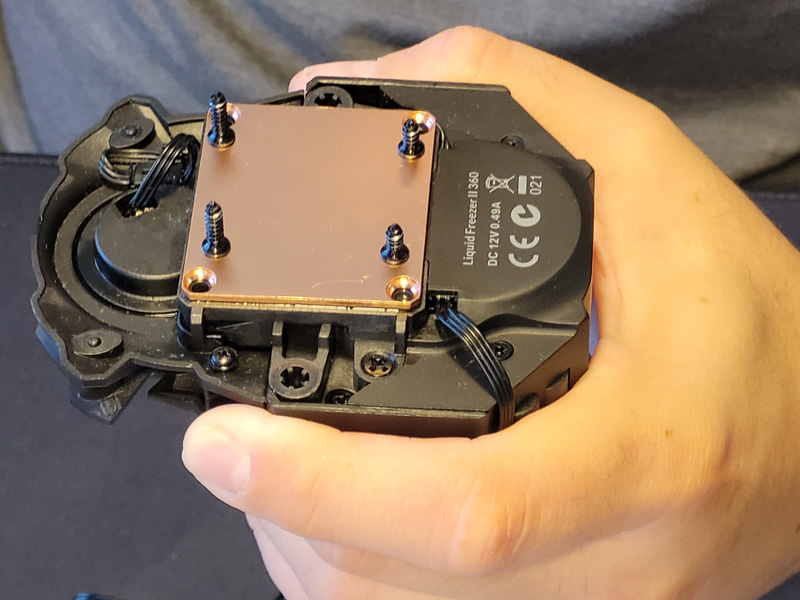
Once all 4 screws are removed, the cold plate can be removed with your fingers.
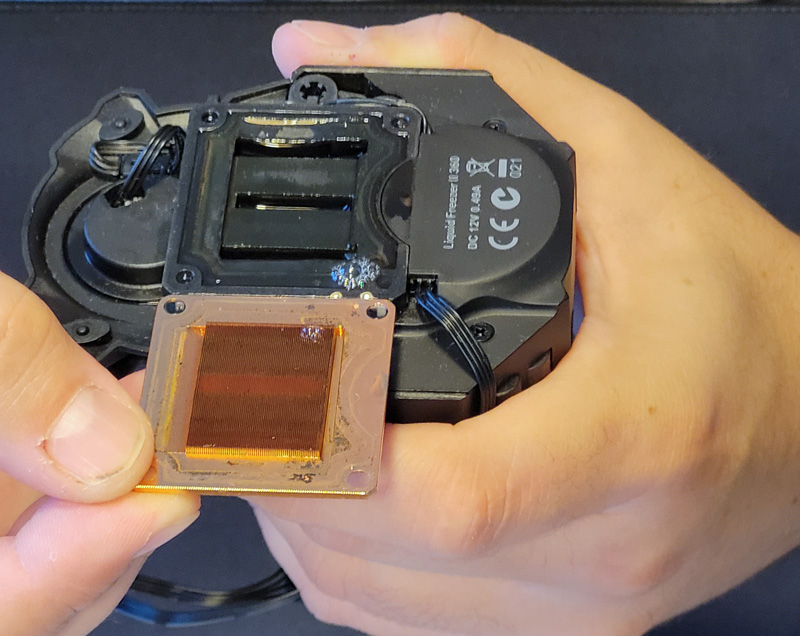
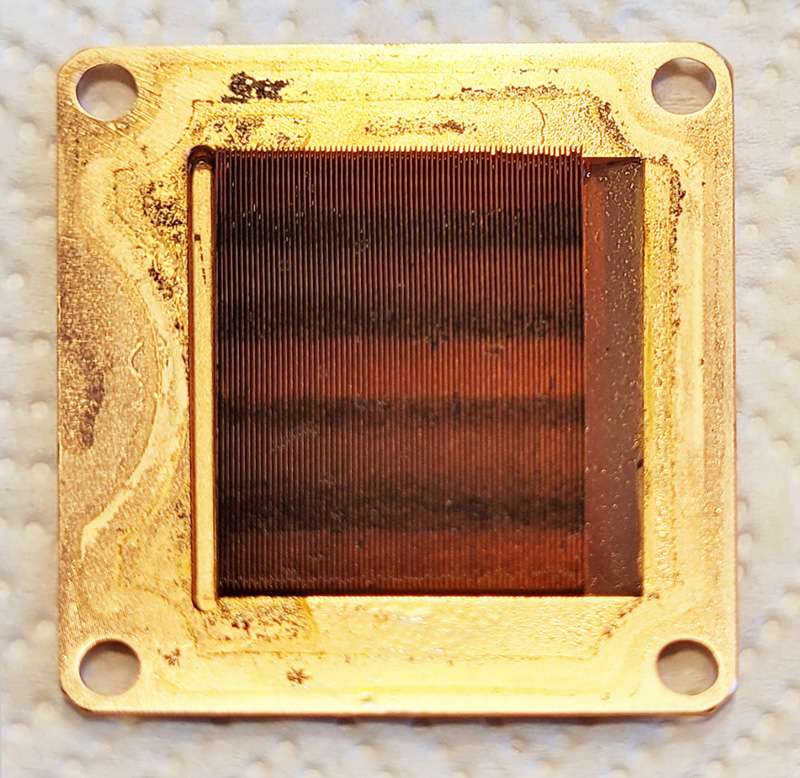
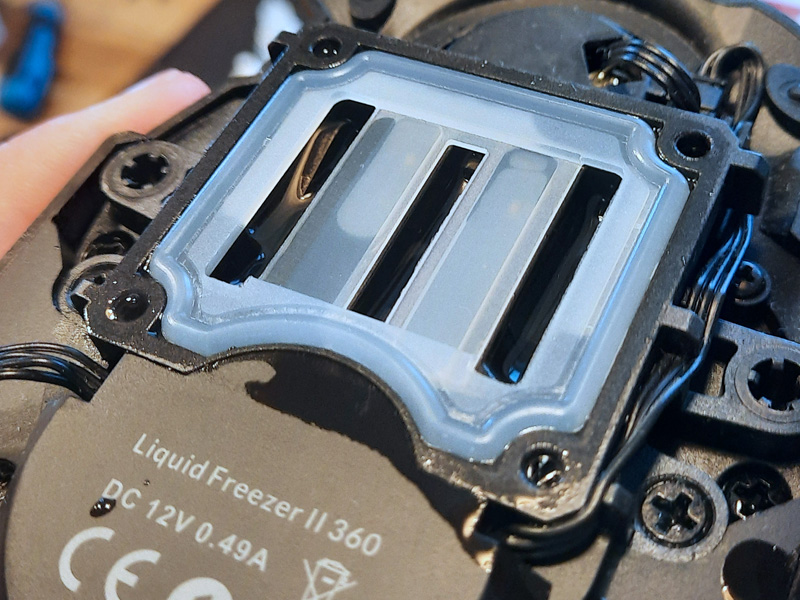
In this example, you can clearly see the residue of the faulty gasket on the cold plate. This is also the reason why a new cold plate is included with the service kite, as the residue would be difficult to remove and you would have to put the cooler down.
Next, the gasket must be removed from the cooling block. A flat-blade screwdriver is very helpful here, but you can also use your fingers. When removing the gasket, a few drops of coolant will leak out, so you should have a piece of kitchen paper ready to dab it up.
Mount Cold Plate …
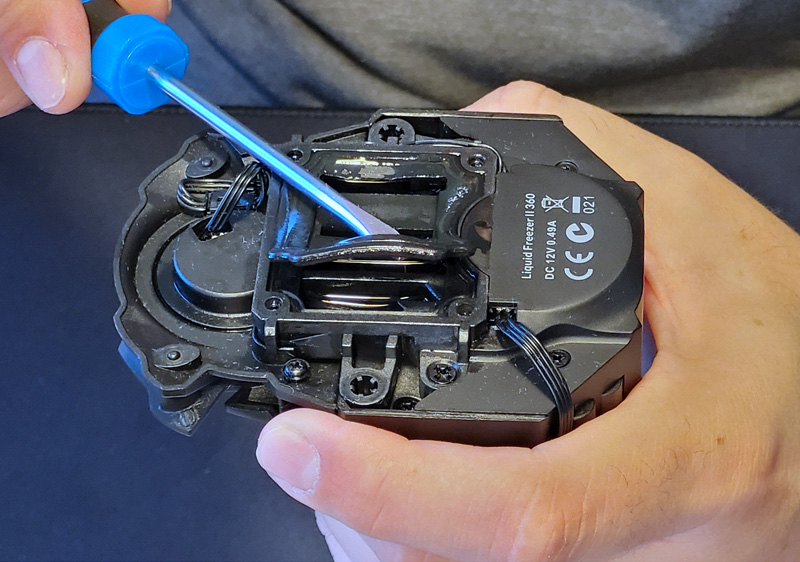
Now insert the new, white silicone gasket. Care must be taken to ensure the correct orientation. The gasket is correctly positioned when the two webs of the gasket form a recess. The cooling fins of the cold plate are then embedded in this recess.
If the new gasket is seated correctly, it is time to top up the coolant. The radiator does not have to be filled to the brim, but you should be able to clearly see the water level from above. With a little less air in the cooling circuit, however, you can counteract noises due to air circulation.
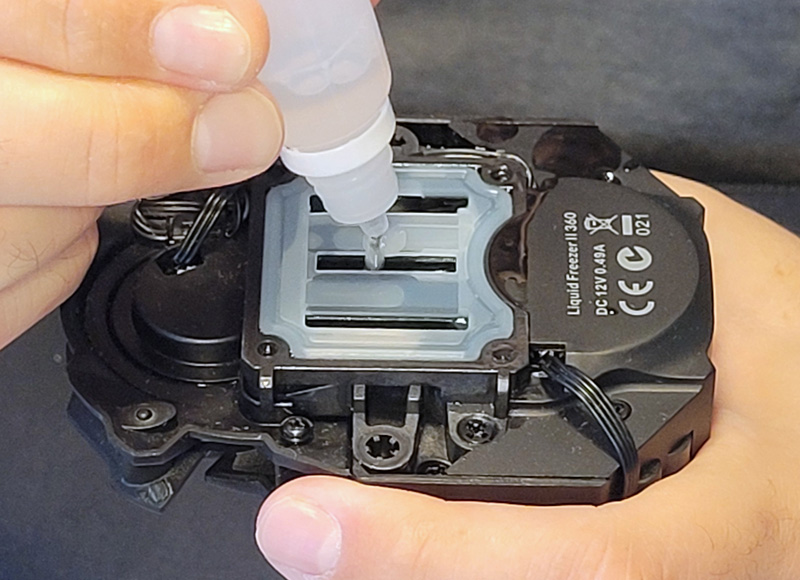
Caution! Arctic strongly advises against using your own coolant. The included coolant is optimally matched to the materials contained in the water cooling system. From this deviating coolant can lead to problems!
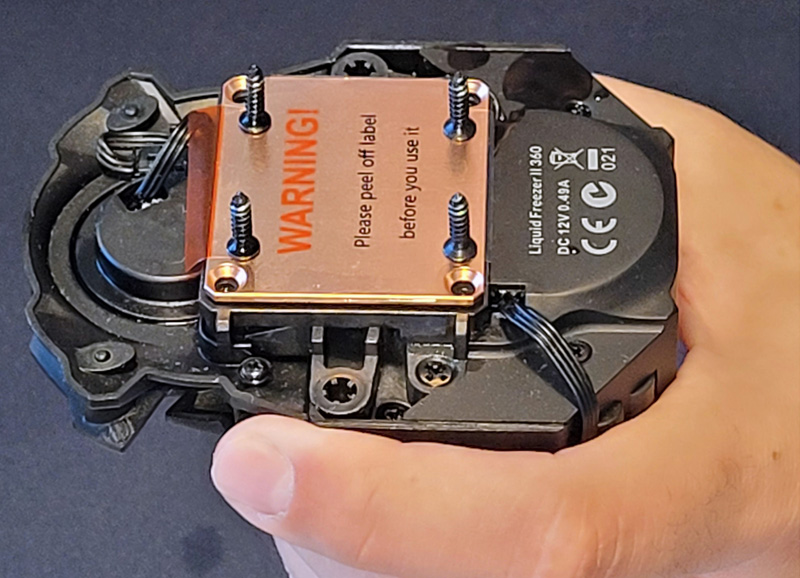
The new cold plate must also be installed in the correct position. To check the correct installation position, Arctic has placed a red stripe on the protective foil, which must point towards the VRM fan. Also, instead of the 2 short screws, new longer screws are now used for installation. All 4 screws are thus the same length.
Almost ready! The screwing in of the screws should be carried out sensitively, never overtighten. The longer screws must first make their way towards the end, which is why they are much more difficult to screw in than those screws where long screws have already been unscrewed before. We recommend that you first tighten the screws lightly crosswise so that the cold plate does not tilt. Finally, tighten all screws crosswise again and check that no gap is visible around the cold plate.
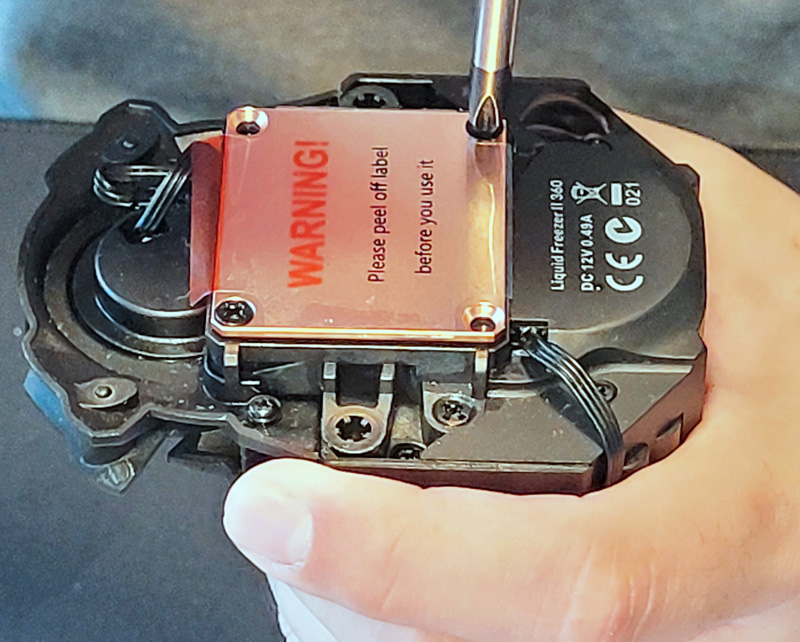
Finally, remove the protective film and wipe off any cooling water that has escaped during tightening.
To be on the safe side, we recommend leaving the water cooling system removed for a few hours after rebuilding the gasket, as a few drops of cooling water can hide in the many recesses of the case, which could still drip down when the water cooling system is installed.
This completes the gasket conversion and nothing should stand in the way of a long use of the Arctic Liquid Freezer II water cooling.
Tip: If you have alcohol wipes, you should use them to remove the old thermal paste from the CPU. The cleaning cloth MX Cleaner included by Arctic spreads a stubborn odor that lingers quite long in the room and on the fingers, and the cleaning fluid it contains does not evaporate as well as alcohol.
Our Arctic AIO Service Kit video, which shows the conversion uncut, illustrates the simplicity of the process when you do the aforementioned preparations. Enjoy watching it!
Arctic Liquid Freezer II Service Kit Result and general impression …