
BIOS and Overclocking …
Get fast to the right UEFI settings …
ASRock B550 Taichi Razer Edition BIOS and Overclocking
ASRock B550 Taichi Razer Edition UEFI BIOS Update
ASRock B550 Taichi Razer Edition overclocking
ASRock B550 Taichi Razer Edition memory settings
ASRock B550 Taichi Razer Edition voltage settings
ASRock B550 Taichi Razer Edition Overclock even easier
ASRock B550 Taichi Razer Edition BIOS undervolting
ASRock B550 Taichi Razer Edition Fan control
BIOS and overclocking …
Let us continue with the BIOS / UEFI Setup options and the UEFI overclocking. Press F2 or Del during PC boot to get access to the UEFI Setup.
The ASRock B550 Taichi Razer Edition UEFI BIOS has a graphical user interface that allows intuitive mouse operation or can be operated with a conventional keyboard.
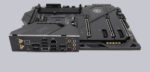
As we already reported in previous AMD AM4 motherboard tests, the ASRock EZ Mode known from previous ASRock boards is not (yet?) available on the AMD AM4 motherboards from ASRock. But the well-known graphical UEFI menu is the first choice for advanced OC enthusiasts anyway. The entry page provides important information such as the CPU used, the UEFI version, the DDR4 memory used with dual channel support, …

… and the time and date.
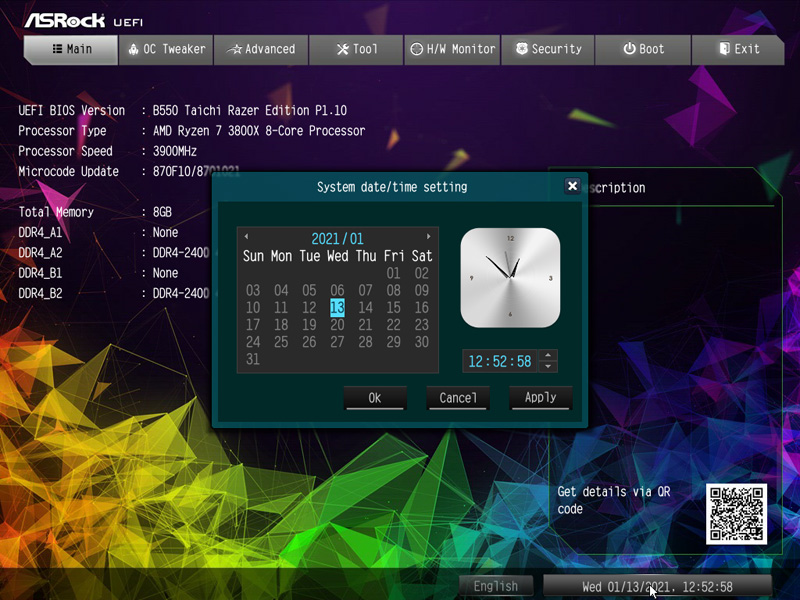
Many other functions can optionally be operated via function keys, which can be called up with F1. For example, if you want to publish a screenshot in our PC forum, you can save it to a USB stick with F12.
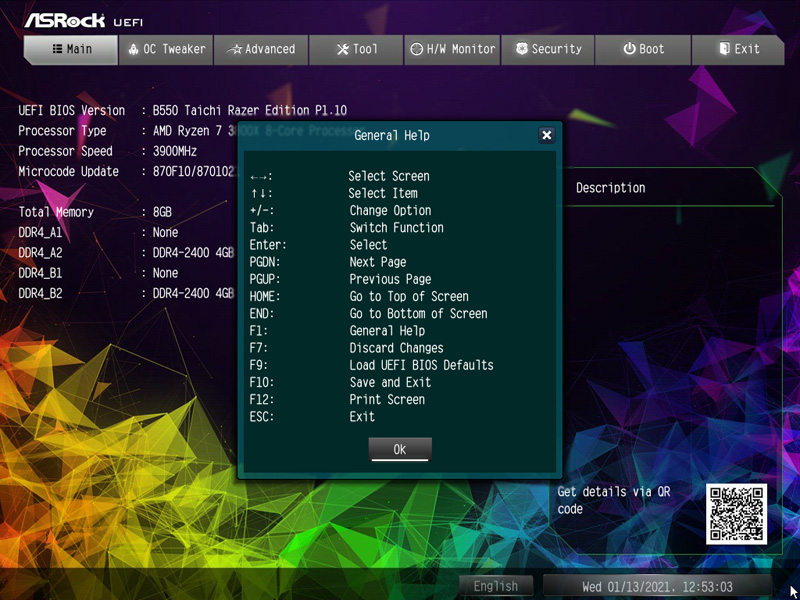
Also the System Browser View, the ASRock Tech Service and the My Favorite menu item is (still?) not available on the ASRock B550 motherboard, but you will find the Full HD UEFI selection and the Active Page on Entry selection, where you can decide on which UEFI page you want to start in the UEFI setup. This is especially helpful for overclocking, as you often have to go to the second OC-Tweaker menu to find the optimal OC settings. With the ASRock B550 Taichi Razer Edition you will find the Active Page on Entry Option and the Full HD UEFI selection under Advanced.
UEFI BIOS Update …
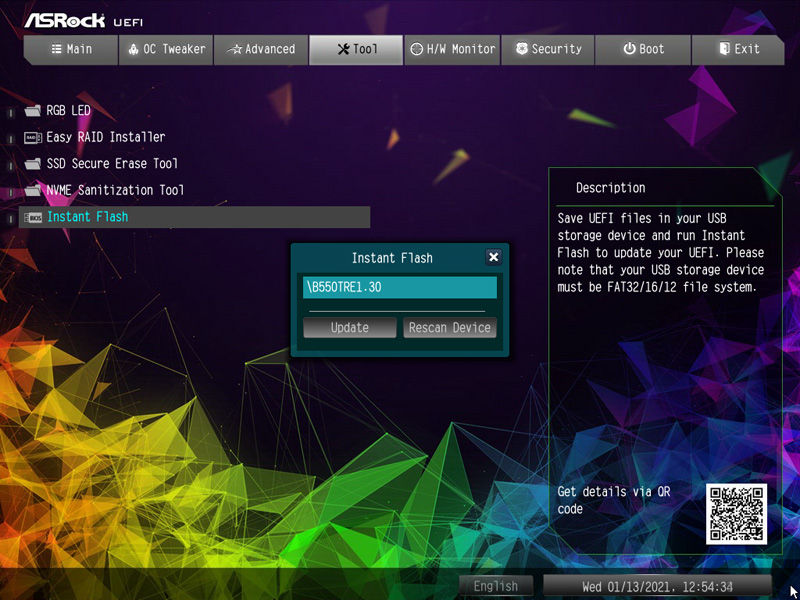
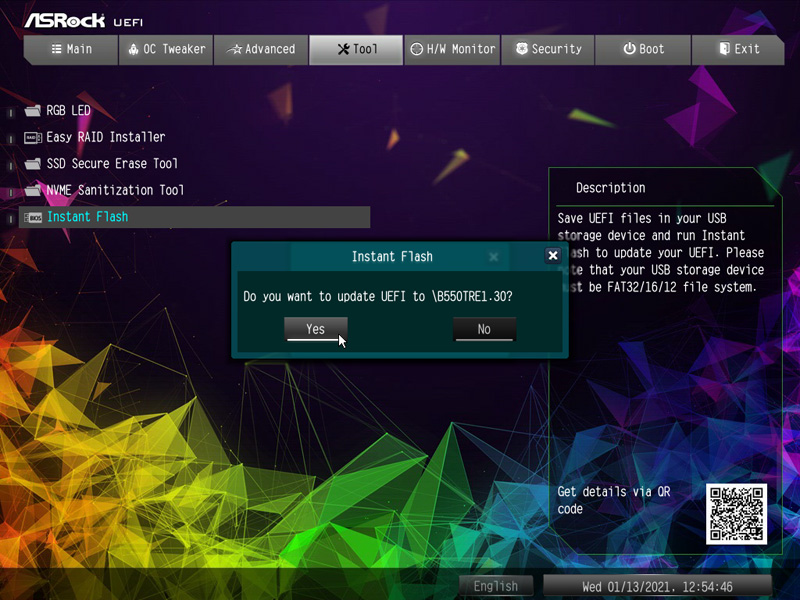
Before we start with UEFI overclocking, we first update the UEFI BIOS to the latest version. Since ASRock regularly integrates new functions, better memory support and new processors, the BIOS update is recommended in most cases. For flashing the UEFI update ASRock offers several possibilities, e.g. the very simple Instant Flash or even the ASRock Internet Flash with a direct connection to the Internet. Via the so-called ASRock Instant Flash Option in the Tool Screen or via the F6 key when starting the PC you can access the ASRock Instant Flash Utility. You can simply install a previously downloaded ASRock BIOS without boot CD or similar by starting the ASRock Instant Flash Utility. Then select the BIOS Flash ROM from the desired drive, e.g. from a USB stick, which you have to unpack after downloading.
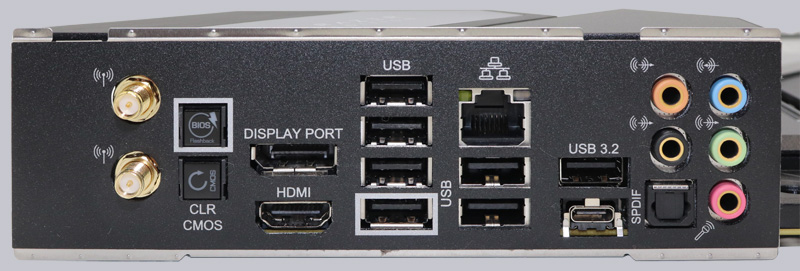
Optionally, you can also use the ASRock BIOS Flashback Switch, which we have already shown in the first ASRock X399 video. You can transfer the BIOS without CPU, memory and graphics card from the USB stick to the motherboard and so you can update even with an old BIOS to a new CPU. One loads the most current BIOS file into the main path on a FAT32 formatted USB stick and renames it as creative.rom. The USB stick is then inserted into the lower, framed USB 3.2 Gen 1 port. This is important because the Flashback UEFI update only works with this USB port. Now press the BIOS Flashback Switch for about 3 seconds and start the BIOS Update (recognizable by the flashing of the green LED in the BIOS Flashback button). As soon as the LED stops blinking, the BIOS update is complete.
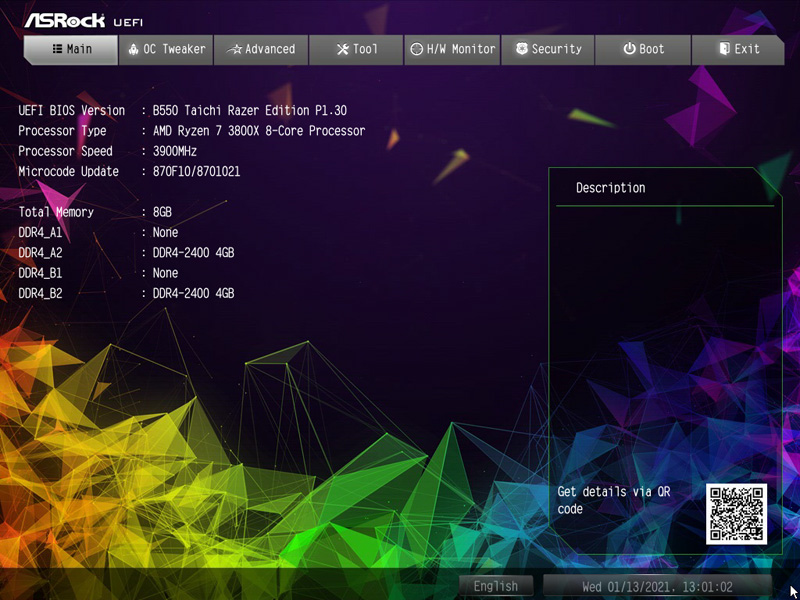
At the date of review, the UEFI BIOS version P1.30 was available as the most recent download, which we of course installed immediately over the pre-installed P1.10 version. We updated the BIOS without any problems.
After a reboot the new BIOS version will be available.
Here you can see the new P1.30 BIOS entry page with the AMD Ryzen 7 3800X CPU.
RGB Settings …
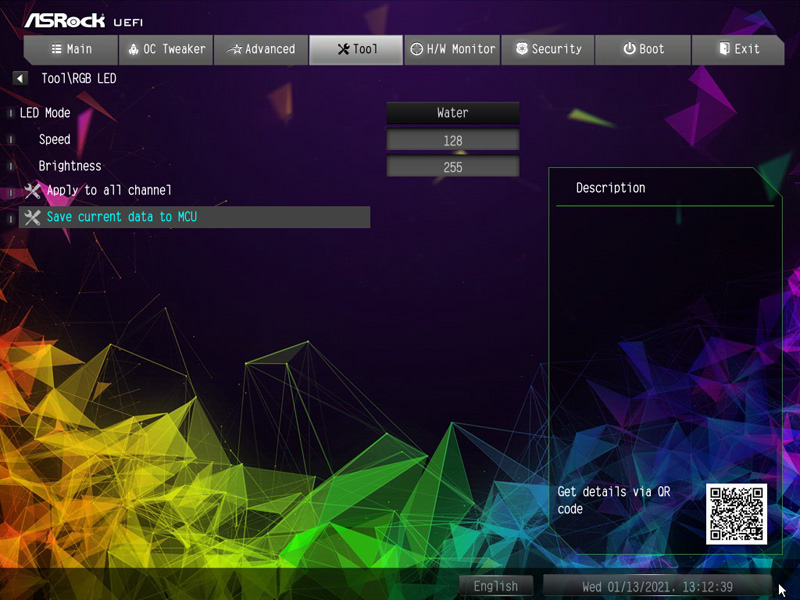
On the Tools page is the RGB LED entry.
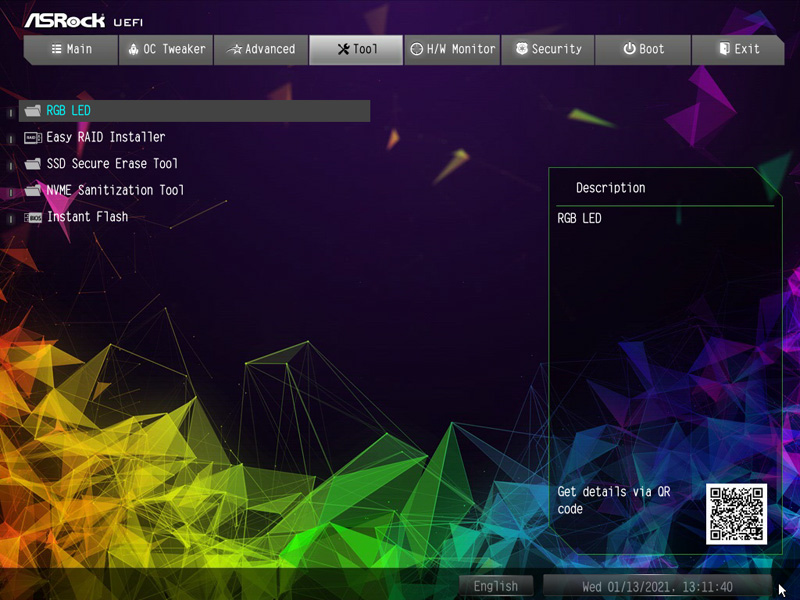
The RGB LED settings are not displayed graphically, but at least they are available in the UEFI and cannot only be adjusted via software. There are already numerous effects to choose from.
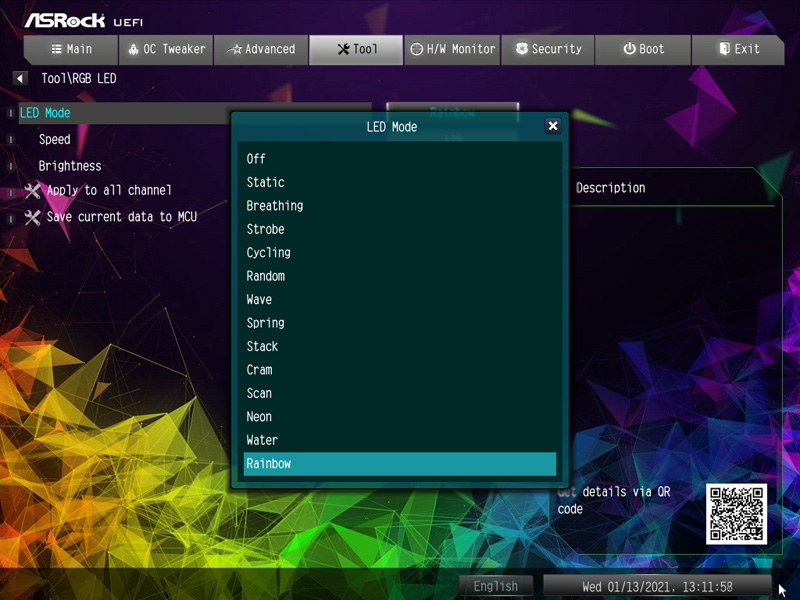
The effects can be applied directly to all ARGB strips and LEDs in the mainboard.

And then the values can be stored directly into the RGB controller, the MCU, to see the effects even without any software directly after switching on the PC!
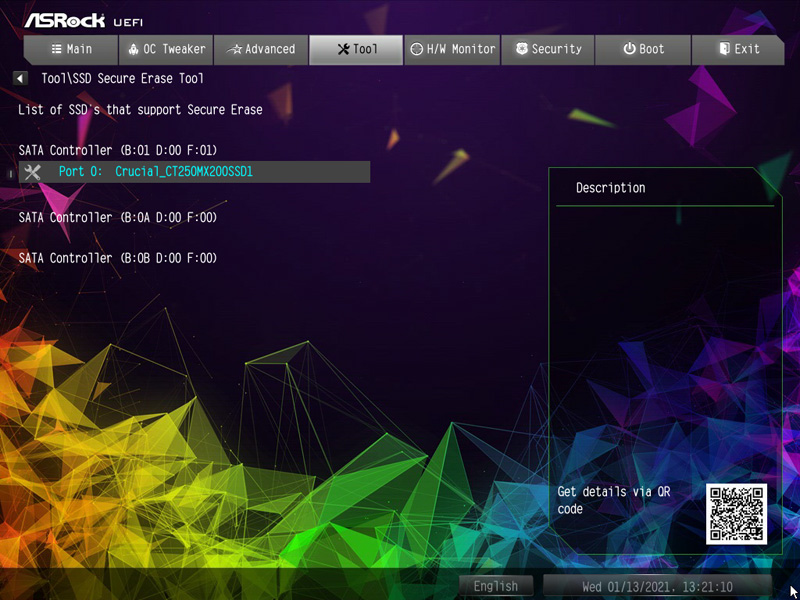
New is beside the NVME Sanitization Tool …
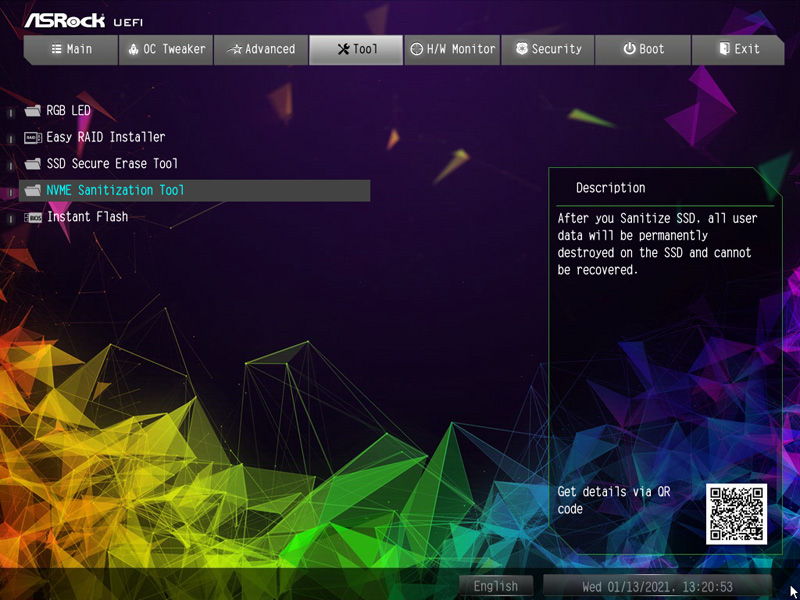
… also the integrated SSD Secure Erase Tool.

Simply select the desired SSD and it will be deleted quickly and securely – for example, for secure deletion before SSD sale or in the event of serious problems with partitioning. Great thing, but of course use it with caution, since the SSD is really erased afterwards!
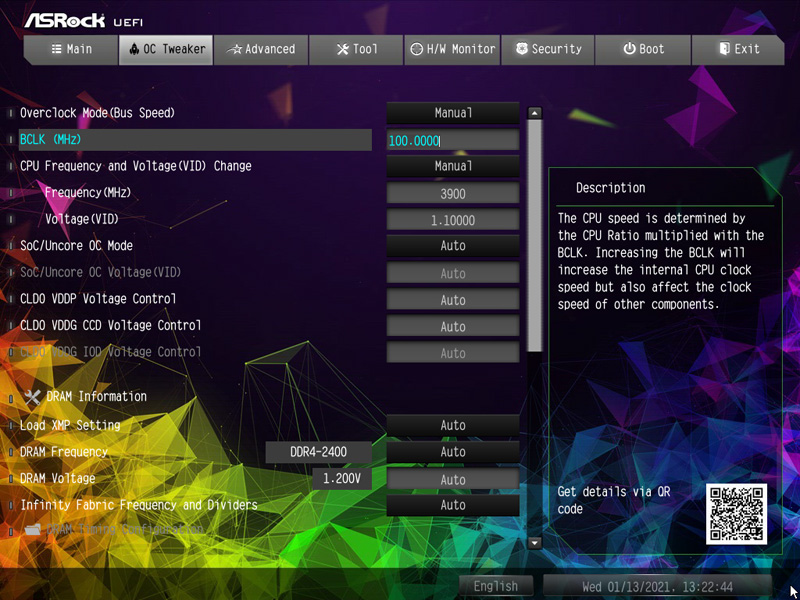
ASRock B550 Taichi Razer Edition overclocking …
Now we come to AMD Ryzen overclocking with the B550 chipset on the ASRock B550 Taichi Razer Edition motherboard. ASRock doesn’t split the OC-Tweaker menu of the ASRock B550 Taichi Razer Edition into subpages anymore, but shows all basic tuning settings clearly on one page. Depending on the CPU, there is also the GFX configuration for the integrated graphics unit.

Let’s start at the top – there are some OC settings available for manual selection. AMD Ryzen 5 and AMD Ryzen 7 and AMD Ryzen 9 processors have an unlocked multiplier, so you can easily increase the desired CPU frequency. With the AMD Ryzen 7 3800X CPU (standard clock 3900 MHz with a CPU ratio of 39x) the ASRock B550 Taichi Razer Edition motherboard offered a range from 2250 MHz to 6300 MHz for manual selection.

And even a direct BCLK setting is available on this motherboard, which we had missed on previous AMD motherboards. We were able to raise the BCLK to 107 MHz in the OC test.
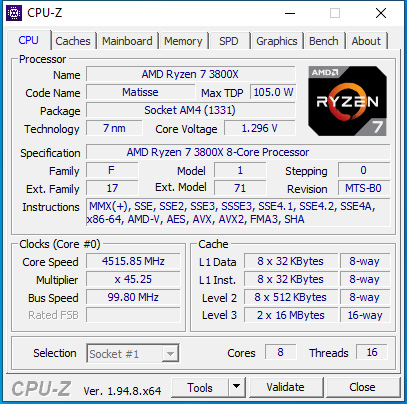
We tried out how easy overclocking is without further ado with the AMD Ryzen 7 3800X CPU and achieved a high value of 4515.85 MHz with a slightly increased 1.3V VCore of 3900 MHz.
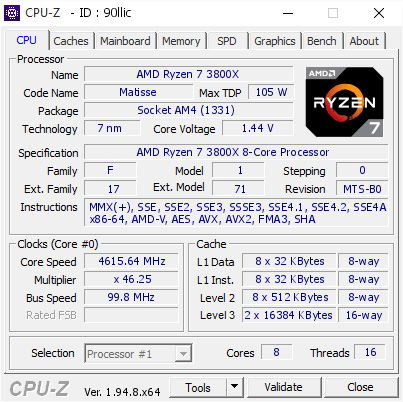
With a greatly increased 1.44V VCore, we got from 3900 MHz to 4615.64 MHz with the AMD Ryzen 7 3800X CPU. Of course, this requires very good cooling!
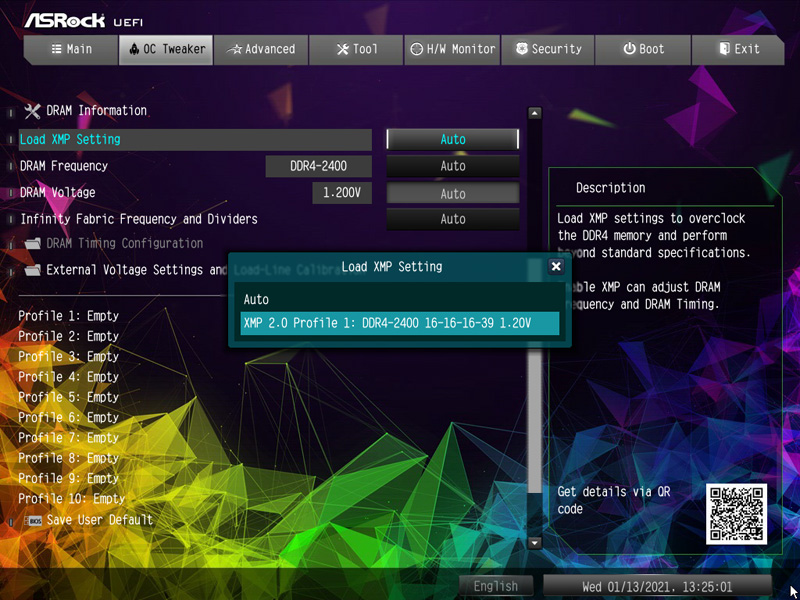
ASRock B550 Taichi Razer Edition memory settings …
The DRAM Configuration Menu contains all important memory settings. Thanks to Load XMP setting support, XMP memory modules can be set correctly with a mouse click in the UEFI BIOS.
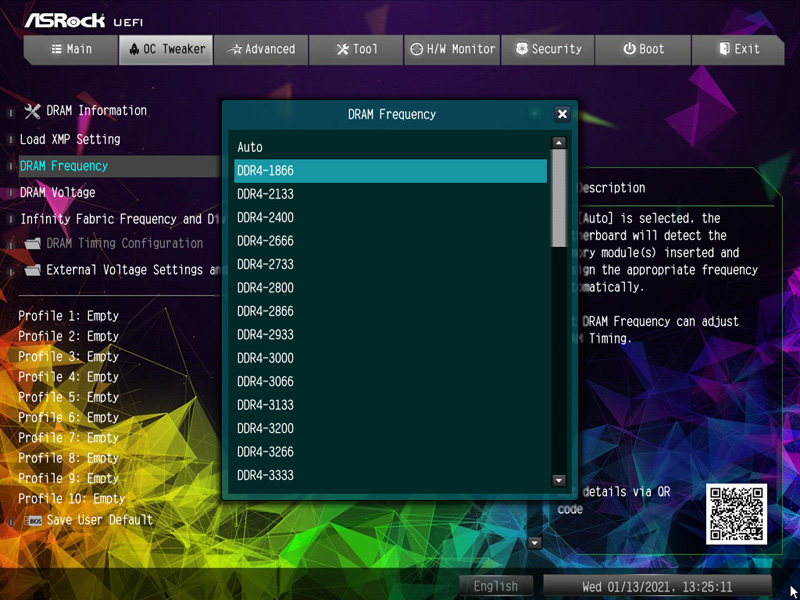
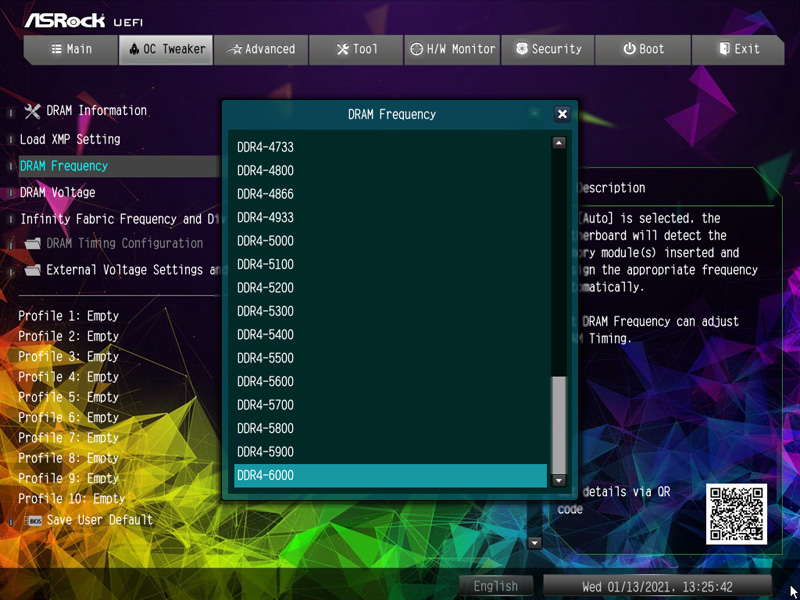
Of course, you can also select the values yourself. The BIOS version already had the DRAM clock settings in the OC Tweaker menu. Alternatively, you can find all important memory settings under Advanced -> AMD CBS -> DRAM Timing Configuration. You can choose between values from DDR4-1866 …
… up to DDR4-6000.
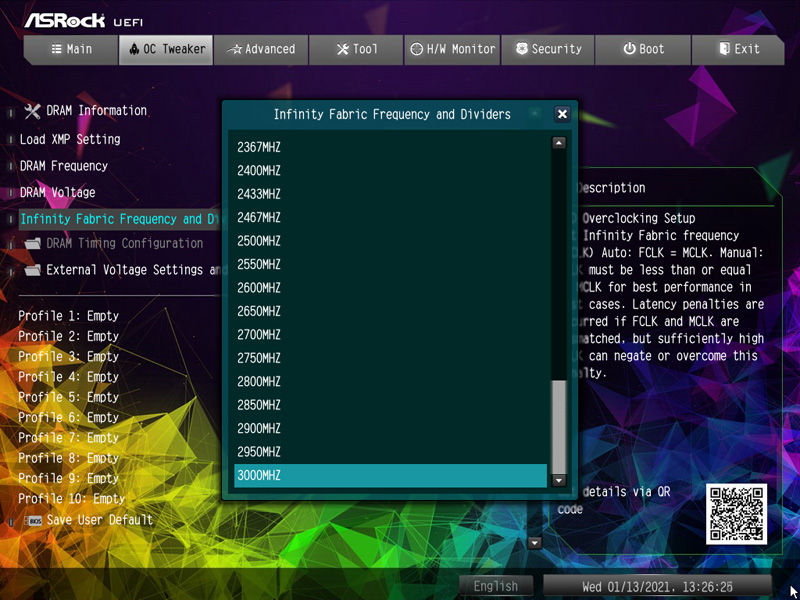
All DDR4 timings can optionally be adjusted manually and the important Infinity Fabric frequency divider can also be adjusted up to 3000MHz.
In addition you can also set the GFX frequency and GFX voltage on a processor with GPU.
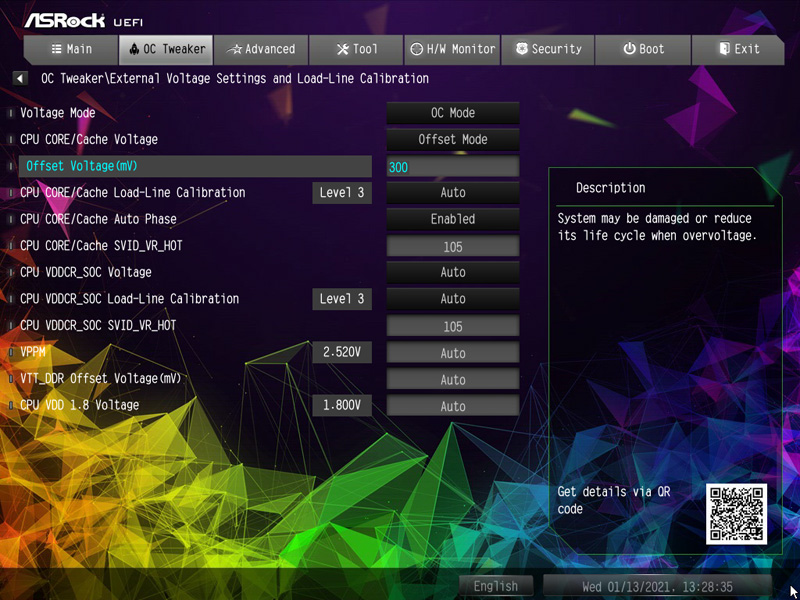
ASRock B550 Taichi Razer Edition voltage settings …
Now we come to the different voltage settings that can be adjusted in the UEFI.
Starting from the CPU Voltage over VCore Offset value, CPU VDD 1.8V Voltage up to the VDDP you have important settings, with which you can overclock the AMD AM4 CPU already well. And the DDR4 voltage can be increased in the Voltage menu, so you can overclock or undervolt DDR4 modules. We have listed all the voltages here.
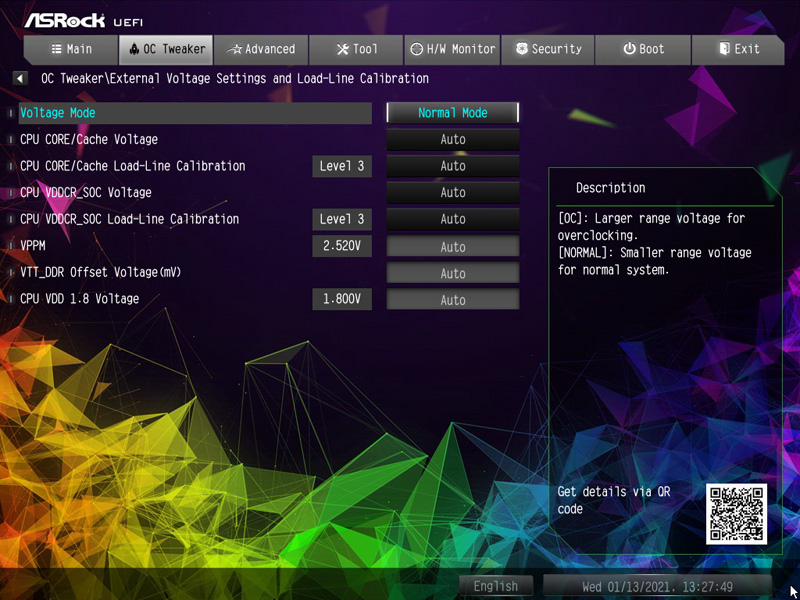
The Voltage Mode can be switched from Stable to OC Mode and only then you get the higher voltage settings.
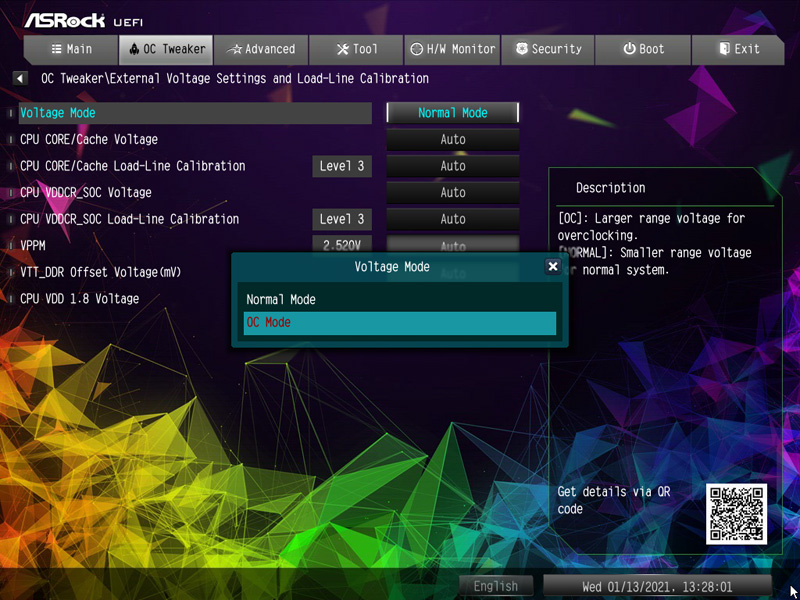
And besides, even a larger selection.
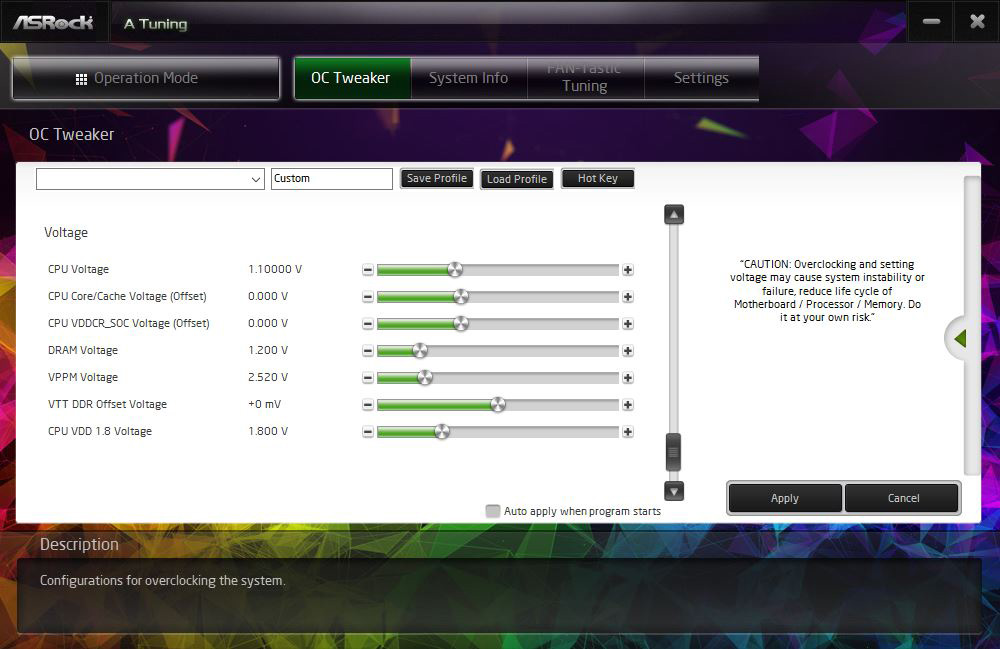
ASRock B550 Taichi Razer Edition easy overclocking …
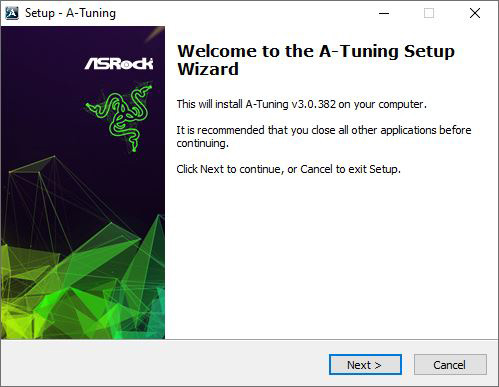
If you prefer to overclock in Windows, you can do many of the above voltage and frequency settings even with the ASRock A-Tuning tool …
… or as shown in the soon published AMD Ryzen OC guide you can also overclock with the AMD Ryzen Master Tool.
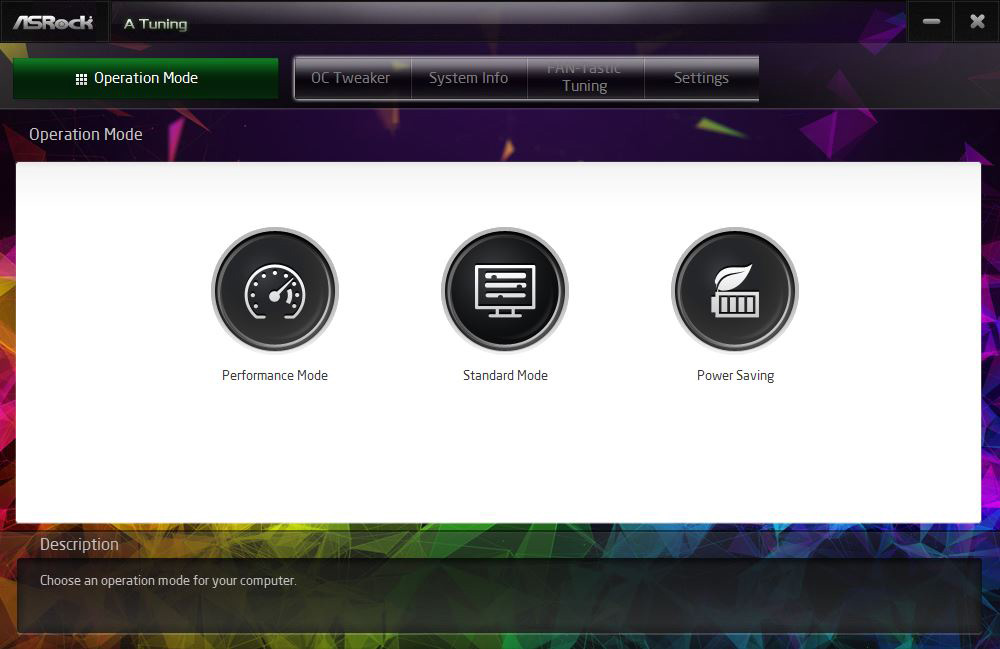
As you can see very clearly, there are …
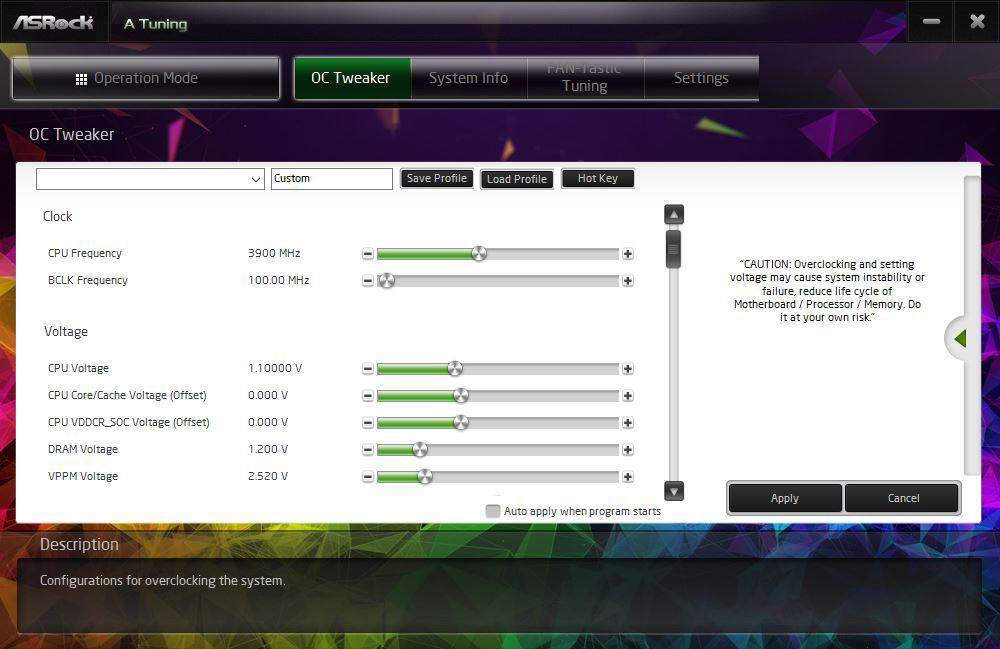
… some settings for comfortable overclocking in the A-Tuning Tool.
Once the desired settings have been found, you can save up to five different BIOS settings with names in the UEFI under OC Tweaker.
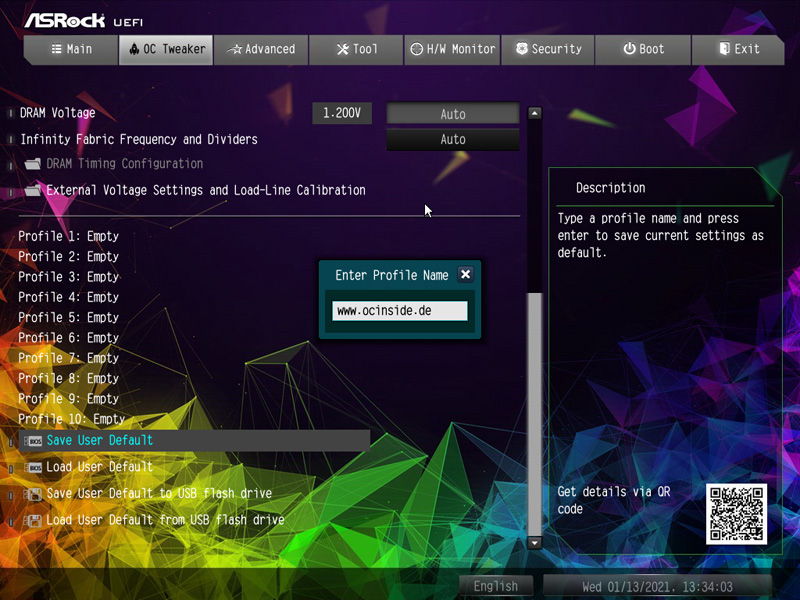
For example, you could store a balanced BIOS setting, overclocking settings and undervolting values or Office and gaming settings as a user profile, so that you can quickly reload these values at any time.
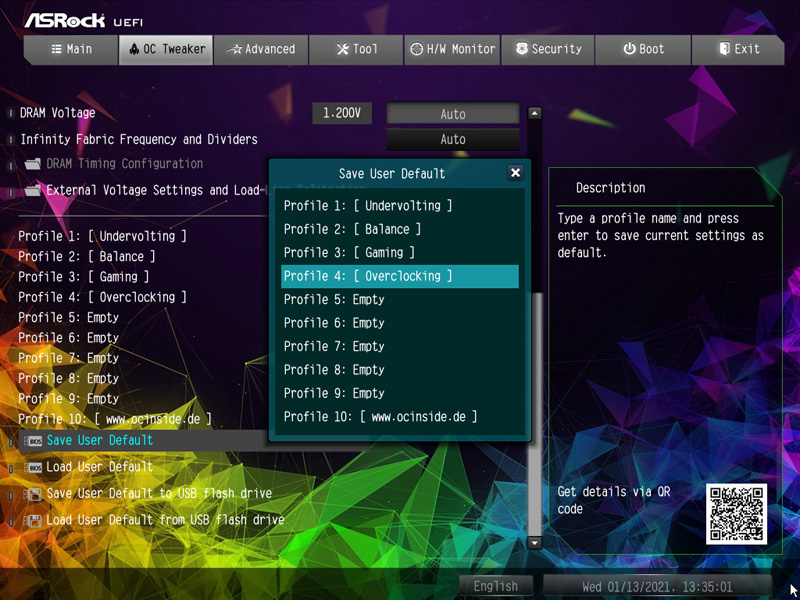
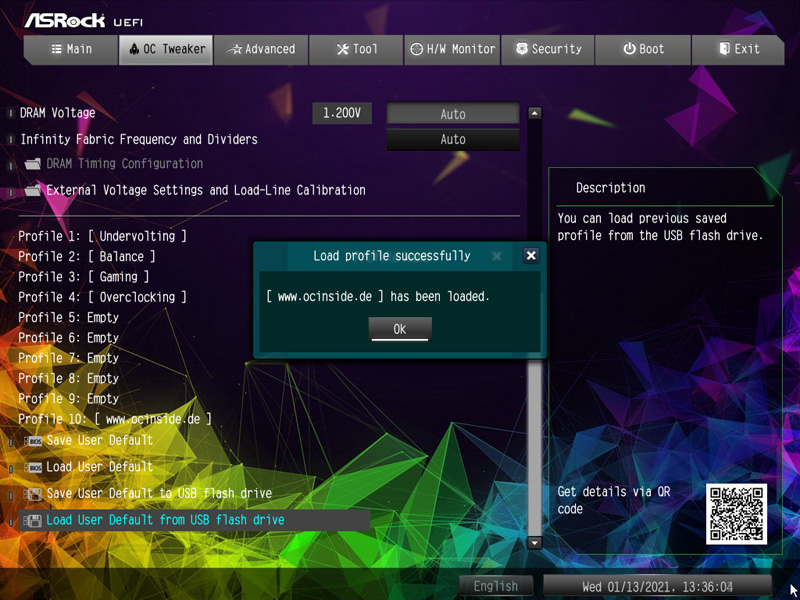
Interesting is also the Save User UEFI Setup Profile to Disk option. Just click to save your own UEFI settings on the hard drive or an USB stick.
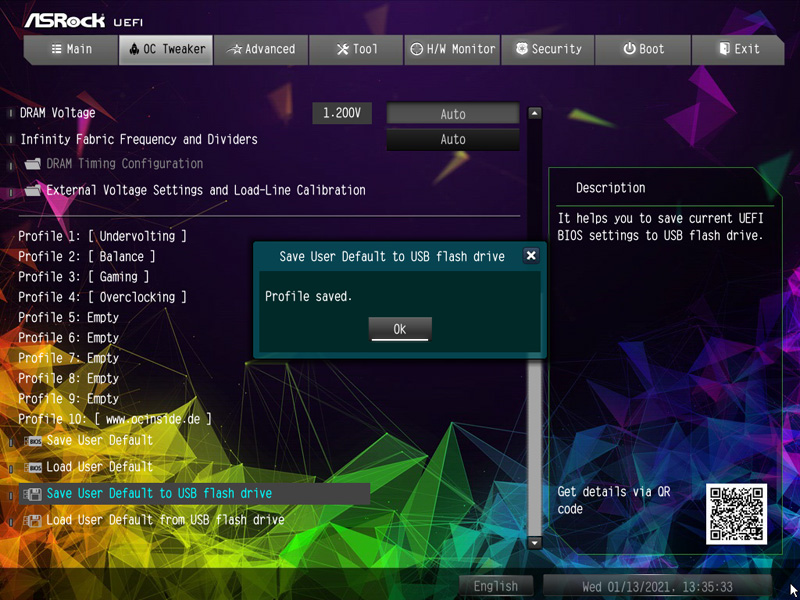
And very easy to load again.
BIOS Undervolting …
Underclocking was also checked again in this test. For this the AMD Ryzen CPU was set to the lowest value via the BIOS and could therefore be underclocked to approx. 2200 MHz or in idle to approx. 800 MHz. Of course, underclocking is like overclocking outside of the manufacturers specification, so it is necessary to have some luck. ASRock gives several options for easy PC underclocking / downclocking.

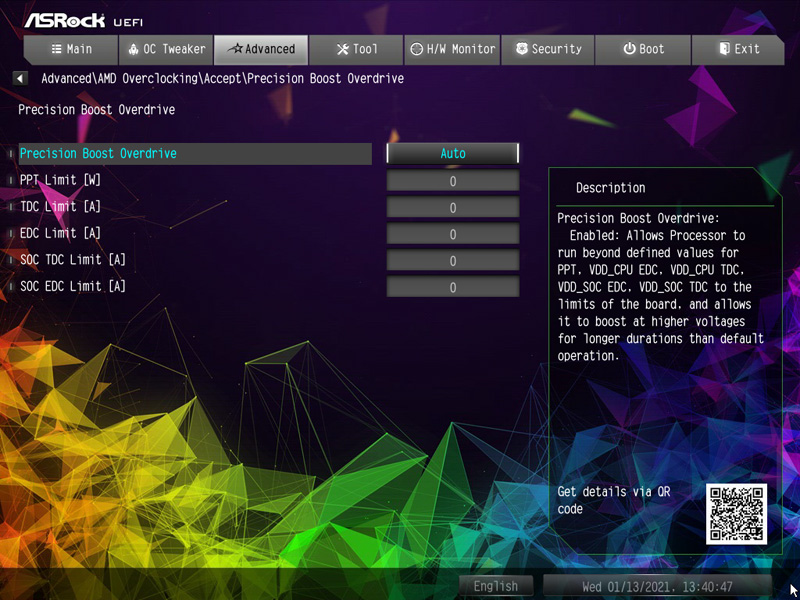
Somewhat hidden, the AMD Ryzen PBO settings can also be found in the UEFI after accepting the instructions for use.
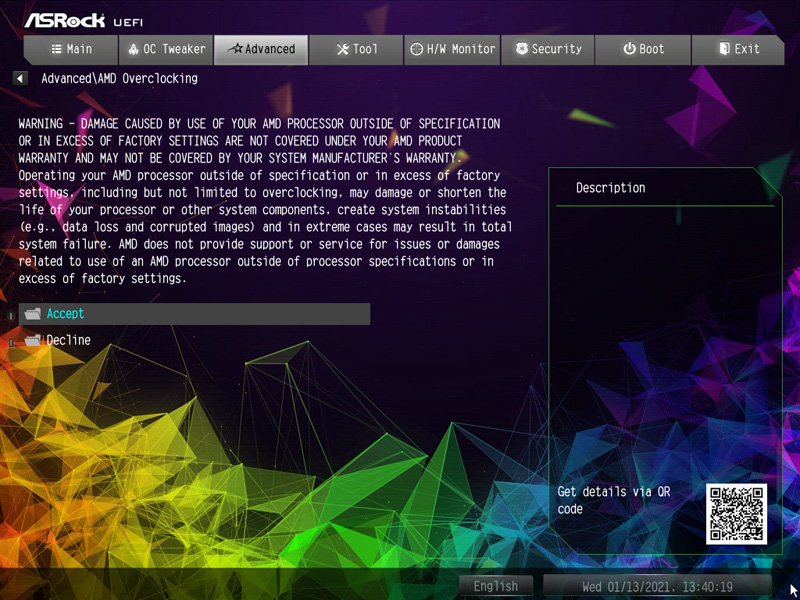
Among others also the PBO (Precicion Boost Overdrive) settings for automatic overclocking.
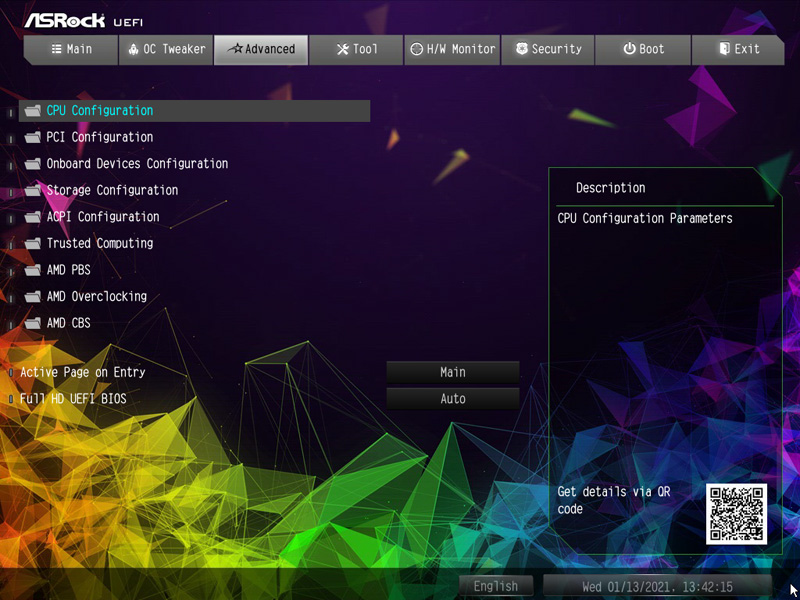
Via the Advanced menu with the CPU Configuration, Onboard Devices Configuration, Storage Configuration, ACPI Configuration, Trusted Computing, AMD CBS Menüs, AMD PBS and AMD Overclocking …
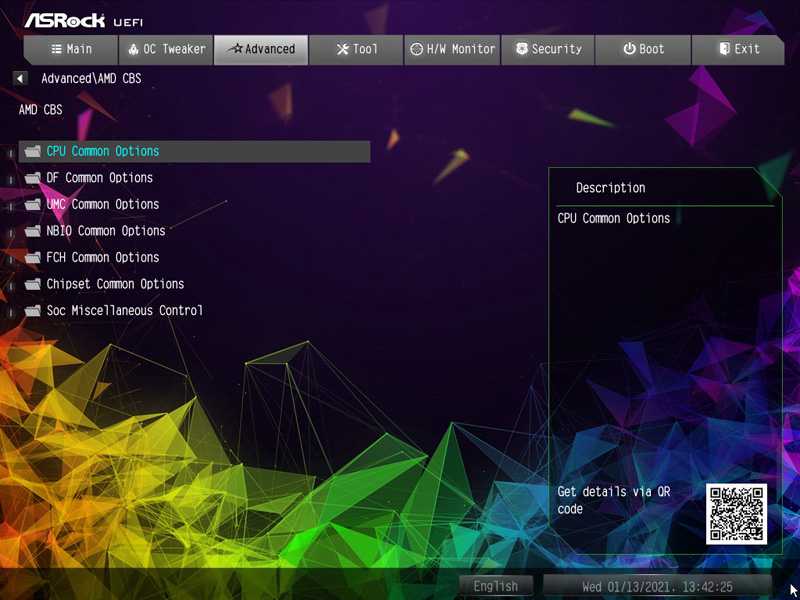
If you get to the AMD Ryzen settings under AMD PBS and CBS on AM4 motherboards, you can also set the previously mentioned Custom Core PStates under CPU Common Options.
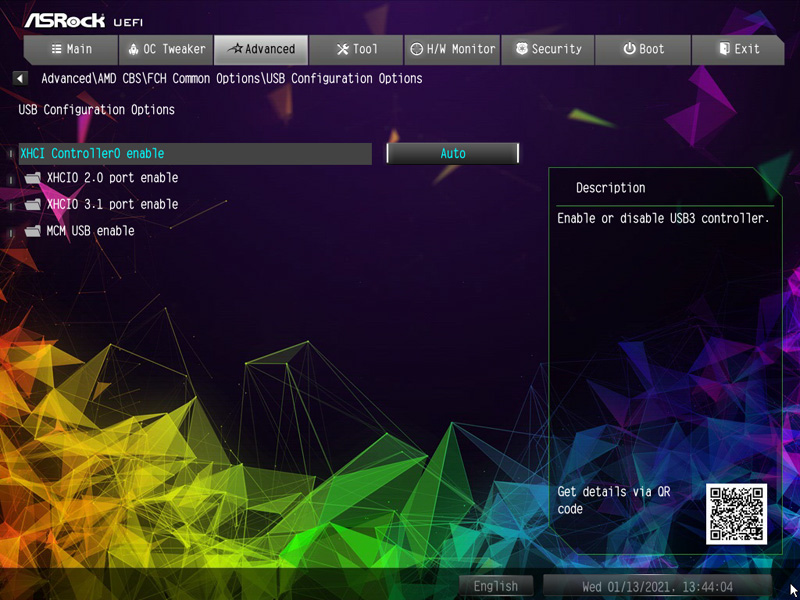
Under Advanced -> AMD CBS -> FCH Common Options -> USB Configuration Options you will find the USB ports (default by AMD).
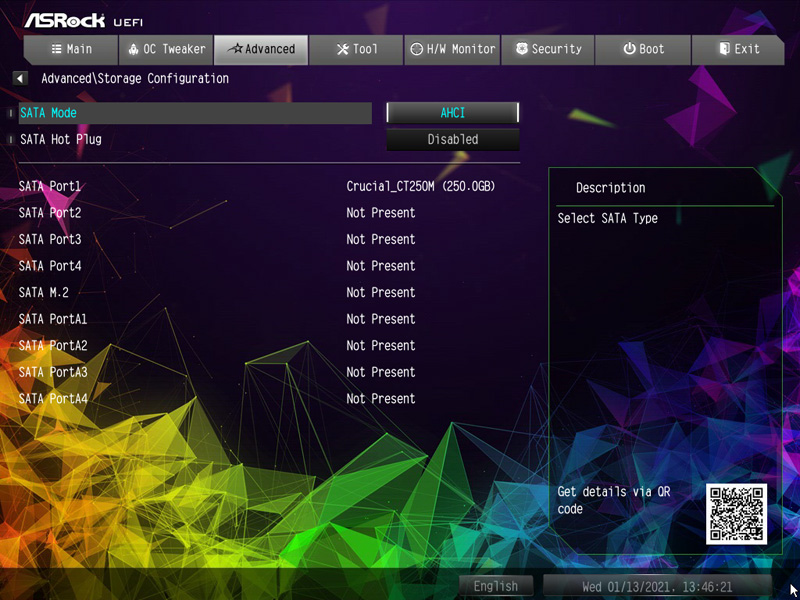
The SATA controllers can be found at the AMD Ryzen in the UEFI under Advanced -> Storage Configuration.
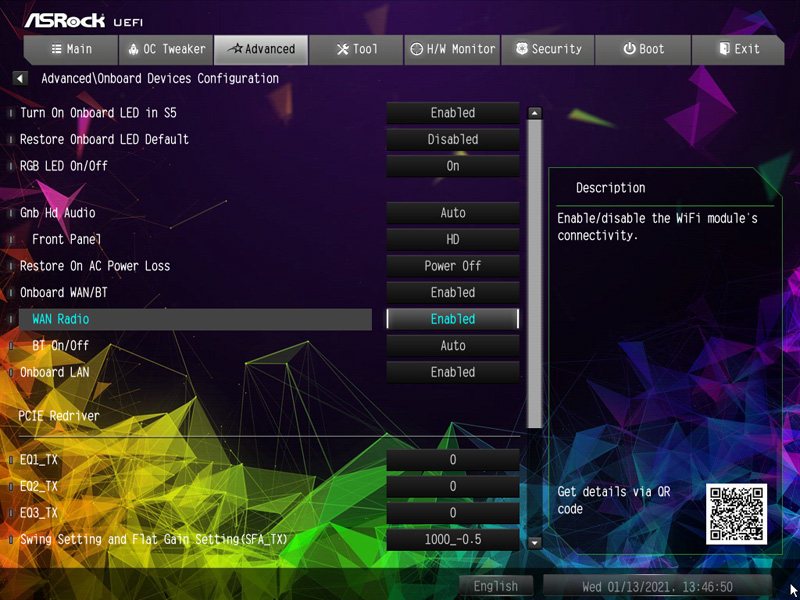
And under Advanced -> Onboard Devices Configuration you can find important setting options for the integrated components.
However, we still hope for a search function in the UEFI, which we would like to suggest again at this point 😉
Fan control …
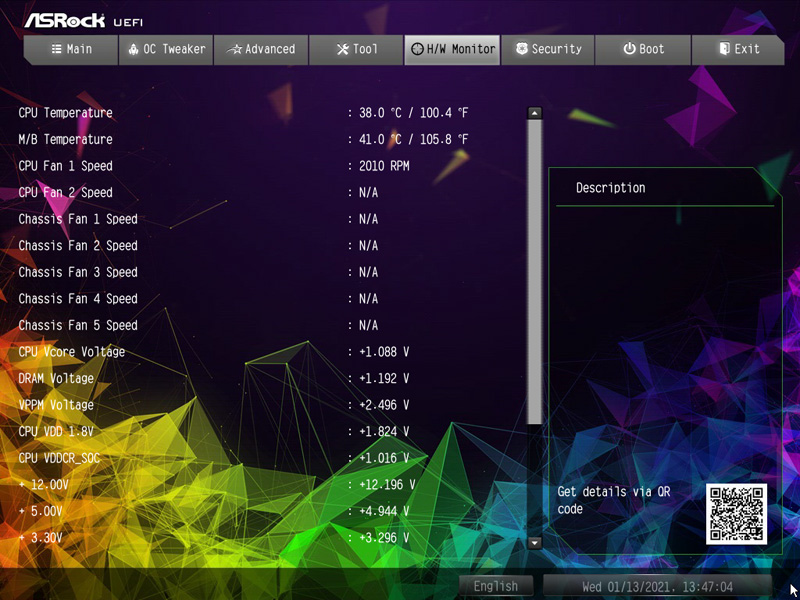
The UEFI Setup of the passive cooled B550 Taichi Razer Edition motherboard offers extensive temperature fan control options. The settings for the fan controller can be found in H/W Monitor directly below the temperature and voltage display.
The fan adjustments can be found under Fan Configuration.
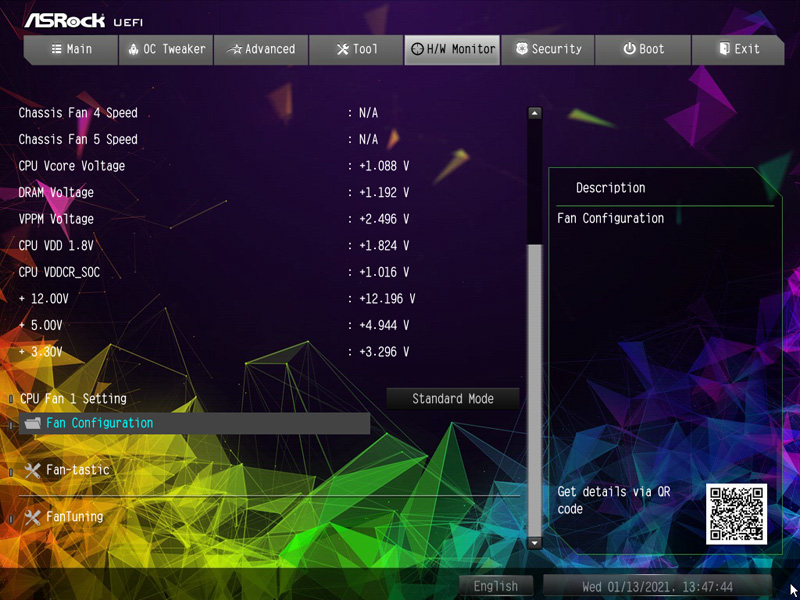
You have the choice between Customize, Silent, Standard, Performance and Full Speed. The fan settings are changed immediately, so you can hear the sound differences immediately.
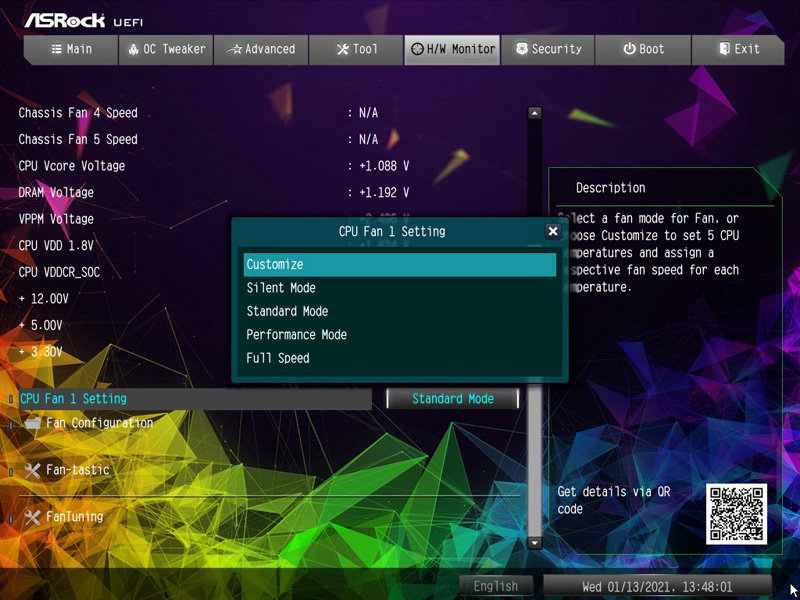
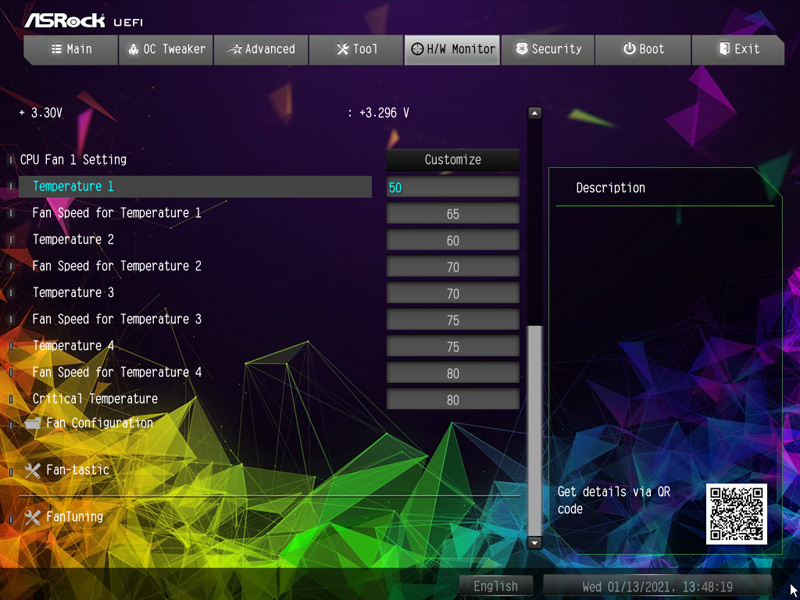
In Customize mode there are several temperature steps available to assign a certain fan speed.
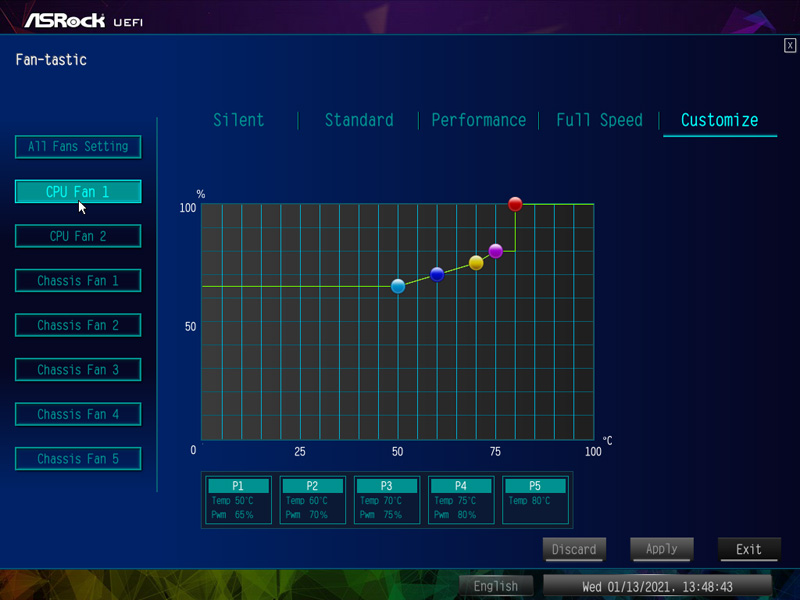
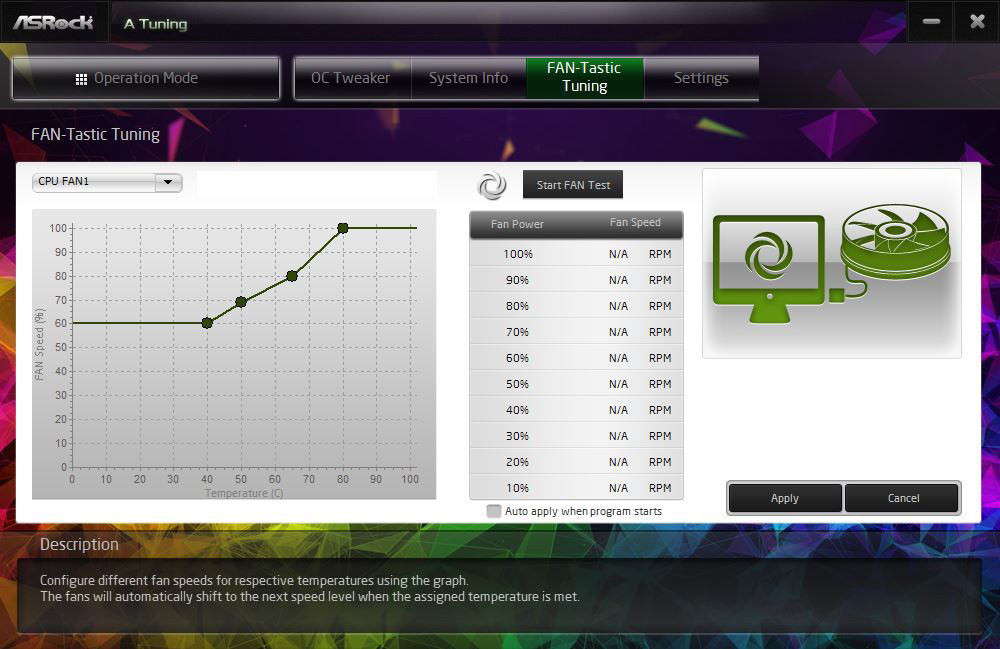
ASRock has again integrated a graphical interface for controlling the fans in the UEFI setup of the B550 Taichi Razer Edition. The FAN-Tastic Tuning menu item can also be found in the H/W monitor and can be used to make all settings very clearly. Simply select the respective fan connection on the left side and then select the mode on the right side: Silent, Standard, Performance or Full Speed.

In Customize Mode you can even select and save the values directly in the diagram.
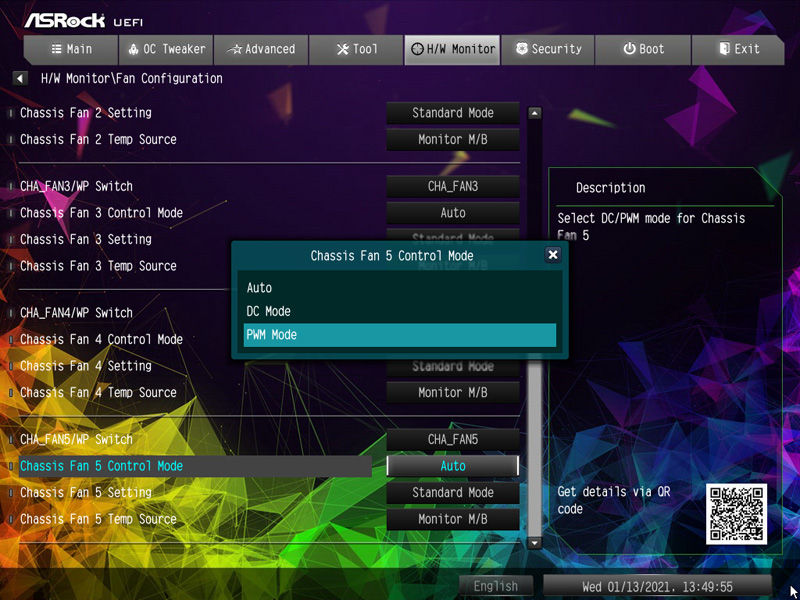
For the chassis fan connectors you can even select, which source you want to use for temperature measurement – CPU Sensor or Motherboard Sensor.

And even the control of the 3-pin chassis fans was thought of with the DC/PWM mode switch.
If you prefer to set the values in Windows, you can use also the ASRock A-Tuning tool.
You can usually get along without an expensive Fan Controller, because the fans are controlled with this fan control based on CPU or motherboard temperature.
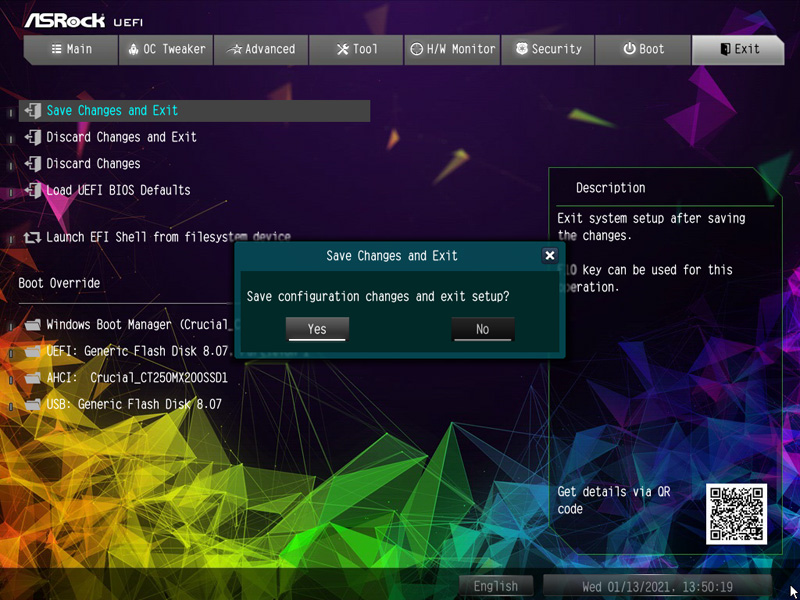
If everything is set in the UEFI, simply save with the F10 key and confirm with Z or with Y for an English keyboard.
ASRock B550 Taichi Razer Edition energy consumption …