

Raspberry Pi Zero Retro Gaming Handheld Recalbox Software …
A very important point for the function of our Retro Gaming handheld is the software. As operating system/user interface we use the well known software Recalbox, which is available as a free download version especially designed for the Raspberry Pi Zero.
Just enter “Recalbox download” in the Google Search.
We have used Recalbox version 4.0 for this manual. In the standard configuration the system is unfortunately not immediately optimally configured for our case of application. We have to set up that we control the GPIOs to which we output the audio signal and the image output is via the composite output instead of the standard output via HDMI. The settings for image and sound output are made via the file “config.txt” in the “boot” directory of the SD card.
Here is the complete content of our config.txt
# uncomment if you get no picture on HDMI for a default "safe" mode
#hdmi_safe=1
disable_overscan=0
# uncomment to force a specific HDMI mode (this will force VGA)
#hdmi_group=1
#hdmi_mode=1
# Sound output. Set to 0 or comment for autodetect, 1 for DVI, 2 to force HDMI.
#hdmi_drive=2
# Using /etc/modules is deprecated and no longer supported on 4.4 kernel
# So manually enable audio
dtparam=audio=on
#config_hdmi_boost=0
# force hdmi while the tv can take time before sending the signal on the hdmi output
#hdmi_force_hotplug=1
# uncomment for composite PAL
sdtv_mode=2
# uncomment for lirc-rpi
#dtoverlay=lirc-rpi
# if you plug your tv at the same time as your rpi and that the rpi switches from the hdmi or give a low resolution because tv had no enough time to initialize it
boot_delay=3
# uncomment if you don't want the rainbow at startup
disable_splash=1
# default CEC name
cec_osd_name=recalbox
# Overclock
gpu_mem_256=128
gpu_mem_512=256
gpu_mem_1024=512
avoid_safe_mode=1
kernel=zImage
dtoverlay=pwm-2chan,pin=13,func=4,pin2=12,func2=4
overscan_scale=1
The penultimate line of the above code defines that the sound is output in stereo via GPIO 13 and GPIO 12. This is where our project clearly differs from most other Retro Gaming handheld projects on the Internet, as it either outputs only mono sound or even places a sound channel on the same GPIO as the controller’s Y key.
If you don’t want to make the changes yourself, you can download the config.txt of our project here and add it to the project by simply replacing the file on the SD card. The easiest way to get access to the SD card is to insert the card on a Linux PC (can also be a virtual machine or a live system on a USB stick), since Windows unfortunately does not support the file system used by the SD card. If you use a Raspberry PI Zero W (with integrated W-LAN) for the project, you can also access the running Raspberry via W-LAN and the PuTTY software and modify the Config.txt during operation. Access via Putty is obtained by entering the IP address of the Raspberry in Putty and connecting to the Raspberry with the user “root” and the password “recalbox”.
The controller settings and a few more can be done via the file “recalbox.conf”. Here are some important settings, which you should take over in any case …
Set audio output to 100%:
# ------------ C - Audio ------------ #
## Set the audio device (auto, hdmi, jack)
audio.device=jack
## Set system volume (0..100)
audio.volume=100
## Enable or disable system sounds in ES (0,1)
audio.bgmusic=1
Activate the GPIO controller. Only activate ONE controller here. Enter “enabled=0” for all other controller options:
# ------------ D2 - GPIO Controllers ------------ #
## GPIO Controllers
## enable controllers on GPIO with mk_arcarde_joystick_rpi (0,1)
controllers.gpio.enabled=1
## mk_gpio arguments, map=1 for one controller, map=1,2 for 2 (map=1,map=1,2)
controllers.gpio.args=map=1
Und den Videomode auf “default” umstellen:
# ------------ H - HERE IT IS - GLOBAL EMULATOR CONFIGURATION ------------ #
## The global value will be used for all emulators, except if the value
## is redefined in the emulator

## Set game resolution for emulators
## select your mode from the command : tvservice -m [MODE]
## CEA 5 HDMI : 1920x1080 @ 60Hz 16:9, clock:74MHz interlaced
## CEA 4 HDMI : 1280x720 @ 60Hz 16:9, clock:74MHz progressive
## use 'default' for using the default resolution
## use 'auto' : switches to CEA 4 HDMI if supported, else keep the current resolution
## (string)
global.videomode=default
In order to be able to read the names of the games later during operation, the font size of the games list must be increased, as it is designed for HD resolution and would not be readable on our small SD display.
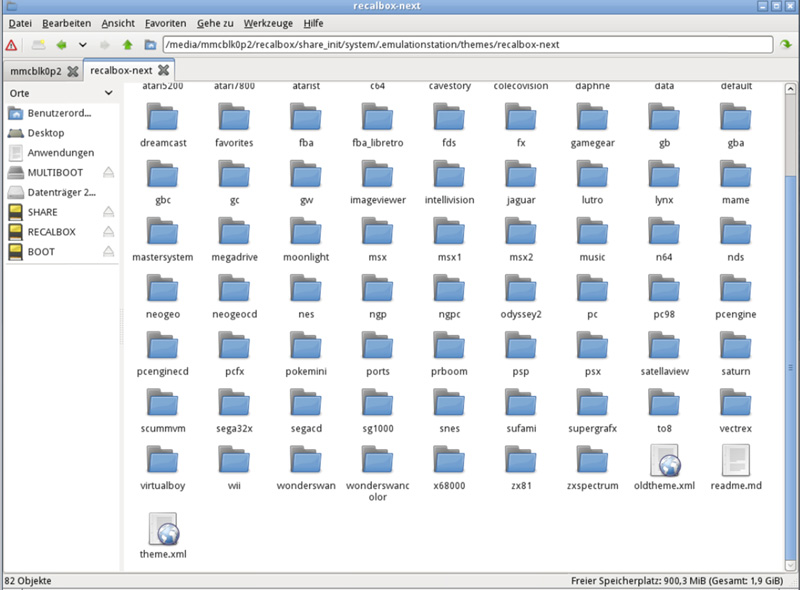
We adjust the font size of the game list in the file Theme.xml in the theme folder of Recalbox. You can see the path in the following screenshot.
In the file theme.xml the value of <font-size> must be changed from 0.02 to 0.05 in the following paragraph. The parameter is almost at the end of the file.
<textlist name="gamelist">
			<fontPath>./data/arts/Exo2-BoldCondensed.otf</fontPath>
			<fontSize>0.05</fontSize>
			<forceUppercase>1</forceUppercase>
</textlist>
This would have completed the necessary changes to the configuration files. Of course everyone can make other or further settings/changes according to his personal taste.
You can download our versions of the 3 files to be changed here and use them on your own Retro Gaming handheld, if you like.
Finally we come to the installation of the Retro Gaming Handheld components …