
Installation …
If the water cooling is to be installed in an Intel system, the mounting brackets shown in the following picture must be mounted on the pump housing.
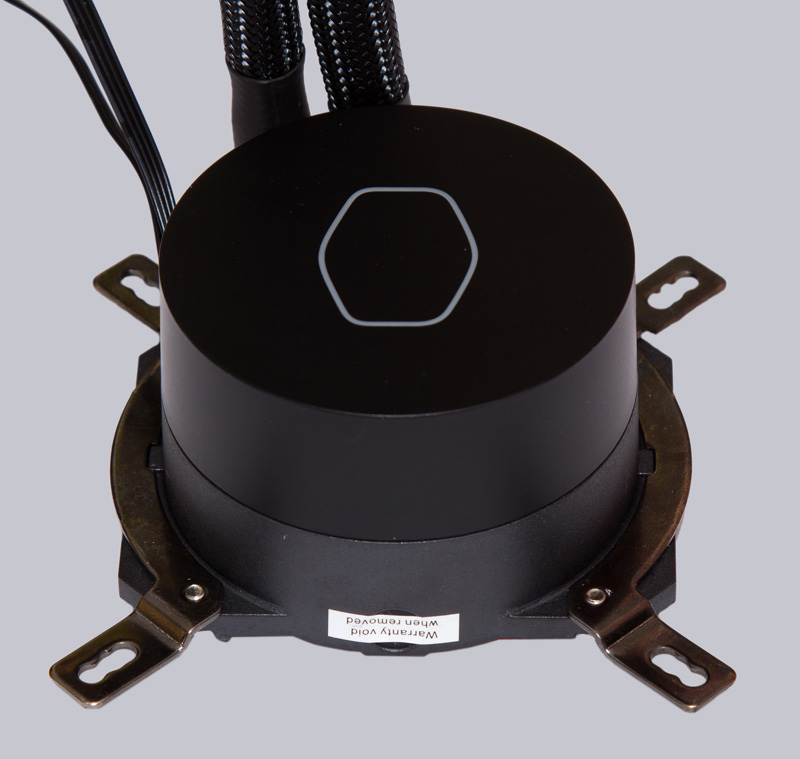
In addition, the backplate must be mounted on the back of the mainboard. Fortunately, there are even adhesive strips on the backside of the mainboard, which make mounting easier. For the final mounting you have to screw the appropriate spacer bolts from the front of the mainboard into the backplate. The included installation instructions provide information about this in clearly understandable pictures.
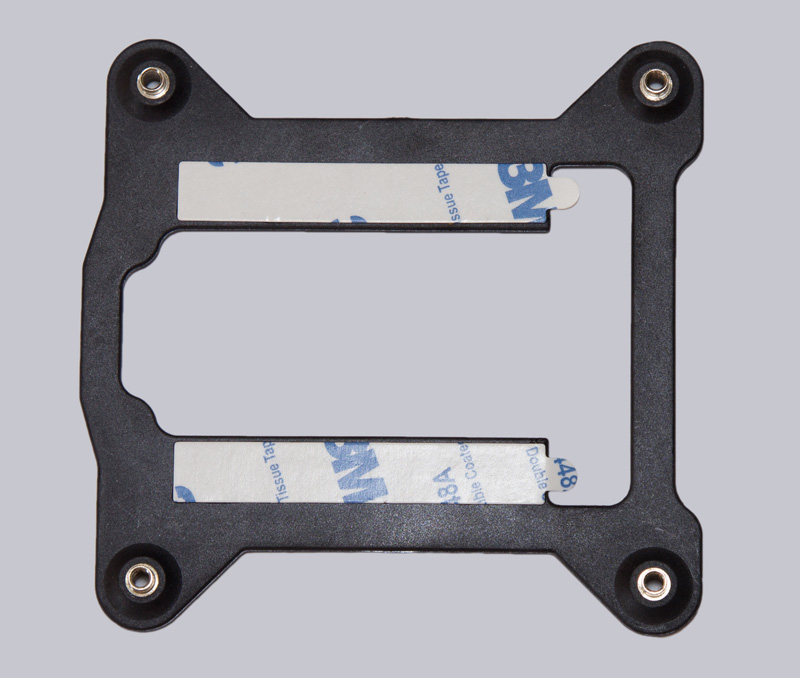
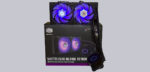
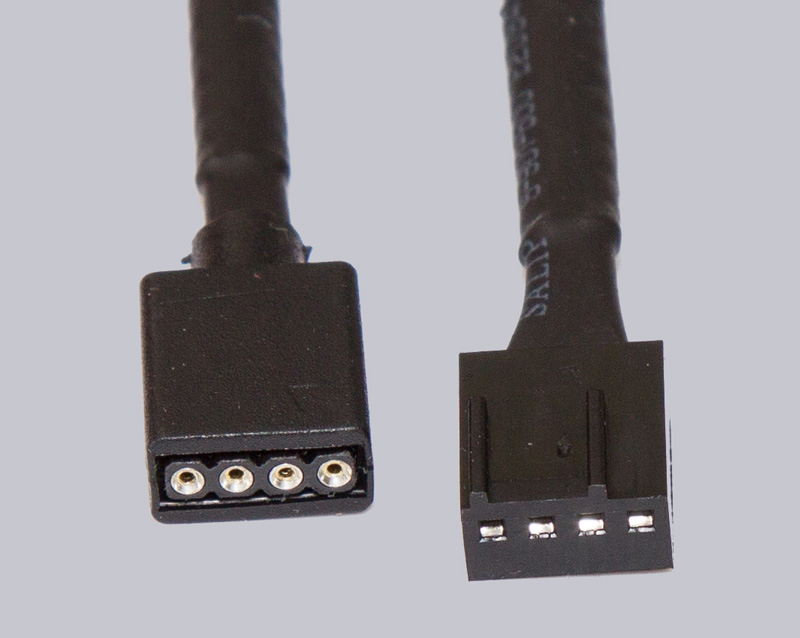
Regardless of whether you use an Intel or AMD system, the pump still needs to be electrically connected. The left connector on the following picture belongs to the RGB lighting. You can either connect it to the mainboard or to the included RGB controller. The right connector is connected to the CPU fan connector of the mainboard.
It is best to make sure in the BIOS that the CPU fan speed is fixed to maximum before mounting, because the manufacturer does not provide a speed control of the pump. You can use for example the original CPU cooler that comes with the processor. If no other cooler is available, you can also do this quickly after installing the water cooling.
With our AMD test system with AM4 socket the installation effort is very low!
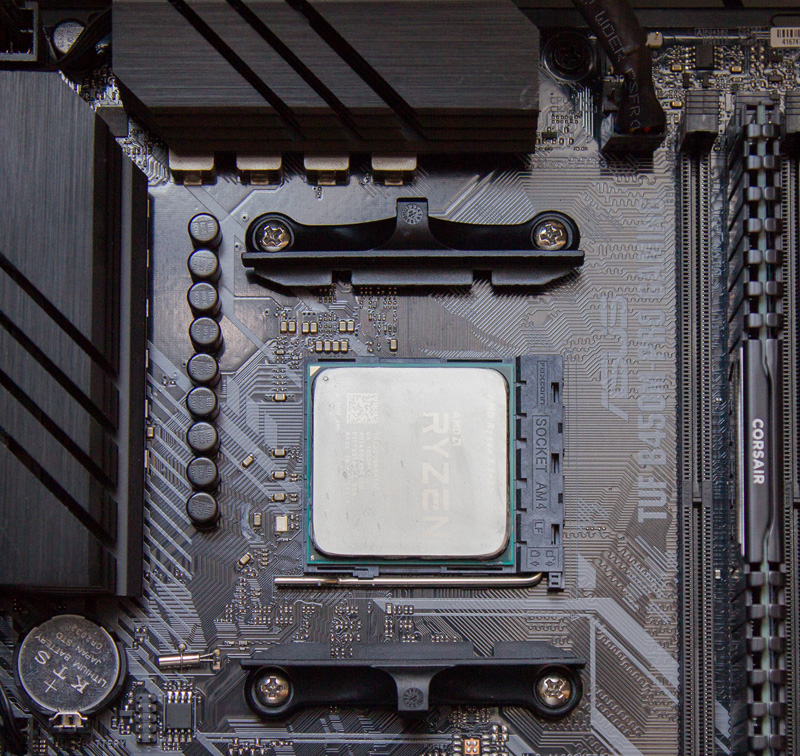
We can mount the cooler on the original CPU cooler bracket. First the AMD mounting brackets must be screwed on the CPU cooler, but this is a piece of cake. You should pre-set the clamping screws as far opened as possible, but not so that the nut is loose. Right on the following photo the nut is screwed on too far. In this condition one could not mount the cooler. Or you would have to apply too much force, which could damage the computer.

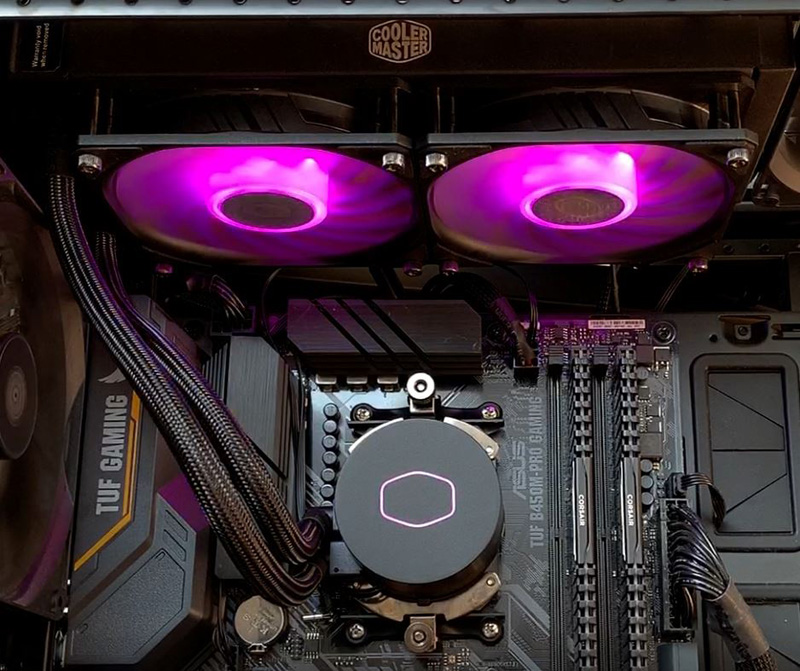
Then remove the protective foil from the cooler and apply some heat conductive paste to the CPU. A pea-sized drop in the middle of the CPU is sufficient. The heat-conducting paste will then distribute itself under the contact pressure between CPU and cooler. After that, just place the cooler on the CPU and hook the two retaining tabs. Finally tighten the two nuts and connect the two cables. The radiator can be mounted in the front or in the roof, depending on the PC case. Since Cooler Master still includes mounting screws with relatively high screw heads, there may be space problems in the area of the CPU power connectors or the VRM coolers on the mainboard. Another small point of criticism is the relatively short tube length of only 300mm. This can be too short for some cases to mount the cooler in the front. Here advance planning is necessary when choosing the PC components. With our test system there was no problem when mounting the cooler in the roof of the case.
Each of the two fans must be double wired. One each for the fan motor and the lighting. For the fan motors there are 4-pole fan connectors for PWM control. In this case you should also activate the PWM control in the mainboard. This has the advantage of a lower minimum speed compared to the conventional voltage control. So you can also reduce the overall volume of the computer, at least when the CPU has little data to process.
How loud the new Cooler Master water cooling is under full load and how good the cooling performance is, we will reveal in the next section.
Cooler Master MasterLiquid ML240L V2 RGB test setup and results …