

BIOS and Overclocking …
Get fast to the right UEFI settings …
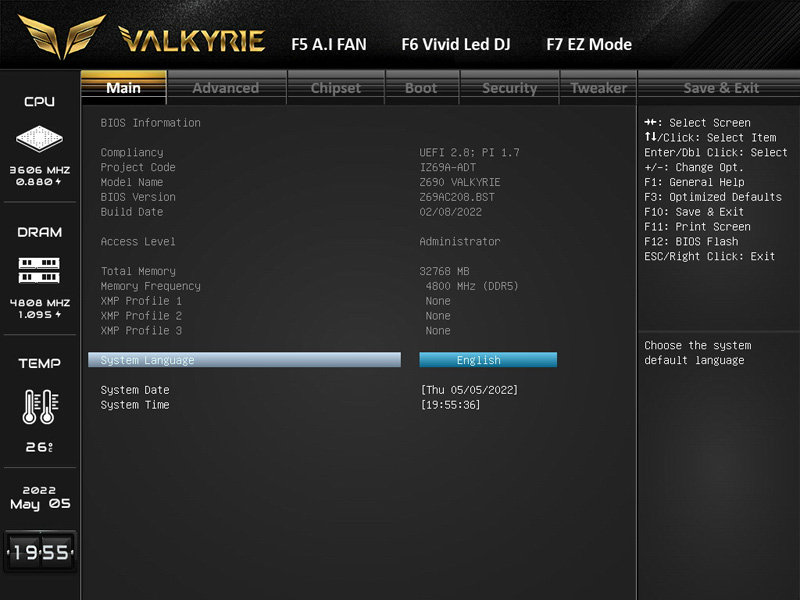
Biostar Z690 Valkyrie UEFI EZ and Advanced Mode
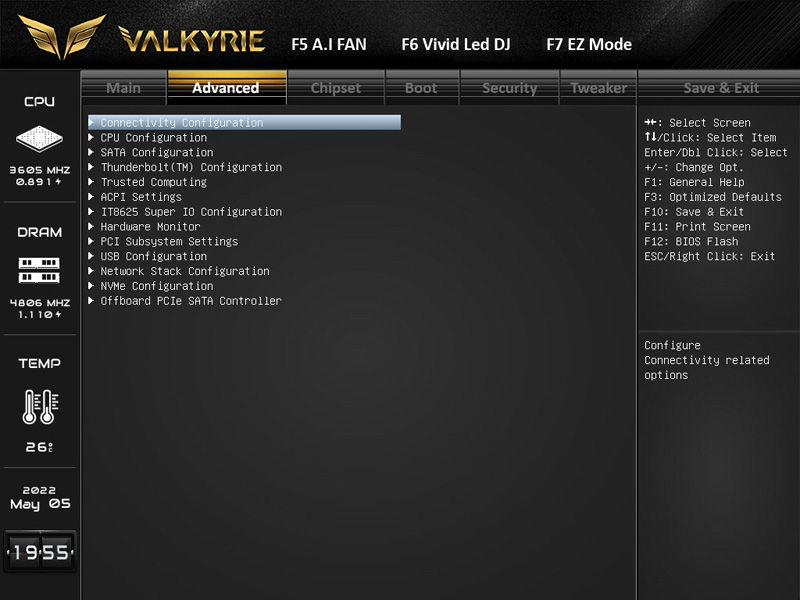
Biostar Z690 Valkyrie Advanced
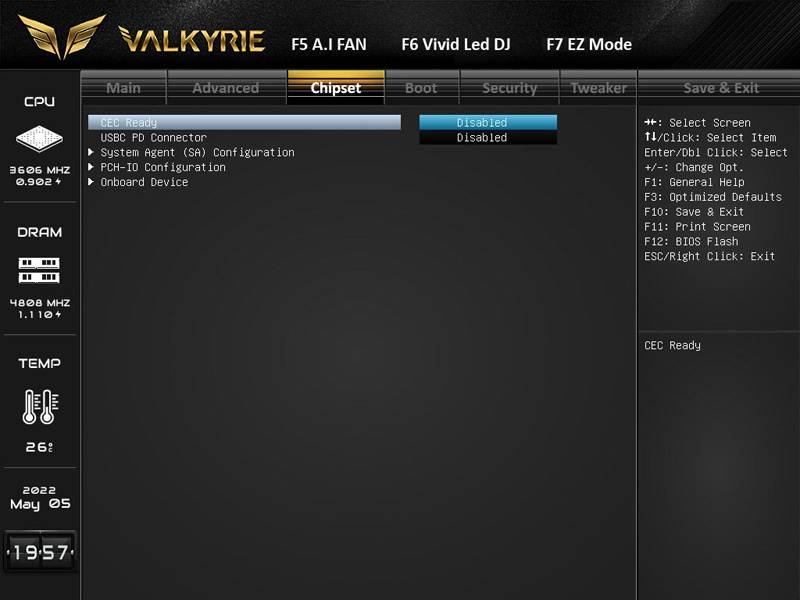
Biostar Z690 Valkyrie Chipset
Biostar Z690 Valkyrie Boot
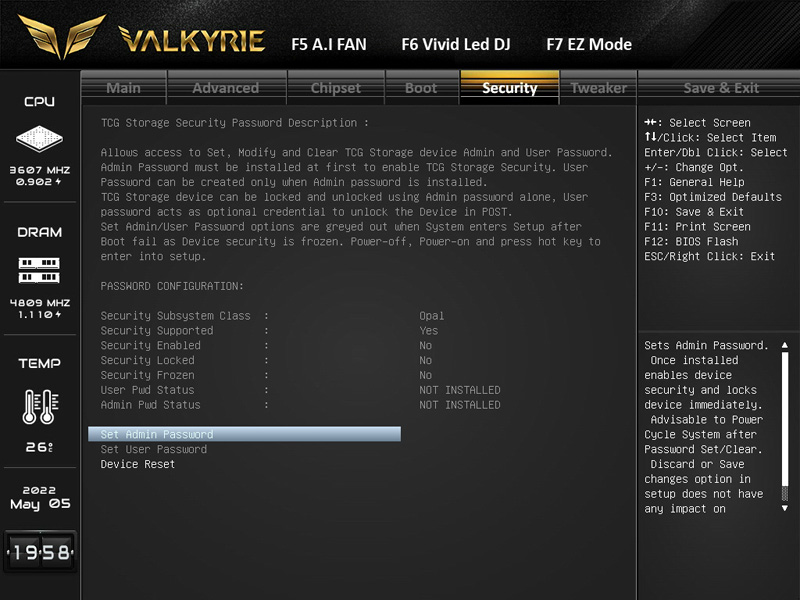
Biostar Z690 Valkyrie Security
Biostar Z690 Valkyrie Tweaker
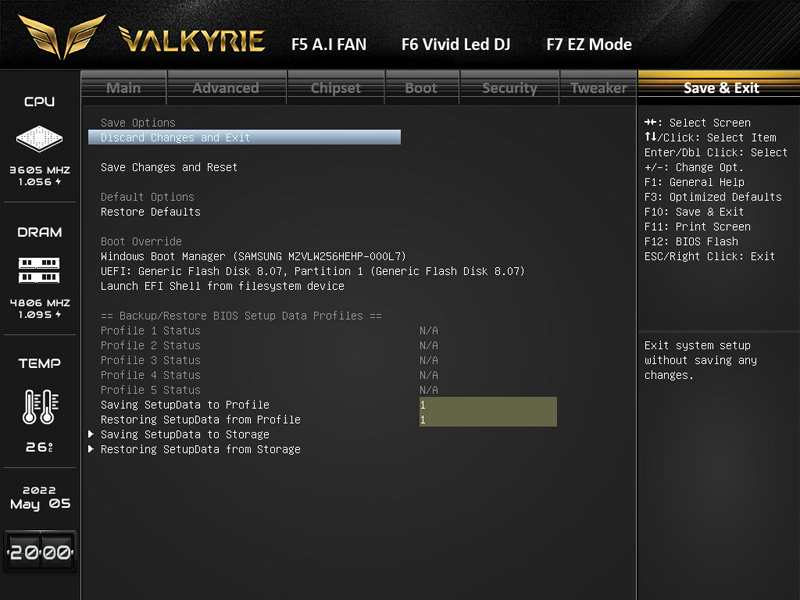
Biostar Z690 Valkyrie Save & Exit
UEFI EZ and Advanced Mode …
To access the UEFI of the Z690 Valkyrie, you have to press Del when booting the computer. After a short moment of waiting, we are already in the UEFI. Alternatively, you can also start the UEFI via Windows by holding down the SHIFT key while clicking on “Restart”.
The UEFI distinguishes between two views, on the one hand the EZ Mode and on the other hand the Advanced Mode. If you don’t explicitly change it, the simpler EZ Mode is always executed.
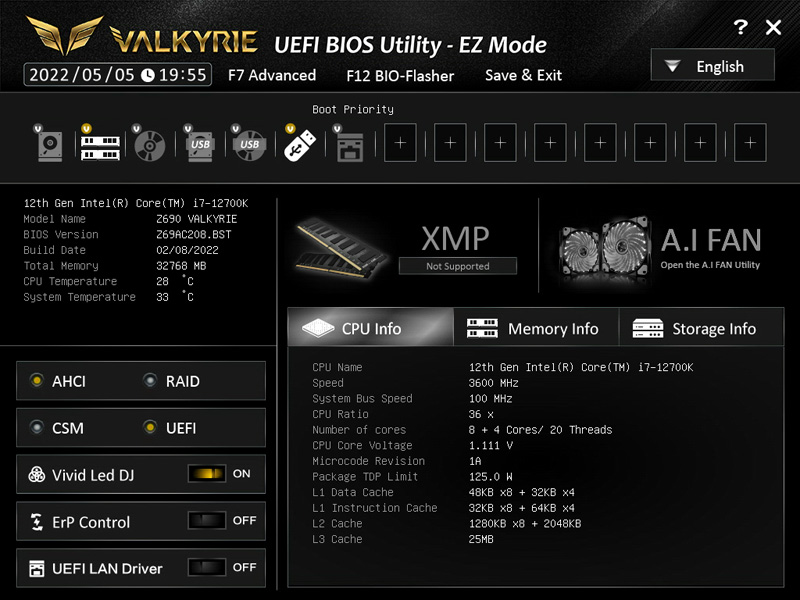
A simple overview of all important system functions awaits us in the EZ Mode of the UEFI. In the upper menu bar, you have an overview of all connected devices recognized by the motherboard. The boot order can also be determined via drag-and-drop here.
Below that, in the left part, you’ll find an overview with the most important features of the system. For example, the UEFI version, processor & system temperature as well as the installed CPU.
Further below, you can easily change the SATA protocol from AHCI to RAID and activate the CSM compatibility mode for older operating systems. There are also activation options for Vivid LED, ErP Control and support for LAN in the UEFI. If you activate the ErP mode, all system and peripheral components (USB/LAN) are no longer supplied with power when the system is in energy-saving mode.
In the right part of the overview we find a more detailed system overview with two shortcuts to the XMP profile settings and the fan settings (A.I FAN). Below that, we can look at detailed information about the processor, working memory and connected storage media.
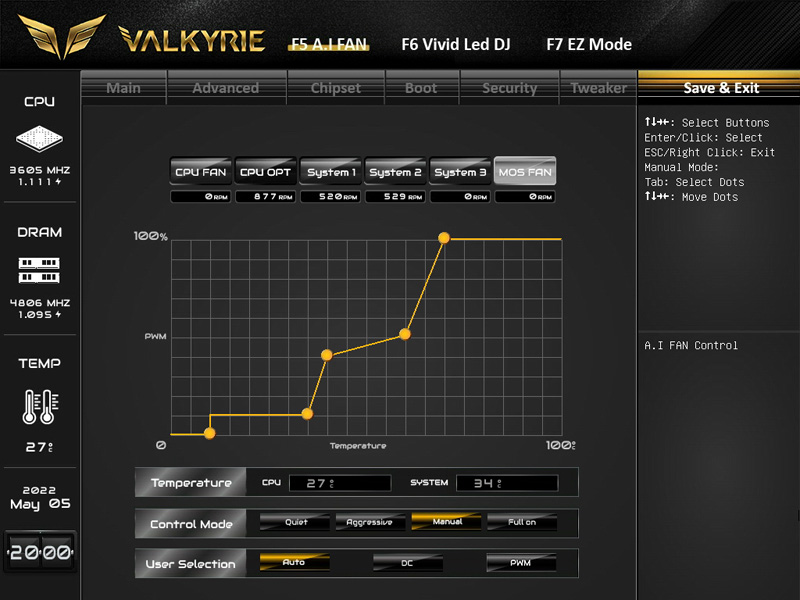
By the way, we can open the fan settings menu with F5. A well-structured graphical menu awaits us here, in which we can control every connected fan on the motherboard relatively easily.
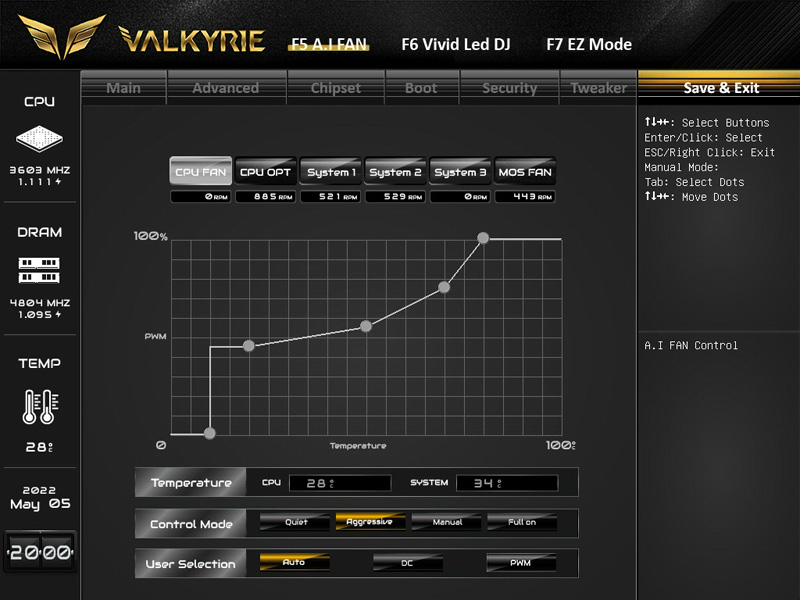
If the three profiles Quiet, Aggressive and Full-On are not enough, you can create your own fan curve under Manual. The two fans that cool the upper cooler of the processor are labeled MOS-FAN. We recommend adjusting the fan curve accordingly, but more about that later.
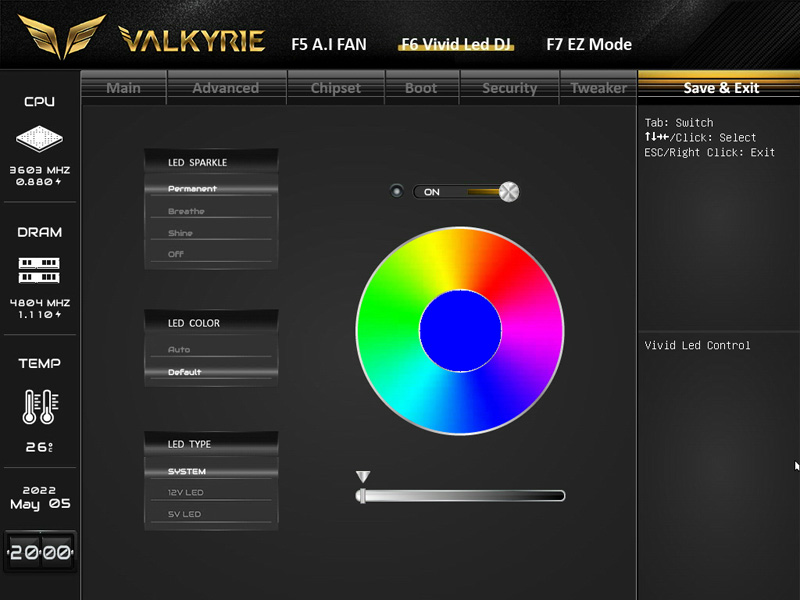
Press F6 to enter the “Vivid LED DJ” menu. Here you can order the board to suit your lighting needs. We would have liked a bit more customization options here. After all, the board is equipped with several LED outputs.
Next, let’s switch to the extended mode with F7. In contrast to EZ Mode, we find processor and RAM information summarized in a table here. A lot of new menu items appear in the new ribbon in the upper area. An overview of the current processor memory speed and temperatures is on the left.
Advanced …
The second menu item we find is called “Advanced”. Here we find all advanced settings for all subsystems of the motherboard.
Let’s start with the second subitem “CPU Configuration”.
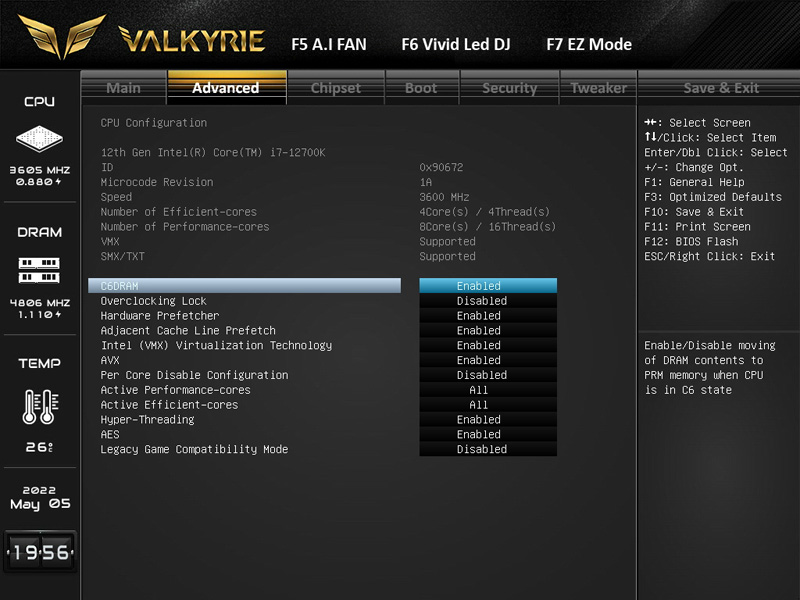
Besides a detailed overview of the processor, you can activate or deactivate all its features. Among others, AVX, VMX or Hyper Threading. Especially worth mentioning is the “Legacy Game Compatibility Mode”, which disables the 4 efficiency cores of our Intel Core i7 CPU. This is helpful insofar as there are still various software that have problems with the big-little architecture of the new Intel processors.
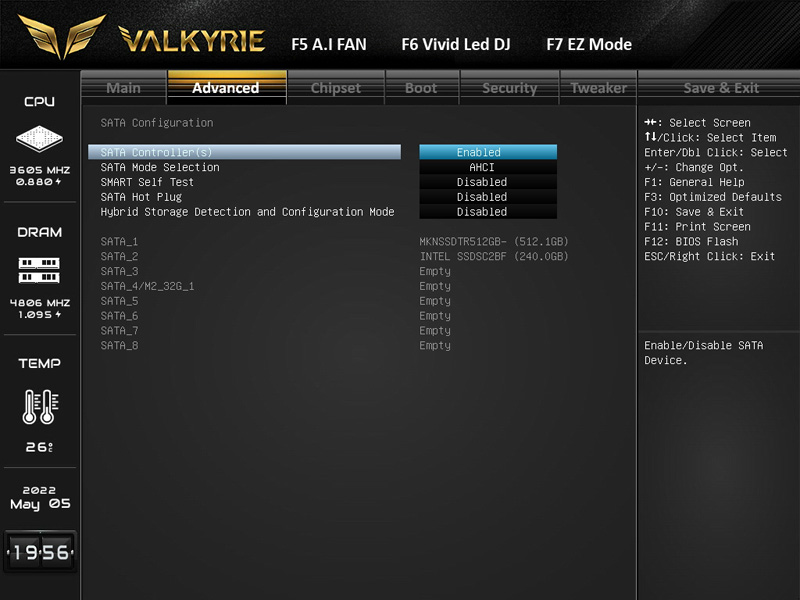
In the menu item “SATA Configuration” we find everything important about the eight SATA 6 connections. Besides SMART, you can also switch from AHCI to RAID and make the connection hot-pluggable. Speaking of RAID, you shouldn’t expect too much here. Only RAID 0, 1 and 10 are supported, and these RAID levels are only available for the first four SATA ports. Biostar could have used a better controller here.
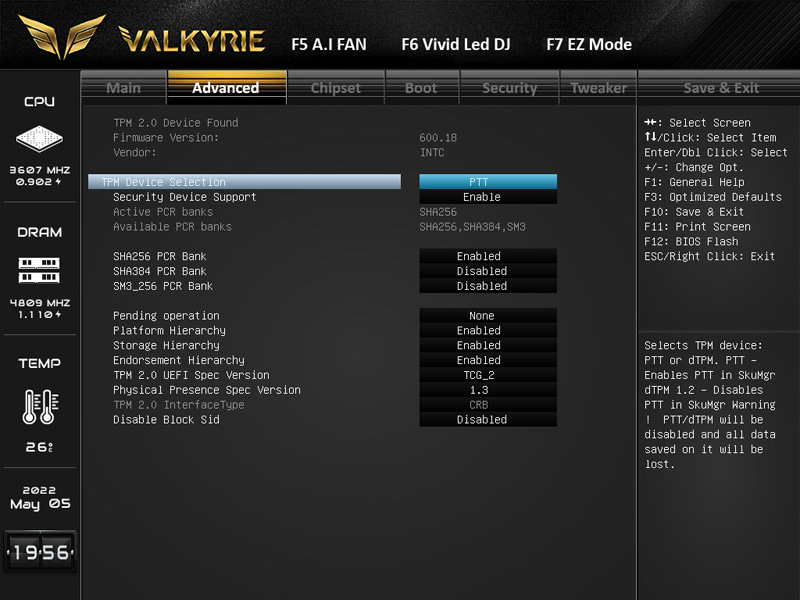
Under “Trusted Computing” you will find everything important to get Windows 11 basically running. The required TPM settings have to be set here. In contrast to the RAID controller, Biostar has done a good job here.
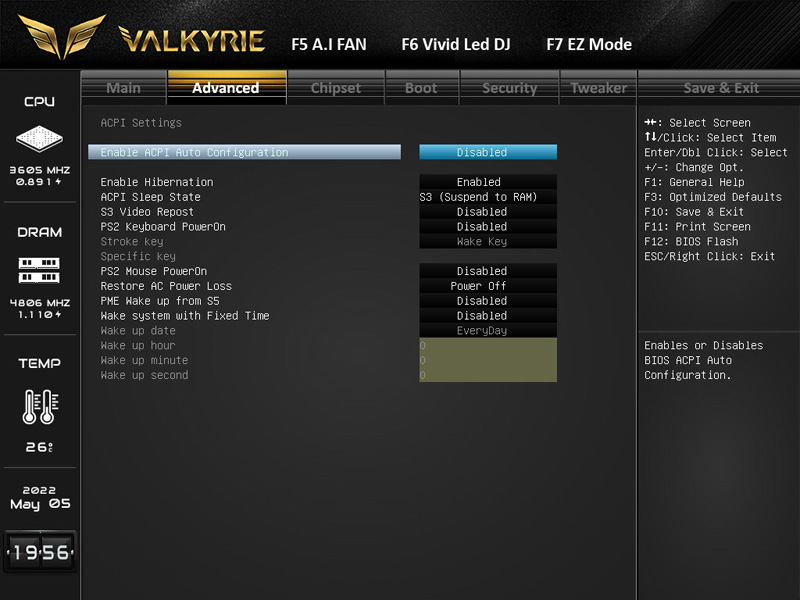
There is also nothing missing in the ACPI settings. However, if you have activated the “ErP Mode” in the “EZ Mode” overview, some triggers like PS2 or WakeOnLan will not work.
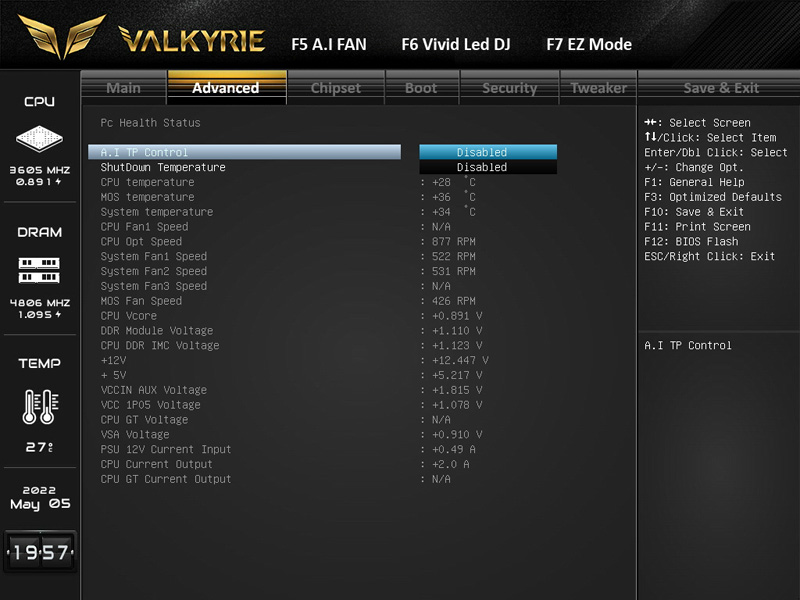
A small function called “A.I TP Control” is somewhat hidden in the “Hardware Monitor”. With this you can tell the processor how much W in TDP it is allowed to generate. Especially with silent or passive systems, you can save a lot of waste heat without having to intervene in the processor architecture. Otherwise, we find a great and detailed overview of all sensors of the motherboard here, as expected.
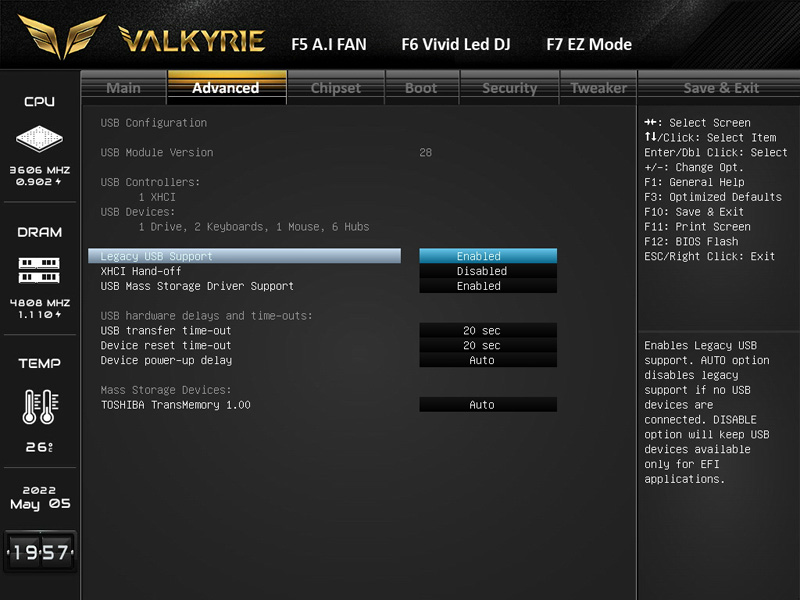
The last interesting menu item in the “Advanced” tab is the “USB configuration”. Besides the usual settings like Legacy USB Support or XHCI, we find an overview of all connected USB devices as well as optional delay settings for the connection.
We will now continue with the chipset.
Chipset …
Even though this offers significantly fewer settings, there are still one or two interesting things to discover here.
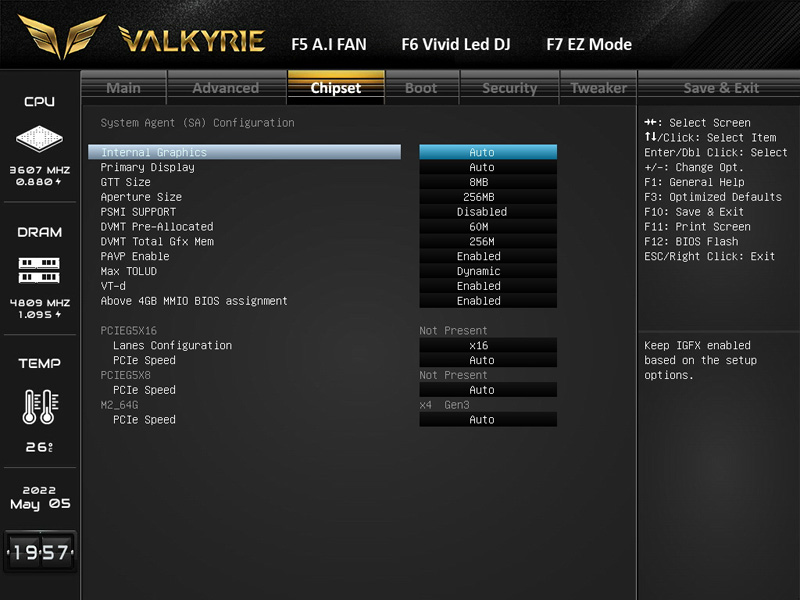
The menu item “System Agent Configuration” actually does not hide a built-in helpdesk for problems, but the settings page for the CPU’s integrated graphics unit as well as settings for the PCIe interfaces.
Now we come to the menu item Boot.
Boot …
In a nutshell, there is nothing to complain about here. The boot sequence can be adjusted to your heart’s content. Furthermore, the “Fast Boot” can also be activated here, as long as the CSM is deactivated. The adjustable “BIOS Setup Prompt Timeout” is also quite practical. If the one second to react is too fast for you, you can set the number of seconds to wait until the system boots.
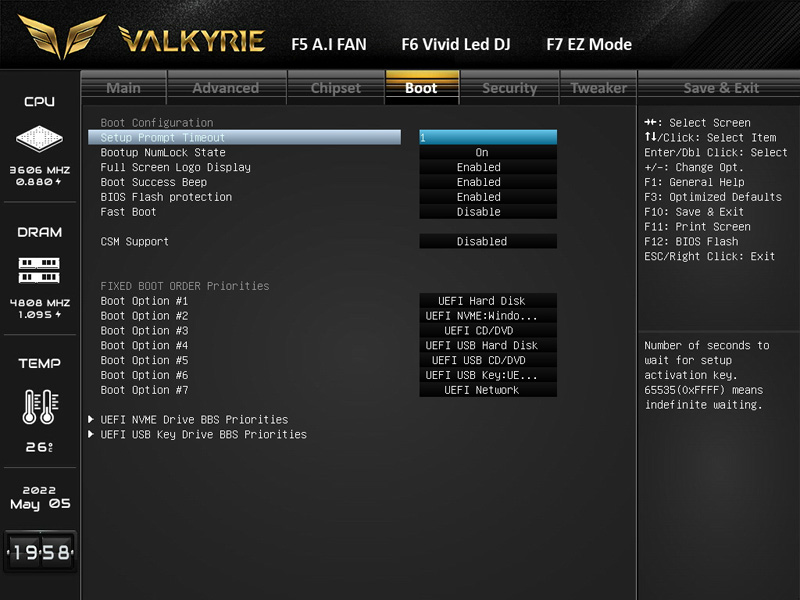
If you have several NVME SSDs or USB devices connected to the system, you can also differentiate separately from which SSD or USB hard drive/stick you want to boot from in the two menu items listed below. This is practical if you have more than one system installed.
Security …
Of course, the Z690 Valkyrie also offers a few security features besides TPM. UEFI passwords can be set in the Security menu. Secure Boot can also be enabled and configured here.
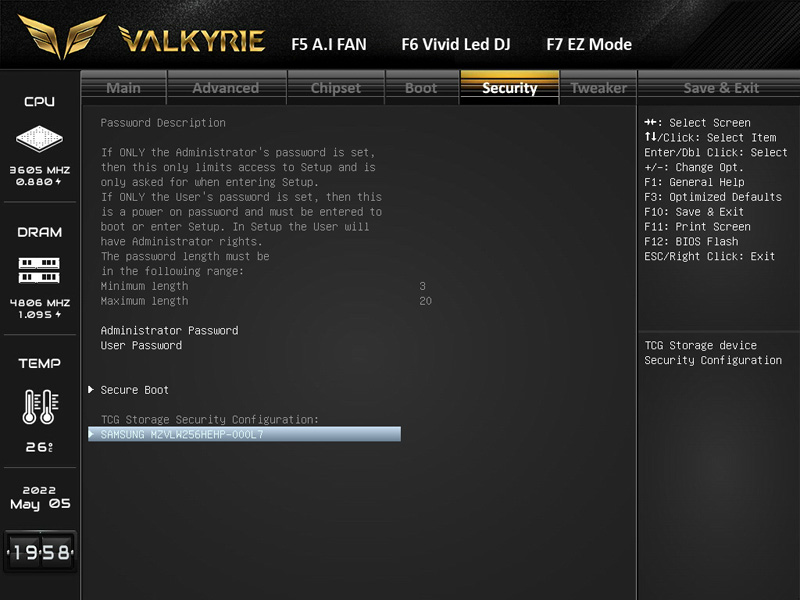
More exciting, however, is the option to encrypt your storage media. However, you should make sure to regularly back up the data to another medium. If the mainboard is defective, the data is basically lost for the time being without the corresponding key.
Tweaker …
Now we get down to the nitty gritty, the Tweaker menu tab reveals the power and overclocking options of the motherboard. As mentioned at the beginning, the motherboard always starts in “EZ Mode”. If you don’t like that, you can select any other menu item under “Start Page”.
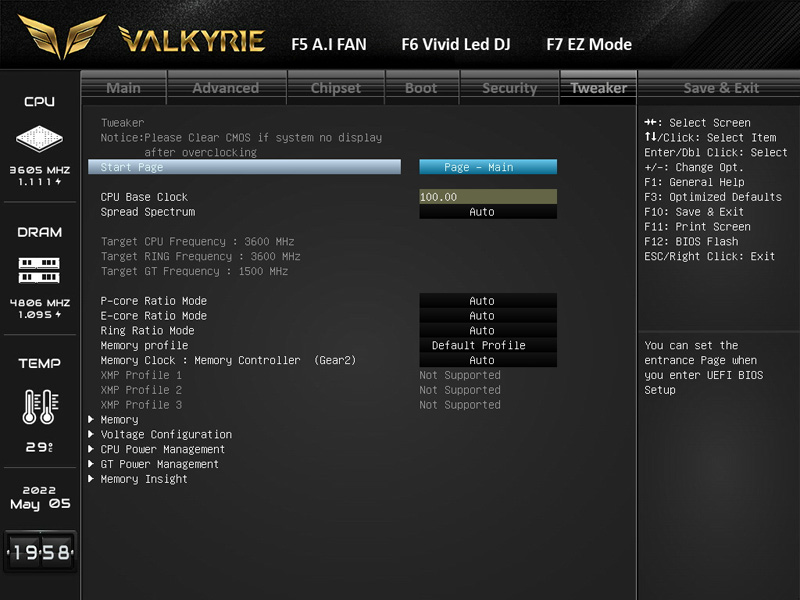
In the Tweaker overview page, we can adjust the “Base Clock” of the processor, as well as make changes to the multipliers of the cores. The motherboard differentiates between the performance cores and the efficiency cores, so both can be overclocked or underclocked independently of each other.
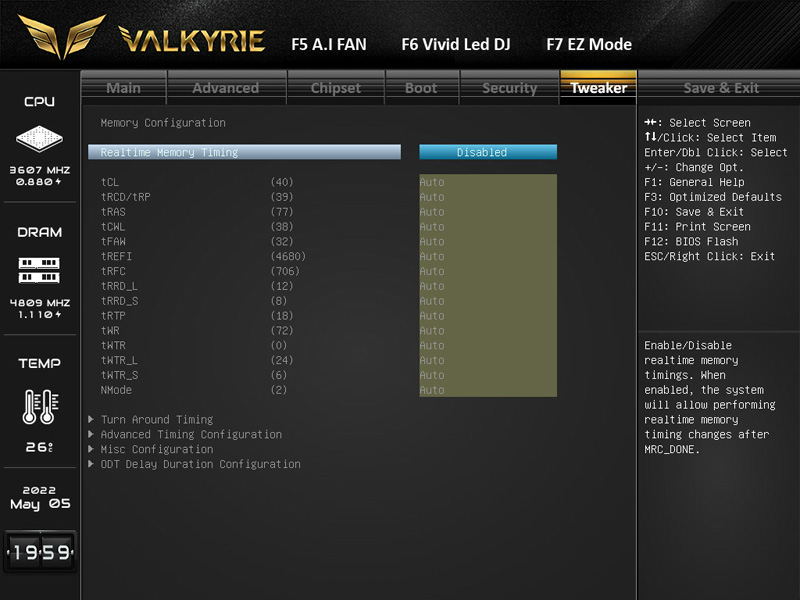
First, let’s take a look at the sub-item “Memory”. If XMP is too limited or the memory simply doesn’t have an XMP profile, you’ll find everything your heart desires here. If you enable “Realtime Memory Timing”, you can adjust and test the RAN timings directly in the UEFI.
Under Voltage Configuration we find all the necessary voltage settings for overclocking.

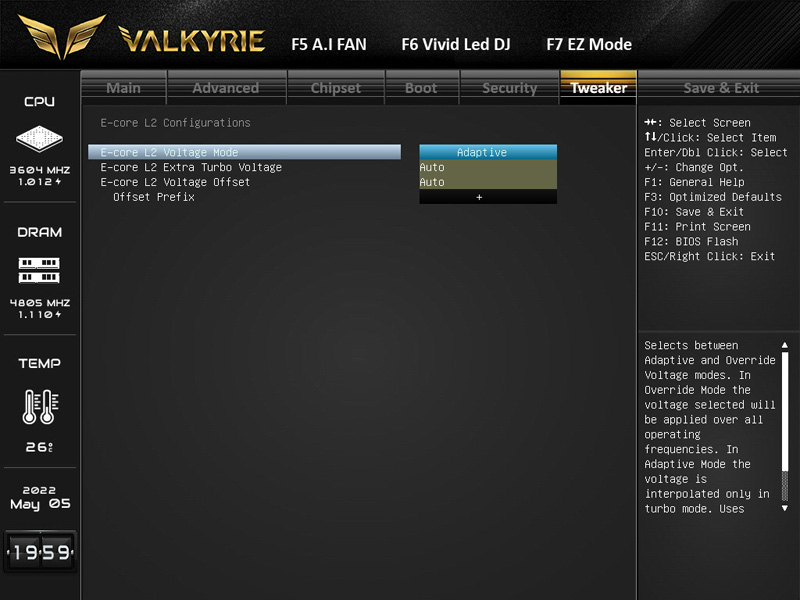
Since our i7 naturally has two different core types, the voltages have to be regulated separately in each case. Everything necessary for the efficiency cores can be found under “E-core L2 Configurations”. Of course, you can also underclock them, because the voltage offset can also be set negatively.
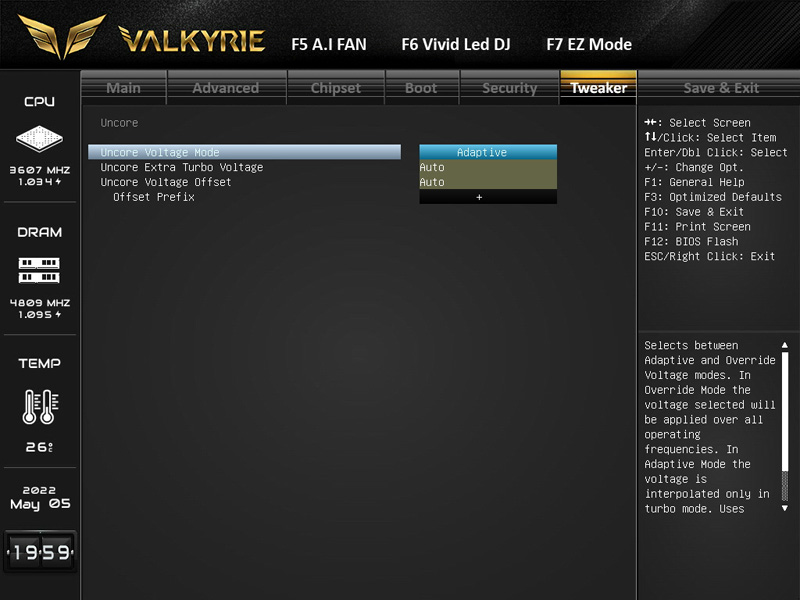
The same voltage settings for the performance cores can be found under “Uncore”. The offset can also be set negatively here.
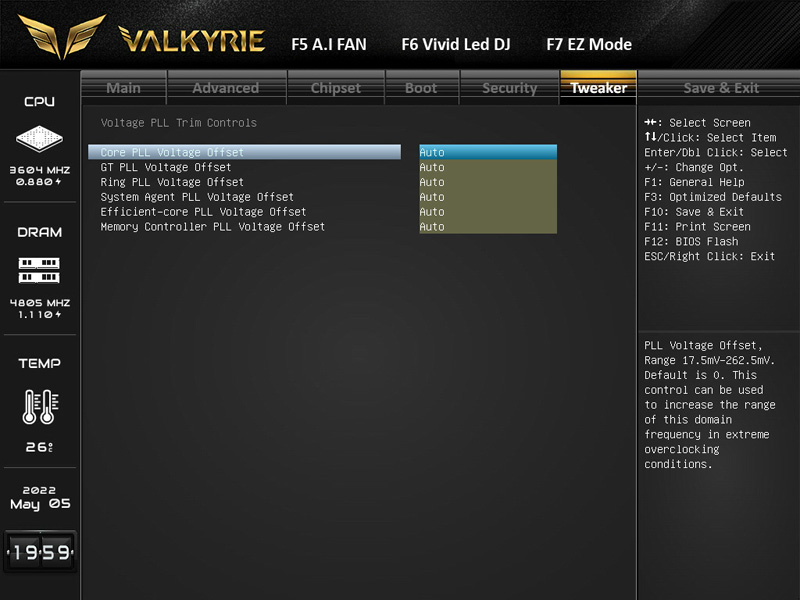
All other voltage settings related to PLL can be found under “Voltage PLL Trim Controls”. But here you should really only change something if you know what you are doing.
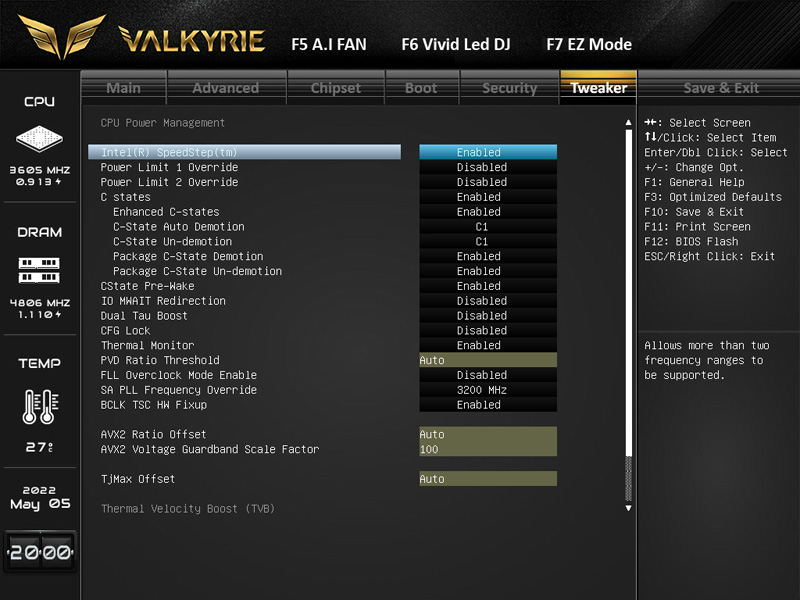
Under “CPU Power Management” we find all the necessary settings to help the CPU get going. Among other things, we can adjust the power limits of the processor within a certain range, as well as set an AVX2 multiplier offset.
Of course, the same applies to the integrated graphics chip of the processor, if present. All voltage settings for this can be found under “GT Power Management”.
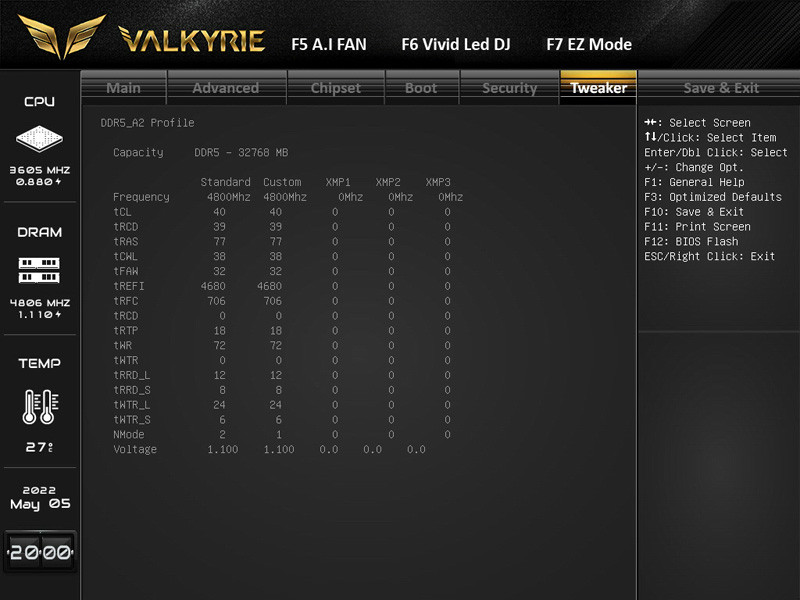
The last menu item under Tweaker is “Memory Insight”.

This basically hides the possibility to read out the specifications of every single working memory module.
Save & Exit …
The last remaining menu item is Save & Exit. As you would expect, this is where you can save all the settings you have made in UEFI. Those who do a lot of overclocking will be happy that Biostar provides the motherboard with 5 profiles to save different configurations.
That’s it so far from the UEFI, let’s now move on to the benchmarks and tools.