
The first steps
Once you’ve found and purchased the right 3D printer, you usually have to finish assembling it.
The Anycubic i3 Mega-S, for example, comes partially pre-assembled.

And even the Geeetech A20M 3D printer is for the most part already pre-assembled.
However, some 3D printer models are delivered already assembled. But in most cases the final assembly is not very difficult, so that no great craftsmanship is required for the assembly. The handling of a screwdriver should be known. The electrical connectors are normally designed so that they cannot be mated incorrectly and are also color-coded. You should choose a place with a stable footprint as the electric motors sometimes move some of the mass rather jerkily. A medium-sized metal-framed 3D printer can easily weigh 10kg or more.
Some materials also emit toxic fumes during printing. Printing with PLA filament, similar to laser printers, generates fine dust and some noise. The best place to operate a 3D printer is in your own work room. Before using it, you should take all necessary safety measures to avoid injuring yourself or anyone else. The stronger and more resistant ABS filament emits toxic fumes during printing. Such materials should not be printed in living rooms. Safety always comes first!
You often see images on the Internet where people put their 3D printers in cabinets or display cases. You should only do this if the printer is designed for it or if you create the appropriate conditions yourself. Any 3D printer should not be placed in a closed cabinet because the electronics can overheat and the cooling of the extruder can be affected. Ultimately, this can lead to poor printing results and even damage the 3D printer. If you put your 3D printer in an enclosed chamber, you should know exactly what you are doing.
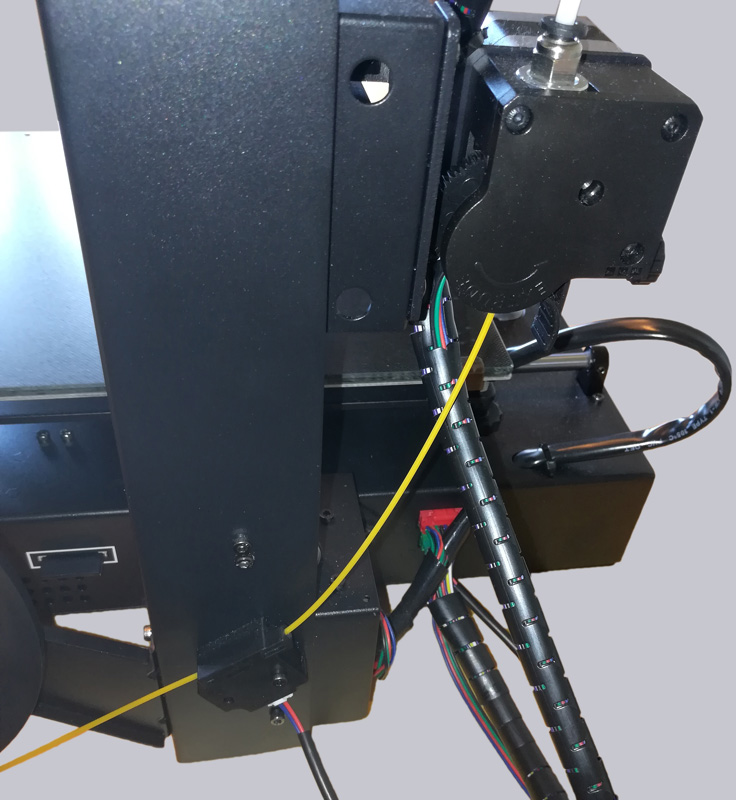
The following picture shows a Anycubic i3 Mega-S 3D printer from below.
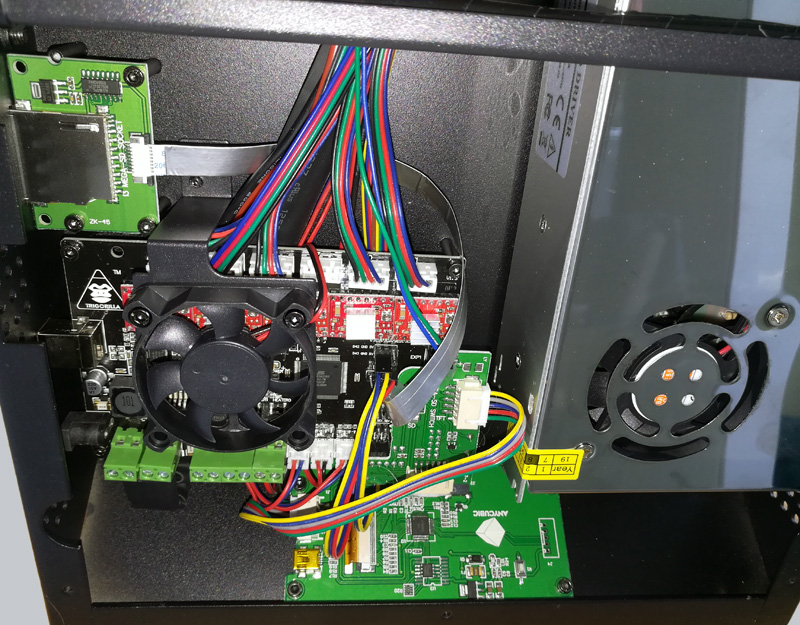
The base plate was dismantled to be able to take a look at the electronics. On the right is the power supply unit, which converts the 230V mains voltage to the operating voltage of 12VDC. It has a fan as well as the drivers of the stepper motors, which can be seen on the left. If you put the printer in a showcase without fresh air supply, the electronics could overheat and be damaged by the rising ambient temperature. In the worst case, a fire could result.
After turning on the new 3D printer for the first time, there are a few basic steps to follow before you can print the first objects.
3D Printer Levelling the printing bed …
To ensure that the material to be printed adheres properly to the printing bed, it must be ensured that the X and Y axes, i.e. the horizontal travel range of the extruder die, move parallel to the printing bed. In most cases, this is done by adjusting the height of the printing bed with adjusting screws at the four corners. For levelling, the print head is then positioned manually in the lowest position (Z0) several times in all four corners of the printing bed and the set screws are turned until the extruder nozzle has a minimum distance to the printing bed everywhere. You should just be able to push a sheet of paper through between the nozzle and the printing bed without it jamming.
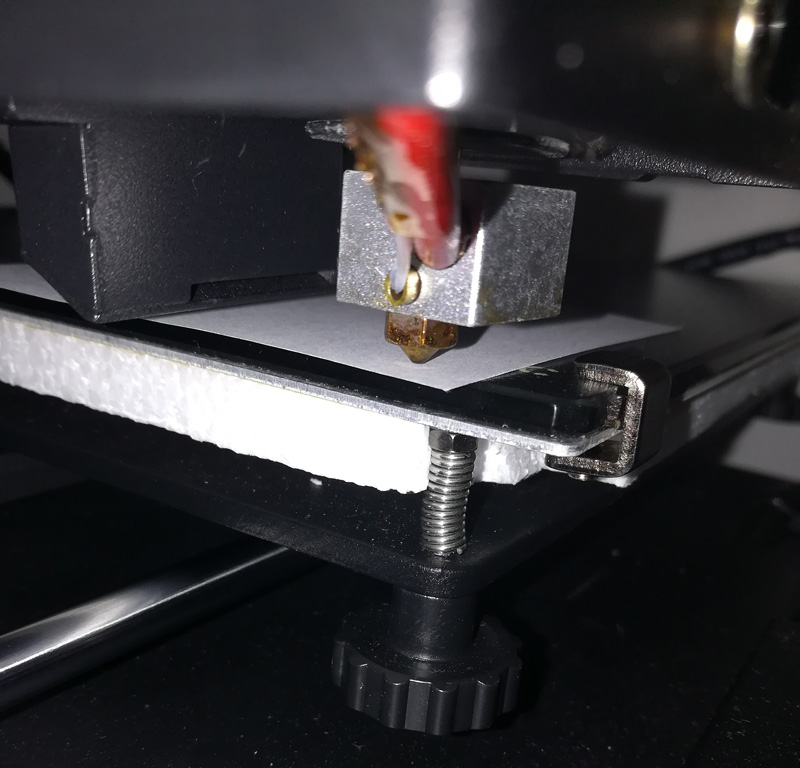
If the nozzle distance is the same at all 4 corners, the bed is already parallel to the printing axes. Since the pressure beds are often not very even, you should also check the middle area for safety reasons. If the bed is clearly arched up or down in the middle, you should compensate this in the end by turning all 4 levelling screws evenly. Especially in the middle area the nozzle distance should fit, because the components are usually printed in the middle. If the nozzle distance is too large, the first print layer will not stick to the bed. If the nozzle distance is too small, the nozzle may even touch the bed, which can cause damage to the printing bed and the nozzle. For this reason, you should take enough time and proceed carefully when levelling. Once the bed has been successfully levelled, the heaviest part of the set-up is already done. There are also 3D printers that can automatically level the bed. However, these are only in the high-end segment.
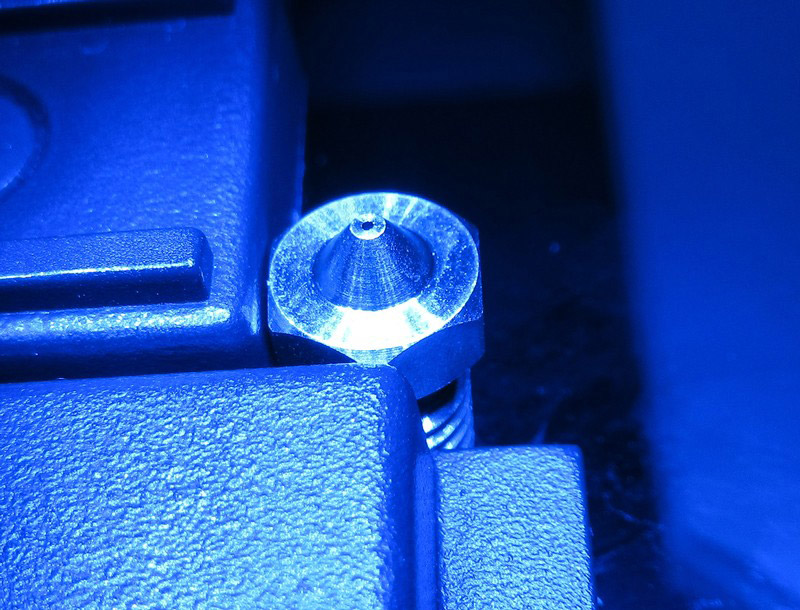
3D printer nozzle …
Speaking of nozzles, here we have measured a 3D printer nozzle on a Zeiss O-Inspect to see how accurate the nozzle bore information is.
3D printer Insert filament …
The filament must also be inserted manually into the extruder before the first print. Most low-cost 3D printers already have a filament sensor, which is located between the filament spool and the extruder. The filament sensor is a small switch that is held open by the passing filament.
Should the filament break or simply run out, the switch closes as soon as the filament end has passed through the sensor and signals the control computer that there is no filament left. The 3D printer then automatically stops printing, allowing you to thread new filament and continue printing without having to discard and repeat the previous print.
The filament spool should be close to the filament sensor and placed on a suitable holder so that the spool can be easily unwound. Coming from the spool, the filament end is pushed through the Filament Sensor and then through the Filament Feeder. The feeder is the part of the extruder that pushes the filament through the extruder. A small lever is attached to the feeder to release the feed drive of the feeder so that the filament can be pushed through manually. When the lever is pressed, the filament is pushed into the extruder until the filament is in contact with the extruder nozzle. This completes the introduction of the new filament and the 3D printer is ready to print. If you want to change the filament, you also operate the lever on the filament feeder and pull the filament back by hand. The extruder should be preheated, otherwise the filament would stick in the cold nozzle.
3D printer 3D models …
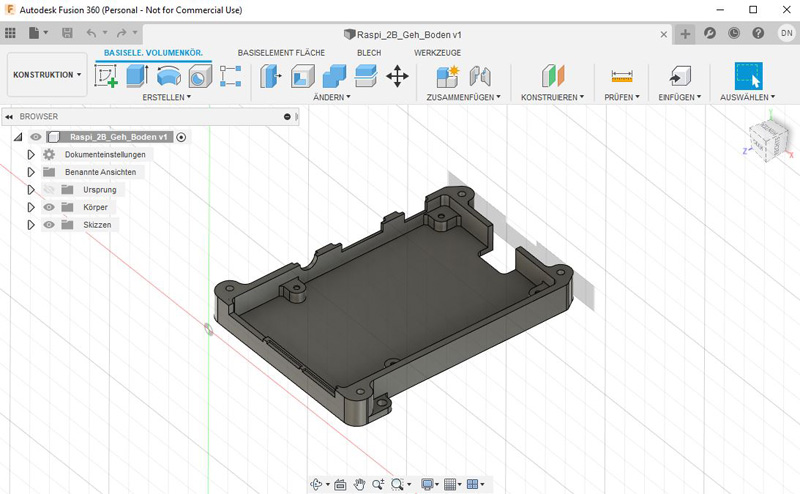
The objects you want to print out are needed as a 3D model on the computer. 3D models are the basis for programming the 3D printer. The STL file format is most commonly used in 3D printing. On various 3D printer platforms, 3D models are made available on the Internet free of charge for personal printing. One of the most popular sites is Thingiverse. There you enter the desired term into the search and with a little luck you will find a suitable 3D model of the object you want to print. This is surely the easiest and fastest way to get a printable 3D model. More experienced users or, if the desired model simply cannot be found, design 3D models themselves. Autodesk is a professional provider of 3D design software (CAD software). Fortunately, Autodesk allows its software Fusion 360 to be used free of charge for 3D modeling in the private sector. Countless YouTube tutorials make it much easier to get started with the program, so that even newcomers can quickly achieve presentable results. With a little practice, modeling your own Raspberry Pi case is done in no time.
Object alignment in 3D printing …
A very important aspect of FDM 3D printing is the alignment of the print object to the printing bed. Before defining the printing parameters, you must consider the ideal position for the object to be printed. Since the component is built up layer by layer from the printing bed upwards, the component to be printed should, if possible, also have a flat area with which it can rest on the printing bed. It is also useful to print open objects like containers etc. with the opening facing upwards. Printing a half of a Raspberry Pi with the opening downwards would mean that the bottom would have to be printed in the air at the end. This is not impossible because the printing program can calculate an additional support structure for such cases. But if it is possible, the printing process should be made as simple as possible to minimize the potential for error. Experienced designers already take care when creating the 3D models that the object can be printed out as easily as possible later.
Next, the print program is generated …