
Create a print program (G-Code) …
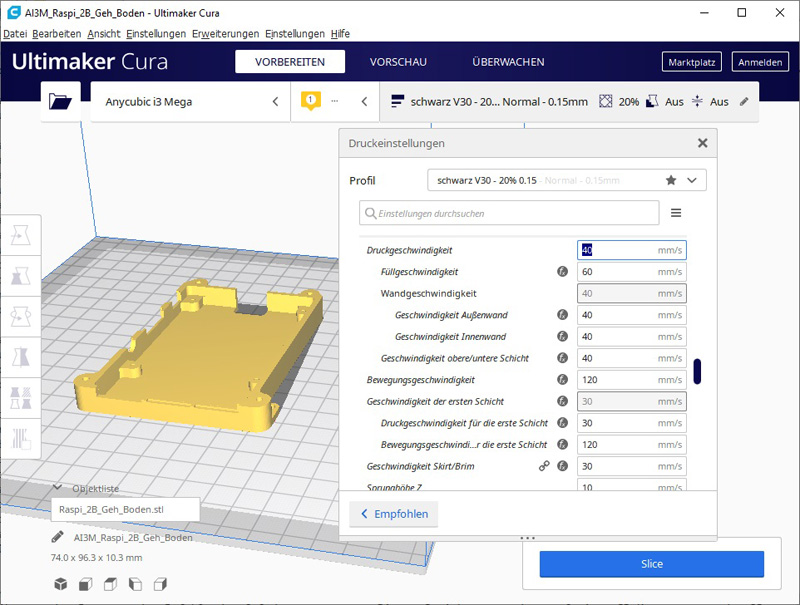
In order for the 3D printer to even know what to print, it needs a print program that contains the so-called G-code. Since each 3D printer model has specific functions, the G-code must always be specific to the 3D printer to be used. It is not possible to take the G-code from another printer. So how do you get the right G-code? The slicer software does that – usually just called Slicer. A popular slicer program that supports a very large number of 3D printers on the market is called Cura. Cura is a slicer software from 3D PrinterManufacturer Ultimaker and is available free of charge for Windows, Mac and Linux. The first time you start Cura, you simply select your 3D printer model and the software configures itself accordingly. This means that the software can be set up with just a few clicks of the mouse and the first 3D model can be imported into the slicer – Cura even allows this to be done using drag ‘n drop from the Explorer. The following picture shows the 3D model of the Raspberry Pi case inserted in Cura from before.
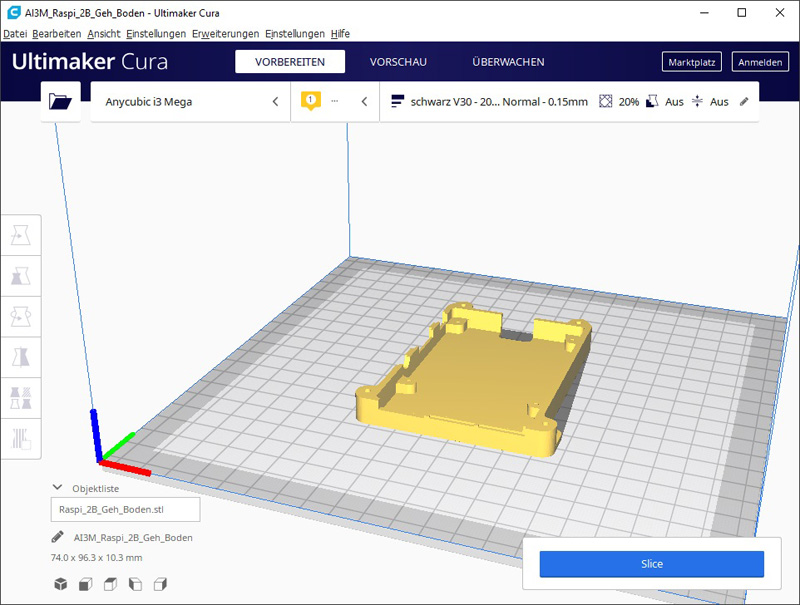
The printing bed is represented by the checkered area. If you align the model parallel to the axes of the printer, you will get the optimal print quality.
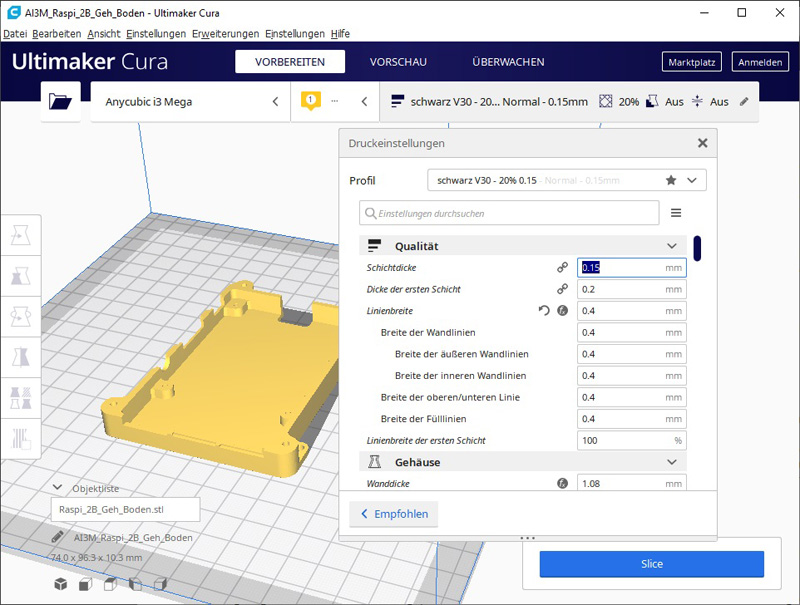
Once you have inserted the print object into the slicer, the next step is to define the print parameters. There are many of these and finding the correct values is not easy, as there are many factors to consider. Most of the time, the printer is equipped with a nozzle with a diameter of 0.4mm. For most printouts this is a good choice. If you want to print particularly detailed models, you can install a nozzle with a smaller diameter and adjust the value in the slicer accordingly. However, a 0.4mm nozzle is a good compromise between detailing power and speed. The necessary nozzle and bed temperature can be taken from the label of the filament. As the name Slicer suggests, the program splits the 3D model into individual layers, which are then built up step by step starting from the bed upwards. How many layers are printed is determined by the selected layer thickness. For a high level of detail in vertical direction, a low layer thickness of 0.05mm is recommended. For faster prints with a slightly coarser surface, the layer thickness can be increased to 0.25-0.3mm. A good compromise between print quality and speed is 0.15-0.2mm layer thickness.
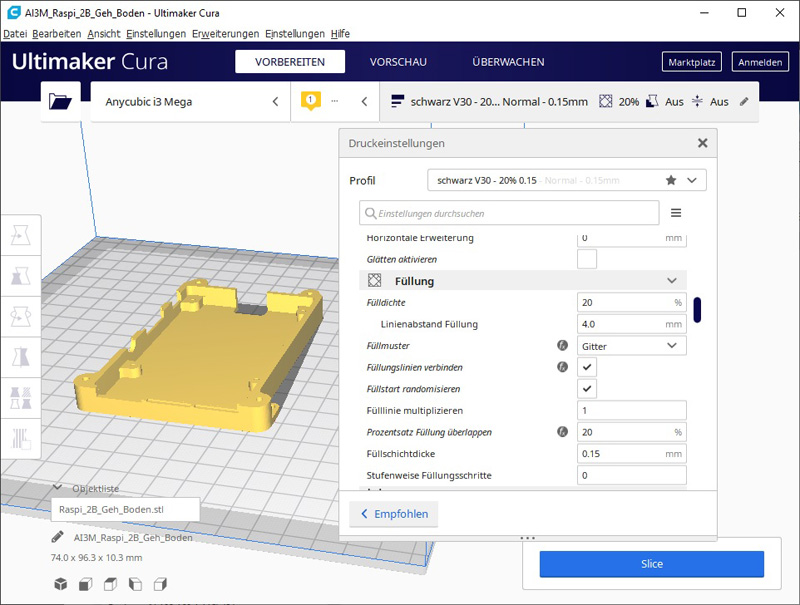
In general, you should not print out 100% of the components to be printed out, or print them out massively. In addition, parts that are printed 100% filled out tend to warp more when cooling down. A fill density of 10-20% is completely sufficient for most models. This saves time and material compared to a fully filled out printed part.
3D printer Print speed …
Another very important parameter is the print speed, i.e. how fast the print head moves in the print plane and ejects material. The maximum achievable print speed depends on many factors.
If a high printing speed is selected for a large layer thickness, it is possible that the extruder cannot get the filament through the nozzle fast enough. The extrusion rate is then too high, i.e. the amount of material per second. In addition, the accuracy of the printout deteriorates as the printing speed increases. It can even happen that the printer is no longer able to follow the component geometry at the desired speed.
Simple shapes such as cuboids with long edges or large circles can be printed faster than complex shapes. A benchmark for complex shapes is 10-20mm/s printing speed. Many printers can also print simple shapes at 60-100mm/s. It’s best to start with small models and low print speeds and then increase in small increments until you know what speeds your 3D printer can handle.
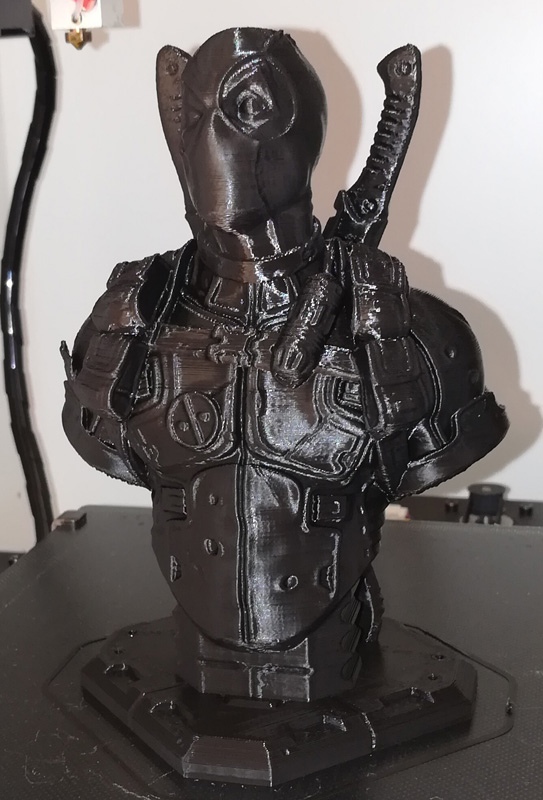
For the first finding of the print parameters it is suitable to print small test cubes with 20-25mm side length. Once all parameters have been defined, the program is given the command to generate the G-code. This code is then stored on an SD card, from which the 3D printer reads the data and prints the object accordingly. Once you know your 3D printer, for example, you can create a 14cm bust in less than 7 hours.
Here is once again the 3D printer video on our OCinside YouTube channel, which was cut together a bit to make it faster and less boring.
Note: Please allow our cookies first to see this external content!
Let us now come to our conclusion on 3D printing …