

Raspberry Pi with PiCam Tested
Raspberry Pi Setup and Test Results …
was the installation of a suitable Linux operating system Linux be done by experienced users only, recently there is a solution even for inexperienced users to get the Pi installed and running. The All-In-One software NOOBS.
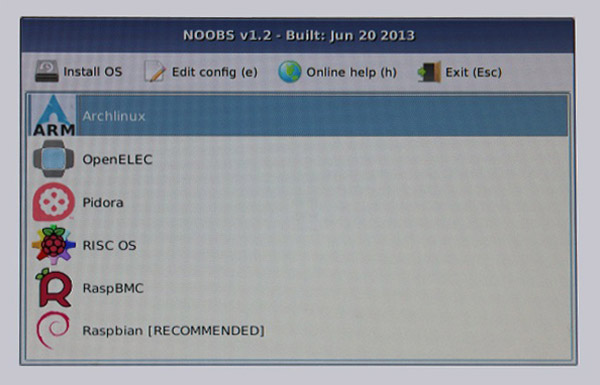
Is the image for Noobs first copied to the card and started it offers the user to install the following distributions:
Archlinux – multifunctional and lightweight Linux distribution
OpenELEC – A XBMC Linux distribution, small and Powerful (Multimedia)
Pidora – A Fedora clone for the Raspberry Pi
RaspBMC – XBMC popular Linux distribution with many options (Multimedia)
Raspbian – popular Linux distribution with native support for additional accessories
RISC OS – graphical operating system with many possibilities
If you install now one of the selected operating systems the software Noobs does everything by itself. Partitioning, and provision of empty space and then configure all important elements such as keyboard layout, SSH access etc. When installation is complete depending on the selected OS a graphical interface or the login prompt in the command line will appear. By default, the user “pi” was created, that uses the password “raspberry”. Then you end up in the console and can immediately start to install software packages. The network interface is in fact installed automatically and is available if it retrieves an IP address from a DHCP server on the router. Up to this point, the normal Windows user can still deal with the minicomputer.
From here on it is essential to deal with the Linux operating system. Some significant differences from the MS-DOS operating system makes it hard to find your way around the console. It helps a lot to read on the Internet or in books about running linux. To learn how to use Linux is not rocket science, and makes really fun when you can tap the numerous commands in the console blindfolded.
A big advantage is that the entire operating system/hard drive is on the on the SD card. If you would like to install a new distibution, you can simply change the SD card and install via Noobs a new operating system. Later, you simply put the old card back and and use your “old” os. In addition to that, there is the possibility to connect USB harddrives to store data. To boot, however, the Pi can only be started from an SD card, but can later use an harddrive for the operating system.
Another feature is that the operating systems react very sensitively to suddenly shut downs. You should get used to shut you Pi properly down by using the command “sudo shutdown now”, otherwise the operating system or file system may become unusable.
Furthermore, there is the small computer GPIO connector box that can still perform other tasks. The name is an acronym for General Purpose Input / Output. These ports can be configured either as input or output. The Raspberry Pi has 8 pure GPIO ports.
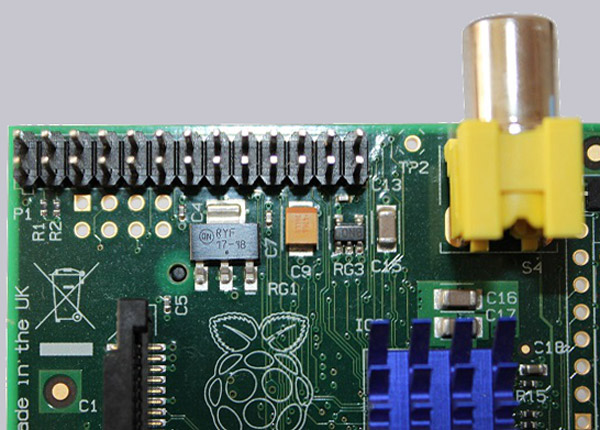
The attentive user will have noticed, however, that there are far more pins on the board. The remaining 18 pins have either a double assignment or there are 5 V, 3.3 V, and the ground line available. It has for example the option to establish an UART communication means RX and TX line, or to communicate with an I2C bus compatible device. Is it possible, if you dont need all this, to use all the 17 pins as GPIO ports. When using these ports should be noted however, that they have no 5V tolerance, but have to be wired only with a 3.3 V signal. Also you should not switch any great loads with the ports because the heat is converted directly into the CPU. This should keep meticulous, because it can in the worst case can lead to the destruction of the ports or the CPU, since the ports have no fuse. With simple transistor or relay circuits it is possible to operate even with the 3.3 Volts very well. Also interesting is the possibility to integrate sensors with i2C bus. These can be read and processed by means of a simple console command. There is a rich variety of sensors which provide, for example, Temperature, acceleration, and can measure and display air pressure, compass or real-time.
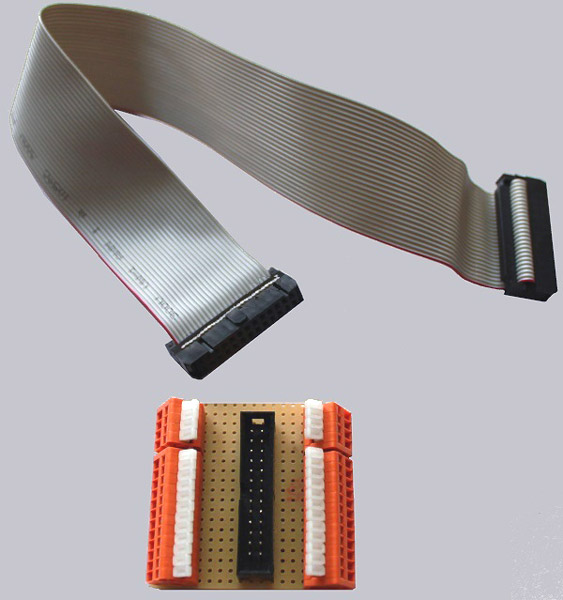
In general, it is advisable to get a small connector board which facilitates the connections of the ports. With some craftsmanship, this can also be built with a few Euro all by yourself. Here’s an example:
As another useful software solution, the program OpenVPN can be cited.
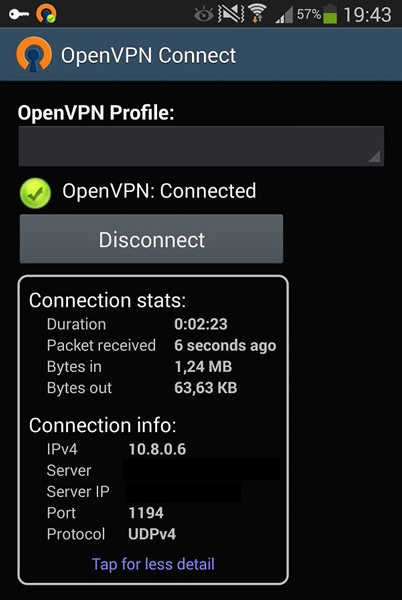
The configuration of an OpenVPN server is rather complicated since the RSA keys need to be generated. But they reward the user with a stable and reliable VPN network which is easily accessible from the outside, if a DNS service provides an IP. Good instructions, you can find searching the internet by Google.
Raspberry Pi OverClocking
It is for some time now officially / legally possible to overclock the Raspberry Pi. This can be done either XBMC settings directly in the OS, or through the console using “raspi-config” configuration.

A variety of overclocking options on the voltage across RAM clock up to the CPU frequency can be set manually in the config files. The 700 MHz standard frequency can be overclocked up to 1000 MHz.
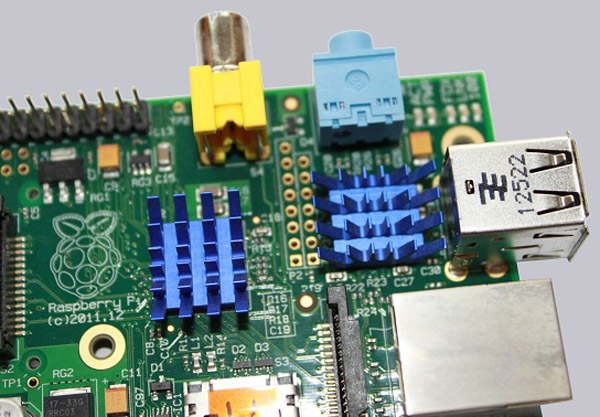
Raspberry Pi Improve Cooling
Here, however, it is essential to ensure good cooling, because a massive increase in voltage is required. To ensure this you can buy either a special cooler for the Raspberry, or use an old Video-RAM-Cooler which lay sometimes unused in our hobby boxes:
When using a multimedia distribution as RaspBMC you should moderate overclock to 800 – 900 MHz to play almost all formats and resolutions fluently. Only MKV container with DTS encoding can not be played good even with the highest overclocking. Which brings us to another point that should be mentioned, MPEG2 and VC-1 codecs …
MPEG2 and VC-1
Raspberry Pi MPEG2 and VC-1 with license key. Through the open source solution, and the various derivatives of the Raspberry Pi has no factory option for MPEG2 decoding and VC-1 formats. This can be added by payment of 3 EUR (MPEG2) and 1.50 EUR (VC-1) , because they should be needed. In the community, however, discussed whether the Raspberry Pi Foundation implements these codes for free in future updates.
PiCam RaspberryPi HD Camera module
Let us take a look at another accessory which could prove to be more useful than it might seem at first sight This is a camera module named PICAM, which consists of a board soldered together with an Omnivision 5647 camera module with 5 MP resolution.
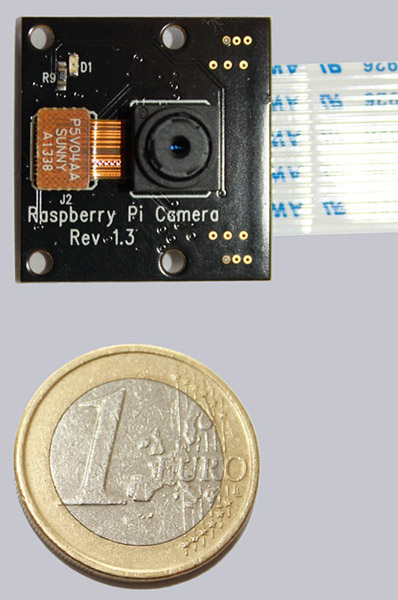
This little camera makes incredible 2592 x 1944 pixels in photo mode and in video mode still full HD 1080p at 30 FPS, 60 FPS 720p and 480p with 60/90 fps. The standard model has an integrated UV filter which is designed to improve the image quality in daylight, but prevents night shots with IR illumination. Although removal of this filter is not impossible, there is a great danger of either destroy the sensor, an SMD component or the connection cable. That is why a second model was launched recently, which has the same specifications as the standard camera, but does not have a UV filter and a black board is constructed. Depending on the provider, it is possible to get the cam at the same price as the model with IR filter.
Here is a captured image in daylight and at full resolution.
Another image with IR illumination and full resolution is maybe posted later on, when i find a favorable IR Illuminator.
Natively, the camera unfortunately is only supported by the operating system Raspbian. Also, there is a problem with the current kernel from Raspbian related to the i2C bus. If you get an error message with the error code “ENOSPC”, just downgrade to the older kernel 3.6.11 and everything works perfectly again. This error should be fixed already, but is still waiting to be implemented in a new kernel. The camera also offers opportunities for motion detection and timed recordings, or a web site implementation. This can be combined of course with 2 servo motors for PAN and TILT allow for move the camera around. Various camera tools are available for Android and iOS with which you can create, retrieve, and save images and videos.
There are thousands of projects on the World Wide Web that deal with the meaningful and less meaningful use of the Raspberry Pi. From aquariums control over Ambilight, to the alarm center, set in a Raspberry Pi probably only own technical capabilities possible limits.
Raspberry Pi Result and general impression …