
Construction, design and features inside …
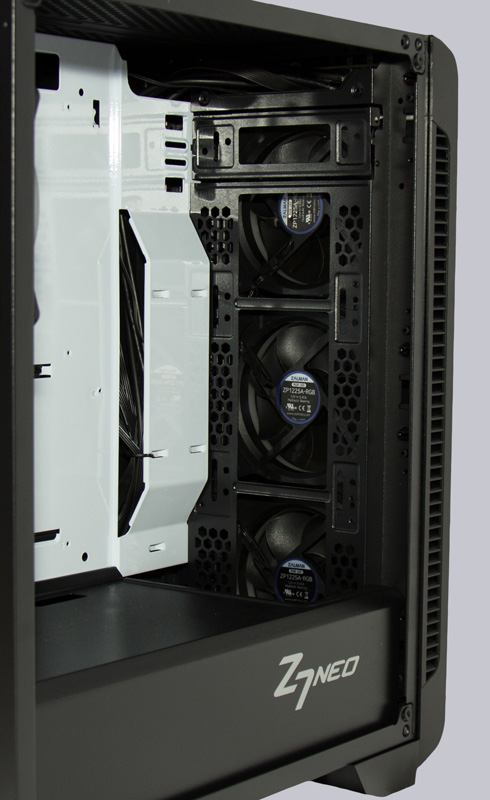
If you remove the frameless, tinted real glass side window, which rests on the two feet for easier assembly/disassembly, you gain access to the main chamber of the case.
The stylish power supply cover has the bright and characteristic Z7 Neo logo in the front area. At the very front, there is a generous recess in the power supply cover, so that a 360mm radiator can also be placed in the front. Unfortunately, there is only a relatively central hole in the cover, through which e.g. the cables for connecting the front panel to the mainboard can be led. Further accents are set by the Zalman case with the glossy white mainboard carrier plate, which has a large vertical slot and a step on the right. Through this slot, cables can be discreetly routed to the rear.
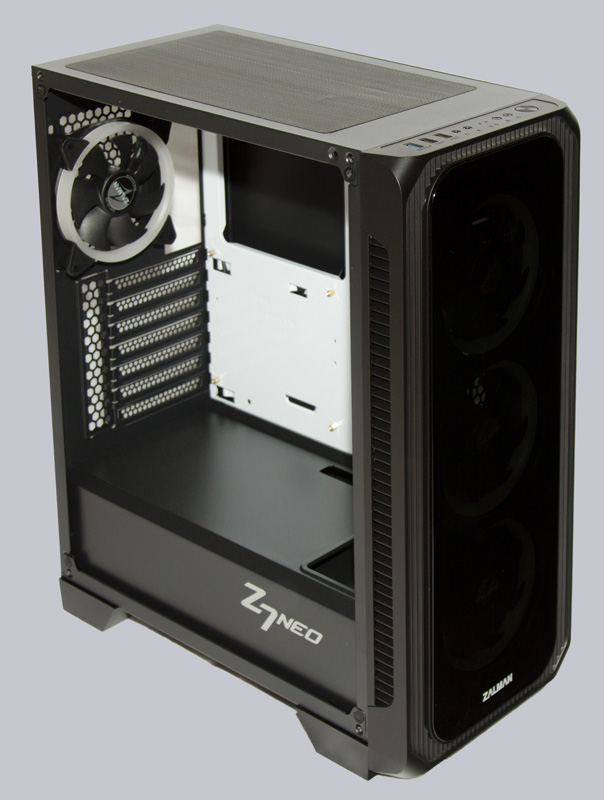
Contrary to the assumption, the three front RGB fans are not mounted on the metal fan frame, but on the black plastic inlay of the front panel. Because of this, the fans have to suck in fresh air through very narrow slits, which we don’t find optimal in terms of fresh air supply. Obviously, the main focus here was put on a chic look when viewed from the front. If you want to improve the air supply, you can instead mount the fans a bit further back on the fan frame, which, however, partially restricts the view of the RGB lights when viewed from the front, as the fans are then located behind the openings in the front bezel.
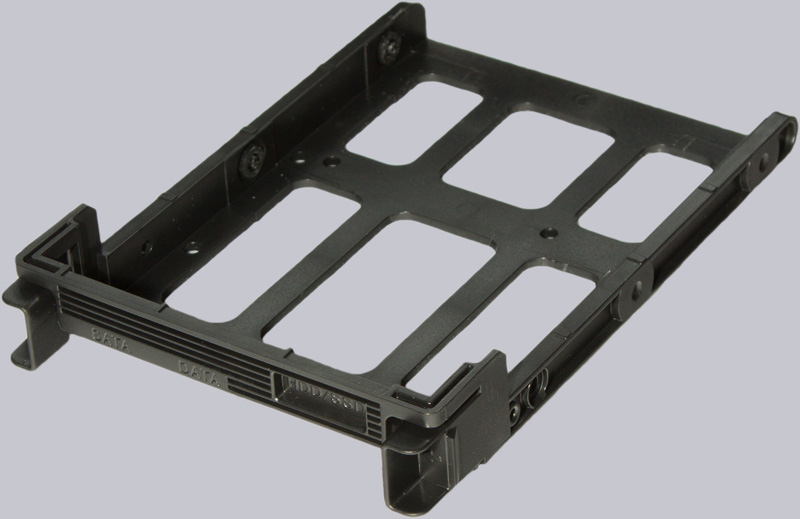
When the front panel is removed, you can see the hard disk cage, which is mounted in the front position at the factory. To mount a 360mm radiator, the cage has to be moved to the rear position or removed completely. The hard disk slides for 3.5″ or 2.5″ drives, which can be inserted without tools, are clearly labelled and the locking mechanism is easy to operate. In order to protect the drives from possible overheating, large openings are integrated.
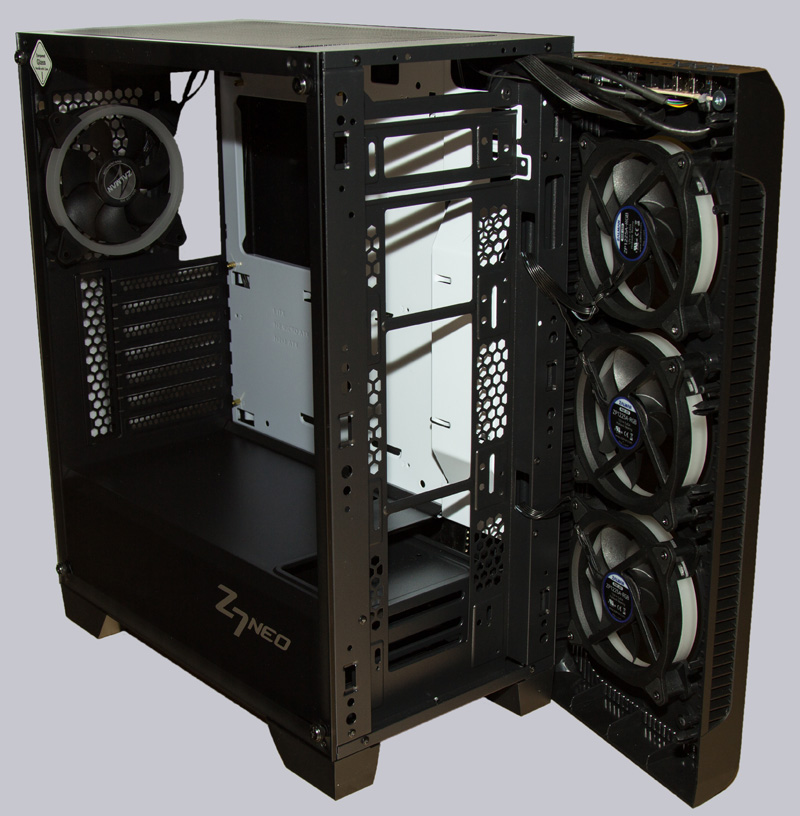
The completely open design in the lower area also makes cable laying much easier, and both the power supply and the hard drives can be mounted from this side easily and without much fiddling. The combined fan/RGB controller for up to 8 fans, which is centrally mounted ex works, is also easily accessible from all sides. There are a total of 13 connectors on it.
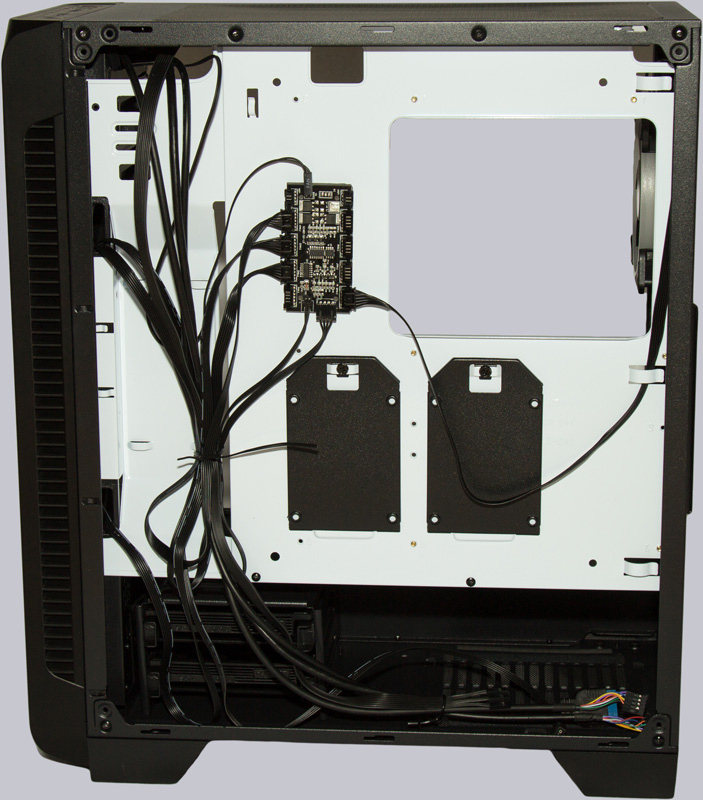
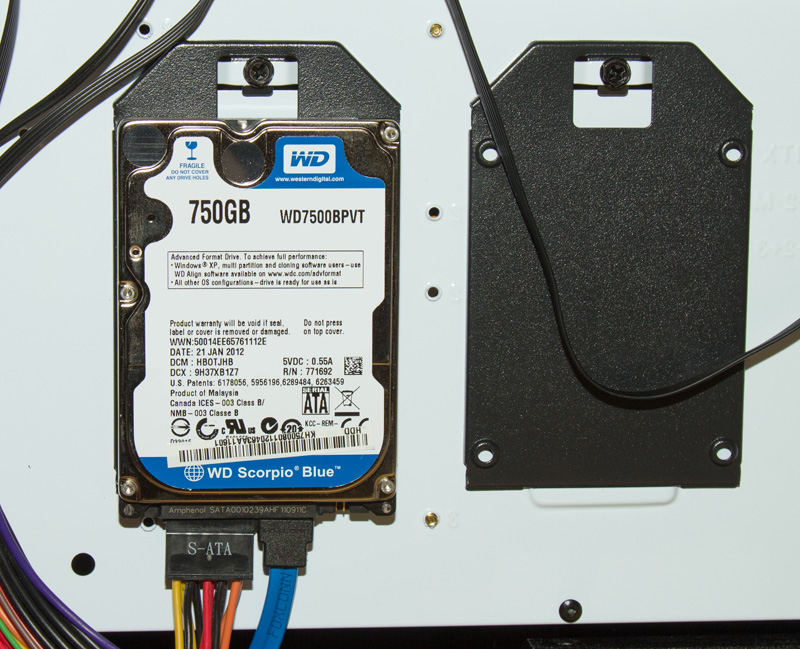
For further data storage there are two more holders for 2.5″ drives on the back of the mainboard carrier plate. First you have to screw the holder to the hard disk or SSD and then push the holder into a recess and fix it with a single screw. This way the small memories are safely stowed away when transporting the PC and the connectors are also easily accessible.
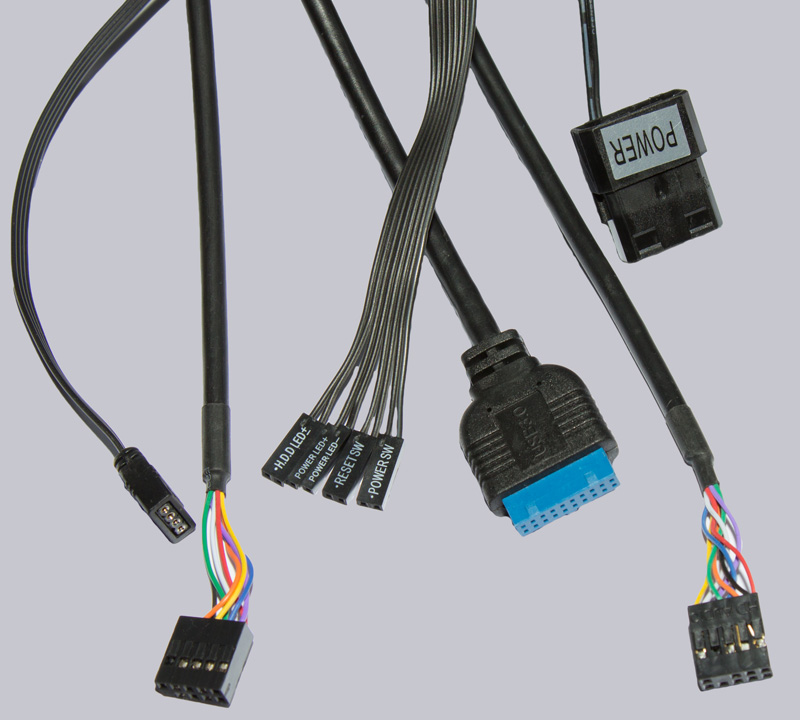
There were no surprises when wiring the front panel. There are the usual connectors for USB 3.0, USB 2.0, status LEDs and switches. We also find a dinosaur in PC history, because Zalman still keeps the Molex connector alive and uses it for the power supply of the RGB controller. Here it should have been a more modern SATA connector 😉
While we are already at the cabling, we also take a look at the RGB lighting in detail …