

Klipper Setup …
From now on Klipper should be executable. Now, however, only the most necessary of the basic setup has been completed.
Before starting the first test prints, the most important functions should be checked. This includes the limit switches (often wrongly called endstops).
If you click on Machine again on the left, a menu is displayed on the right where you can check the status of the limit switches. Here you should check the function of each limit switch before you perform the first homing.
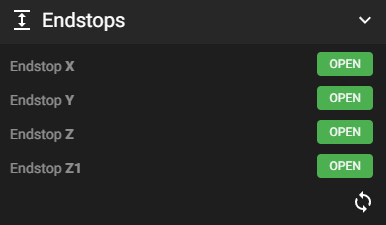
If the limit switches work reliably, you can try a homing. I recommend a pseudo-homing first. So place the axis manually in the center, click homing and operate the limit switches by hand. You can also check if the axes are moving in the right direction.
If this works, you can perform a homing of the axes and then test whether the heating elements on the extruder and on the print bed are working correctly.
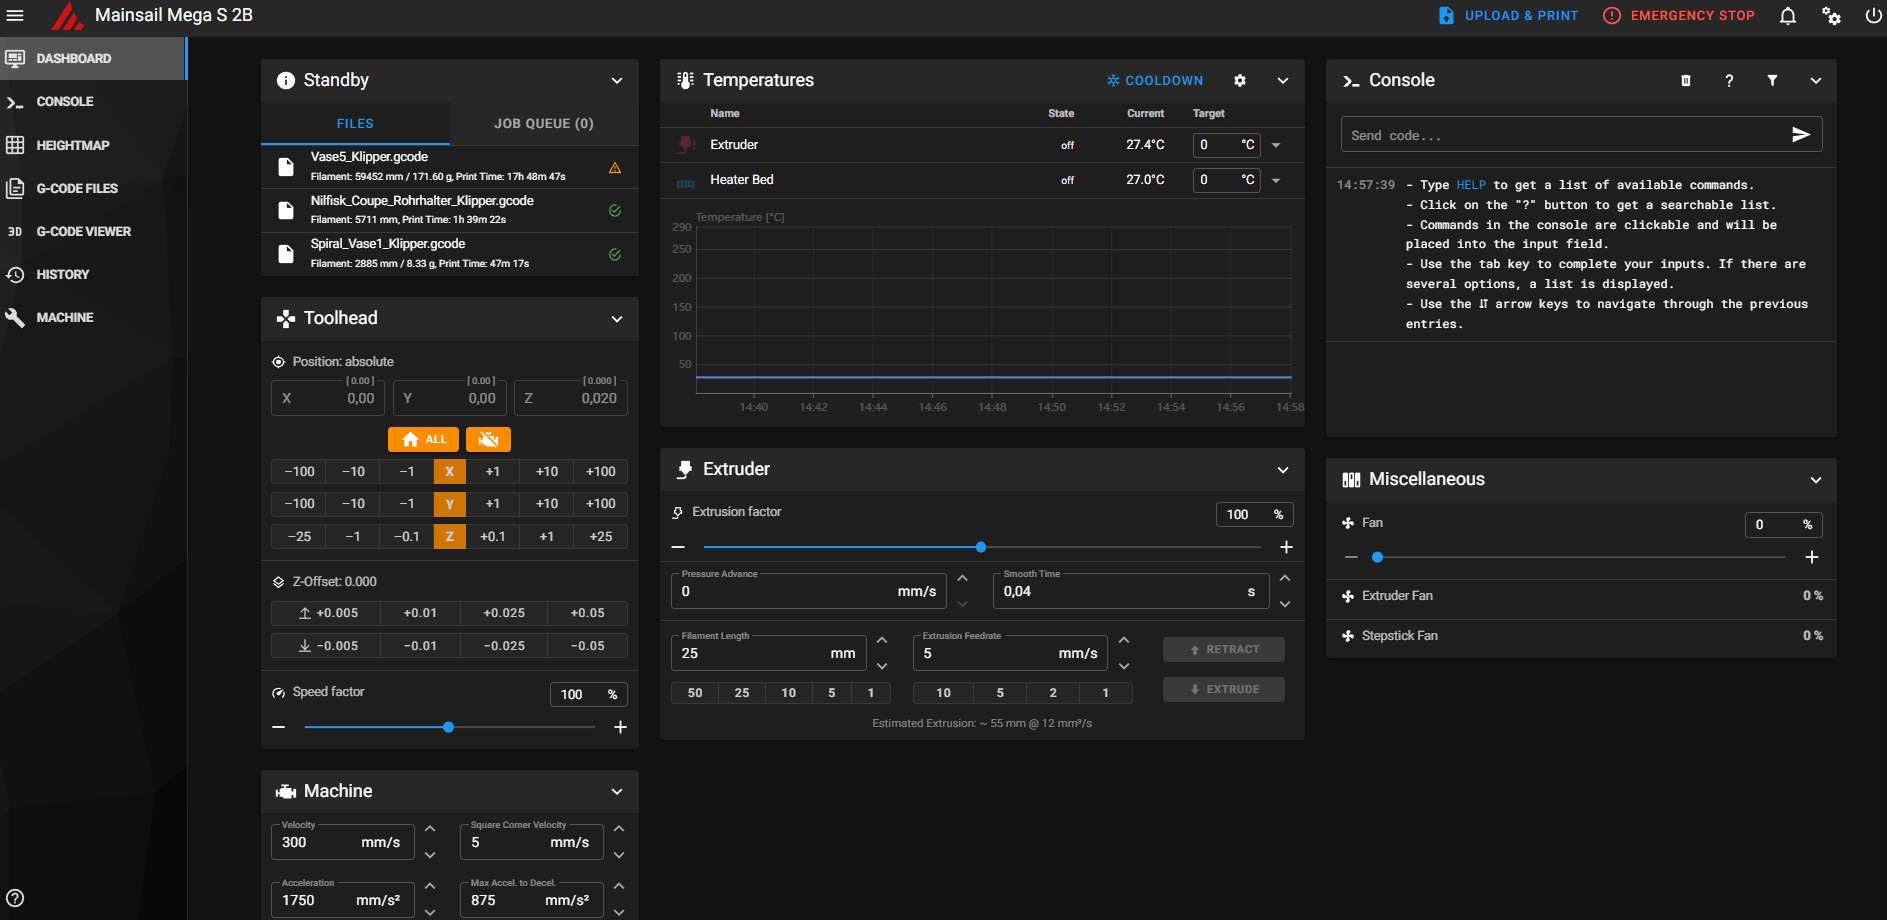
To do this, switch to the “Dashboard” via the left menu bar and click on the house. On the right, the temperatures are displayed in the graphics area. If the correct ambient temperatures are already displayed there, things look good and you can carefully heat up to a low temperature by entering the desired target temperature under “Target” and confirming it. Afterwards you should calibrate the E-Steps – for Klipper this is called “rotation_distance” and is stored in the “Extruder” section of the Printer.cfg configuration file.
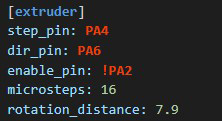
Note that the Rotation Distance in the screenshot is for a converted Mega S with Titan Aero direct extruder and not for the stock Bowden extruder of the Mega S.
Via the dashboard of the Mainsail web interface, you can also perform a manual extrusion, among other things, with the help of which you have quickly calibrated the Rotation Distance.
This concludes the basic setup of Klipper on the Anycubic Mega S. If there are any questions regarding bed mesh leveling or similar, please feel free to discuss such details in our forum in the tinker corner.
Klipper G-Code …
How to create the G-code for Klipper?
In Slicer, it is best to set the code output for Marlin. Commands to call the bed mesh, acceleration and speed limits or similar, must be removed from the G-code for Klipper. Otherwise, error messages will occur when the program is called. Unknown commands are reported, but also skipped, which does not stop the program flow.
The following commands, frequently used under Marlin, should not be included in the G-code for Klipper, for example:
M501 (Load default values from EEPROM)
M420 (Load Bed Mesh)
M201 (Max. acceleration X, Y, Z, E)
M203 (Max. velocities X, Y, Z, E)
M204 (Retract acceleration)
M205 (Jerklimit, Extrusion limit)
TMC2208 stepper drivers are recognized by Klipper on the Mega S even further configuration and controlled correctly in standalone mode. For the operation of the TMC2208 (2209) in spreadCycle mode under UART additional settings and adjustments at the cabling of the Step Sticks (drivers) are necessary.
If you want to add more functions like Input Shaper (compensate oscillations), Pressure Advance (Linear Advance) etc., you should always look into the detailed and very well designed documentation of Klipper first. There everything is explained very precisely. If you still have questions, we will be happy to help you in the forum.
The full Klipper documentation can be found here.
Finally, let’s come to the Anycubic i3 Mega S Klipper conclusion …