
KVM Practical testing …
KVM Connection …
First we connect the cables, …
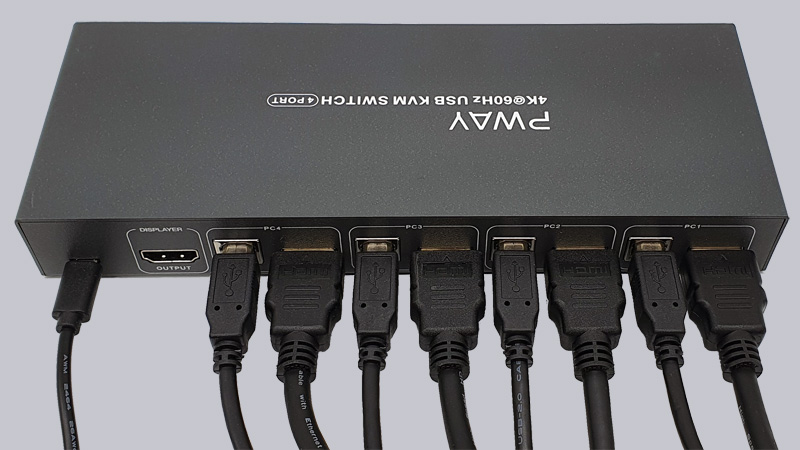
… whereby all cables needed to connect up to four PCs to one monitor were included.
Of course, the cable lengths are not enough for every application, so we ended up having to reorder all the cables for our setup in the right lengths. And if you want, you can even connect such extraordinary Vivify Aceso W10 and Vivify Arquus W73 cables with RGB lighting.
KVM Control …
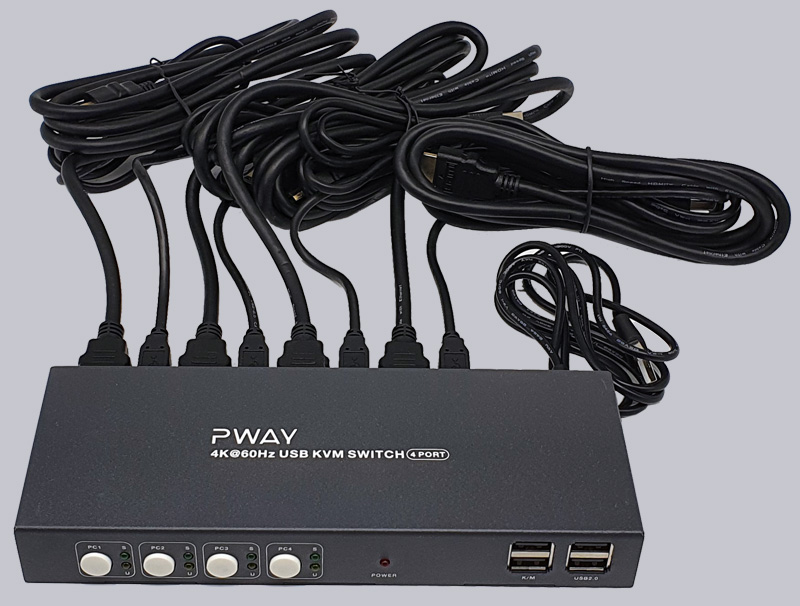
Now you can immediately see from the front LEDs whether the power supply is present (red LED lit), which PC is connected (yellow LEDs lit) and which PC has been selected as the input for the monitor (green LED lit). By the way, automatic switching to an active PC is not provided. In the following example, PC3 and PC4 are connected and PC4 has been selected.

However, one can not only select the input source for the monitor via the four keys on the front of the case, but also have the keyboard and mouse connected to the respective PC and select the PC with the key combination Ctrl, Ctrl followed by the key 1 to 4 for PC1 to PC4. Alternatively, you can also use the key combination Scroll Lock, Scroll Lock followed by the key 1 to 4.
Tip:
The following key sequence can be used to deactivate switching via the Ctrl key:
Ctrl, Ctrl, C, T, R, L, 0.
The following key sequence can be used to re-enable toggling via the Ctrl key:
Scroll Lock, Scroll Lock, C, T, R, L, 1.
It is absolutely necessary that the keyboard is connected to one of the two USB ports marked with K/M, so that the key combination is recognized by the KVM Box! According to the manual, you should also connect the mouse there. But since the K/M port is only an extremely slow USB port and a mouse with a high sampling rate is clearly jerky, we recommend to connect only the keyboard to the upper K/M port and the mouse to the upper USB 2.0 port instead. Then the switching works via key combination and you still achieve an optimal connection of the USB mouse.
KVM PC switching …
The switching of the PCs works reliably and is with almost exactly 5 seconds completely in the green area. However, we have noticed with PCs with higher resolutions that the graphics card reduces the resolution of the PC not in use when switching, or signals the operating system that the monitor has changed. This is not really a tragedy, but it quickly becomes annoying if, for example, you leave windows open in Microsoft Windows 10 before switching PCs with the KVM, which are pushed together small after switching PCs.
The problem lies in the missing DDC (Display Data Channel) interface, which interrupts the EDID data (Extended Display Information Data) along with the resolution and the operating system resets the resolution to a standard resolution of 1024x768px, for example, and thus also pushes all open windows together. Since this KVM switch doesn’t seem to support EDID, you would need an EDID emulator to learn the EDID data and emulate a monitor with the correct resolution, even if the monitor was just switched.
Tip:
Here, too, we have a very simple tip at hand first, which at least solves the problem with the too small windows. Simply before switching using KVM press the Windows key with the m key to minimize all windows, so: Windows+M Now switch to the desired PC and after switching back simply press the Windows key with Shift and the m key to restore the minimized windows, so: Windows+Shift+M
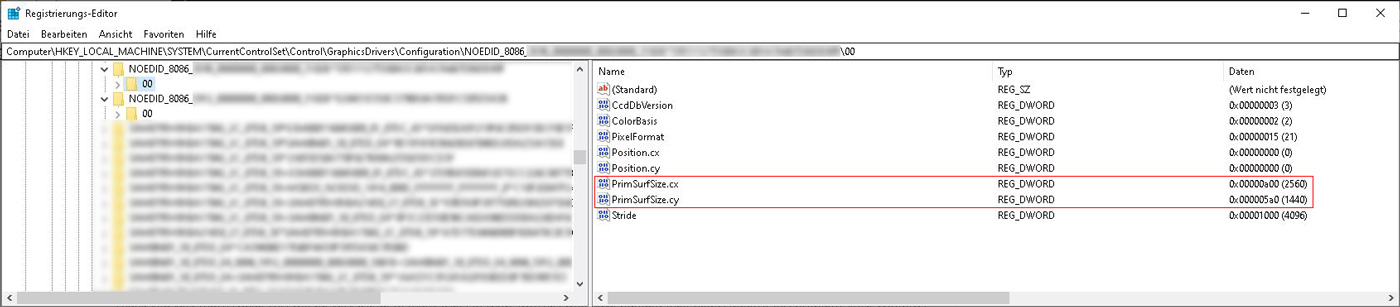
We can also present a permanent solution here by setting the NOEDID Monitor Configuration of Windows to the correct values to set it to this resolution in case of missing EDID signals. To do this, search for the NOEDID entry in the registry and find it for example in Microsoft Windows 10 under \HKEY_LOCAL_MACHINE\SYSTEM\CurrentControlSet\Control\GraphicsDrivers\Configuration\ the entries PrimSurfSize.cx and PrimSurfSize.cy with which you can then adjust the appropriate resolution.
Now the resolution falls back to this resolution in Windows if the EDID signal is missing, so optimally to the correct resolution that you use for the monitor anyway. If you are interested in a detailed, individual explanation for your own PC, you can simply contact us in our PC Forum. By the way, one has similar problems under Linux and then finds error messages like “probed a monitor but no/invalid EDID” in the logs. Here you could either use the drm_kms_helper.edid_firmware or drm.edid_firmware entry to predefine the respective edid.bin data or alternatively simply force the resolution at boot time via xrandr –mode for example, save it with all necessary entries in a .sh shell script and then include it in the Linux autostart of Ubuntu Unity Desktop, LXDE, Xubuntu, KDE, Gnome, Xfce etc.
USB Performance …
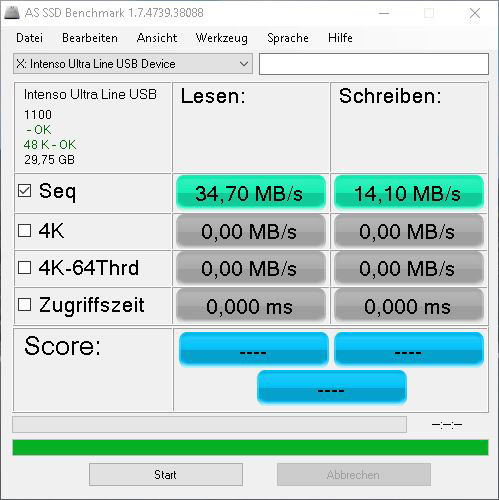
Let’s get back to the USB ports for a moment. As mentioned before, these are USB 2.0 capable, which means that even a USB 3.0 stick reaches a maximum of 480 MBit/s, i.e. about 30 MByte/s, as can be seen here in the benchmark of an Intenso 32GB USB 3.0 stick on one of the two right USB 2.0 connections.
By the way, a Crucial P1 1TB M.2 NVMe SSD in the USB 3.2 Gen 2 10 GBit/s case only worked for a short time and reset the KVM switch to PC1 after a few seconds with full data transfer due to the clearly too high power consumption! In this respect, you should only use USB 2.0 devices or USB 3.0 devices with low power consumption on it, so that you can then use them comfortably on any PC.
Tip:
Since the USB stick or USB printer is disconnected from the PC during the switchover, you should definitely enable “fast removal” for the storage media used in the Device Manager, so that Windows deactivates the write cache for this. Only then can the USB stick be safely removed without prior ejection.
This brings us to the end of our KVM Practical testing and now to our conclusion.
GHT PW-S7403H Result and general impression …